Last year, I shared a beach tote tutorial over at the Spoonflower blog. Since the weather is warming up again, I thought I would share it again so you can sew one up for your summer adventures!
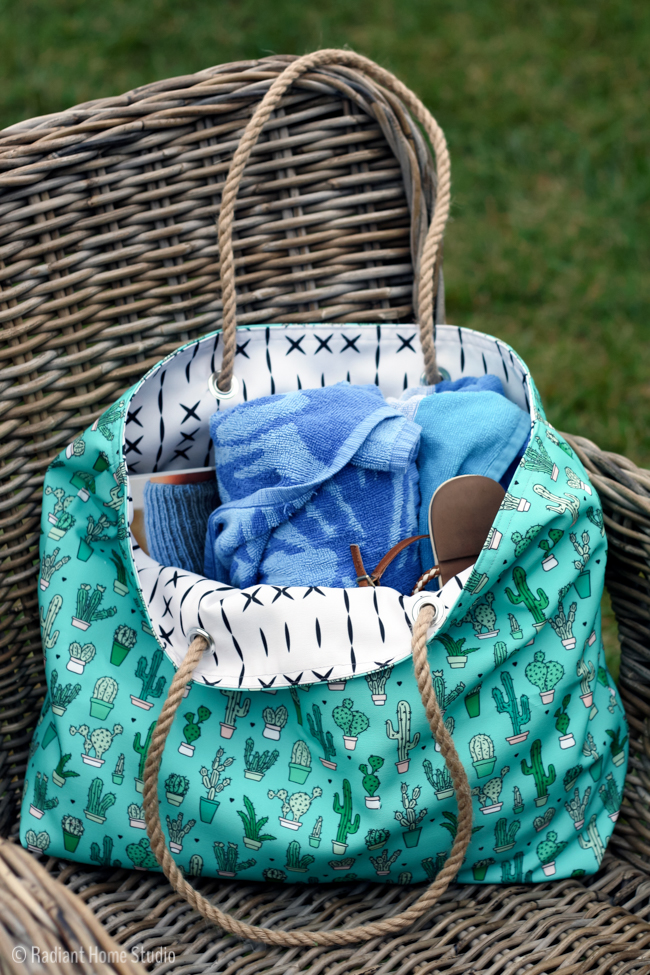
I used Spoonflower Eco Canvas fabric, but you can use any type of home decor fabric, canvas, or interfaced cotton.
The bag is a simple tote bag, with one full-width pocket that is divided into 3 sections. If you want more pockets, just repeat the pocket directions for the other side of the bag! The fun rope handles are simply threaded through grommets and knotted. I’ve included detailed directions for attaching the grommets, and a simple alternative (button holes) if you prefer.
Materials:
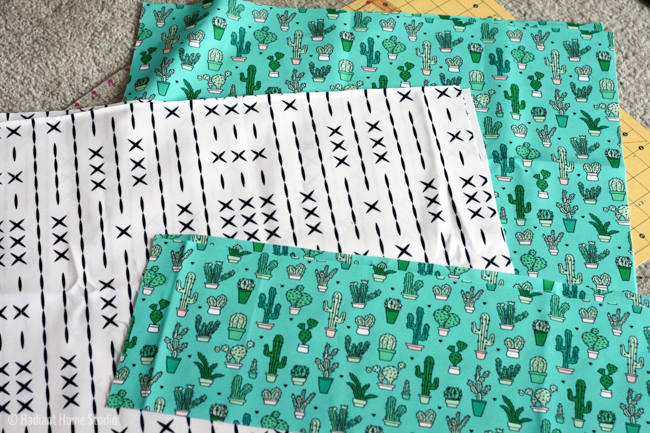
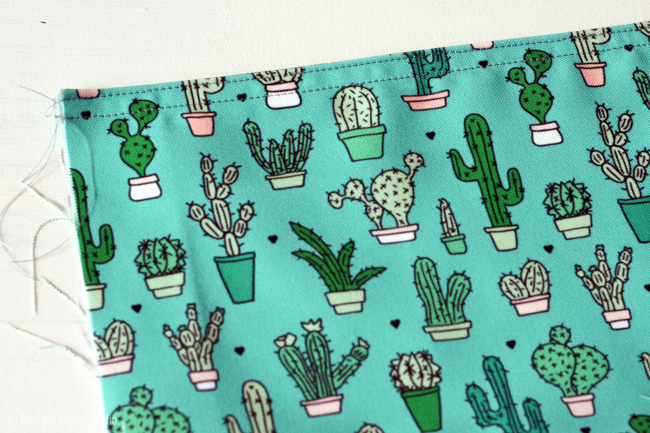
Exterior – 1 yd. of Eco Canvas (I used Cactus Cacti Garden by LittleSmilemakers)
Lining – 1 yd. of Eco Canvas (I used Cross Line Mudcloth by Holli Zollinger)
Rope – 2 yds. of 1/4″ rope
Coordinating thread
Grommets – size 7/16″ (optional, use a button hole in place of grommets if you choose)
Hammer – to set the grommets
(You’ll also have some fabric leftover for another project!)
Cutting measurements:
Exterior – cut 2 pieces, 22″ x 18″
Lining – cut 2 pieces, 22″ x 18″
Pocket – cut 2 pieces, 22″ x 8″
Finished Size :
About 18″ square, with 12″ handles.
Notes:
All seam allowances are 1/2″ and included in the given measurements.
Press all seams with your iron temperature set for synthetic fabric (if you use eco canvas…).
Instructions:
Cut out your pattern pieces using the measurements provided above. You may find it helpful to use a rotary cutter and mat to produce straight lines and right angles.
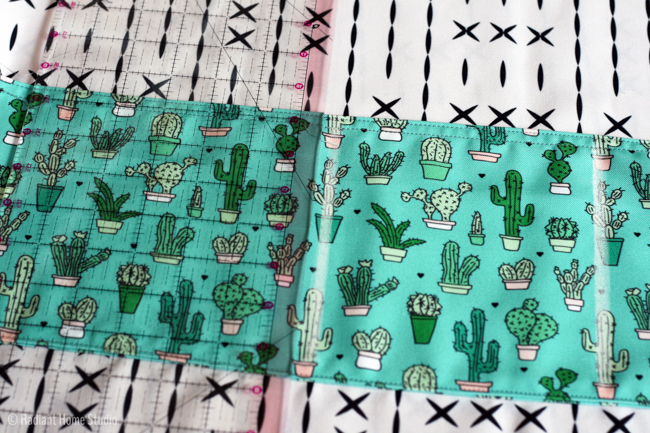
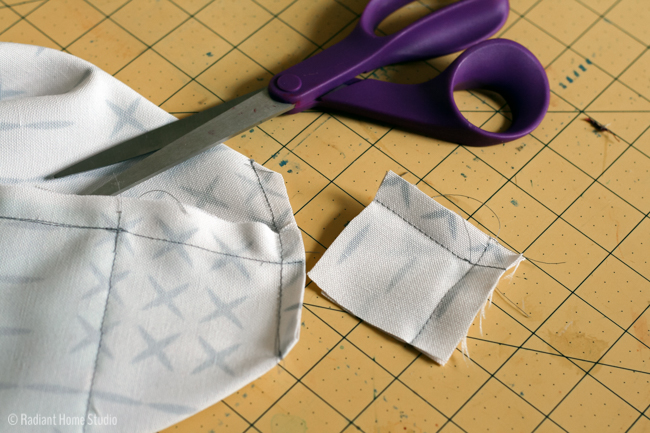
Locate the pocket pieces. Place them right sides together and stitch across the long edges of the fabric, leaving the short ends open.
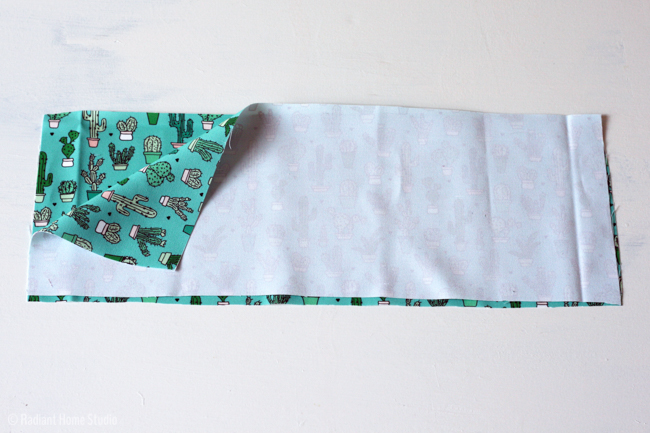
Turn the pocket right side out and press.
Topstitch along the folded side at 1/8″ and 3/8″ from the edge. This is the top of the pocket.
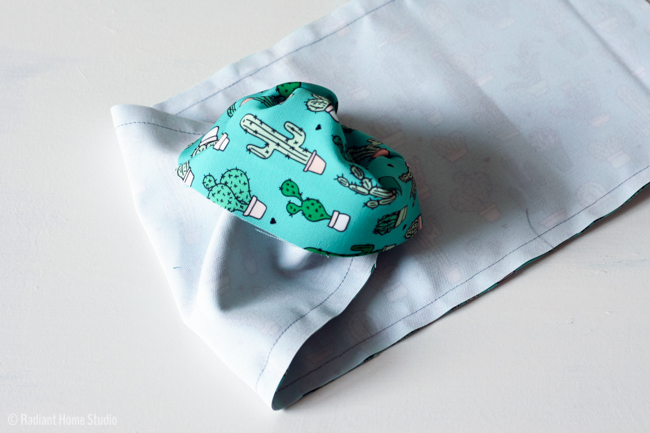
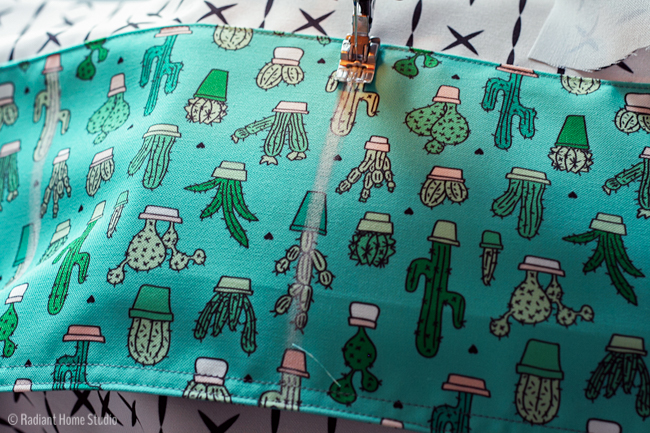
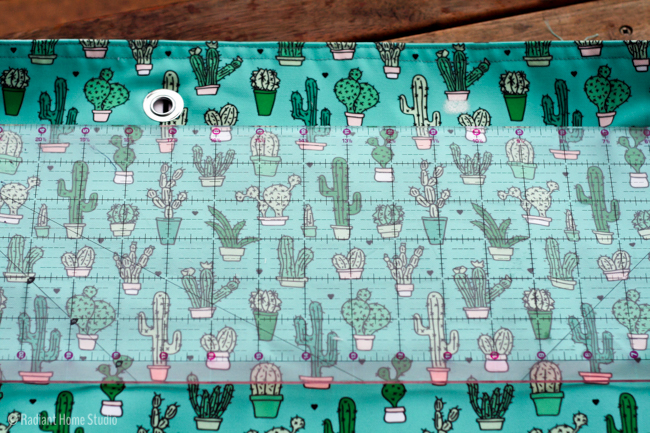
Place the slip pocket across the right side of one of the lining pieces. The top edge of the pocket should be 6″ below the top edge of the lining piece.
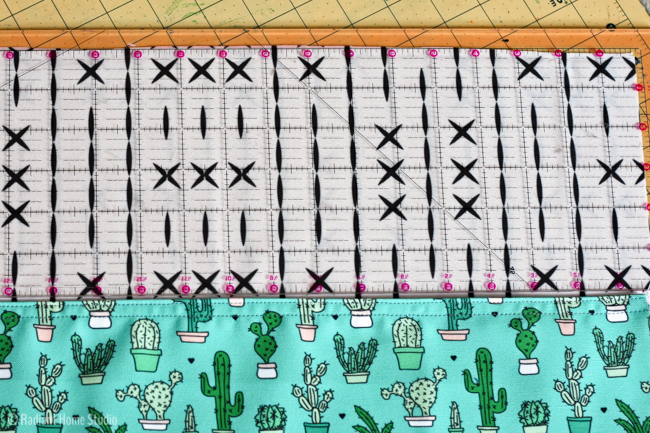
Baste the pocket sides to the lining sides in the seam allowances (about 1/4 ” from the edges).
Topstitch the bottom pocket edge to the right side of the lining.
Mark two vertical lines on the pocket, dividing the pocket into 3 sections.
Stitch along the lines, from the bottom of the pocket to the top of the pocket to avoid puckering, backstitching at the top edges to secure the stitching.
One side of your lining should now look like this…

You can repeat the pocket directions for the other side of the lining if you prefer more pockets.
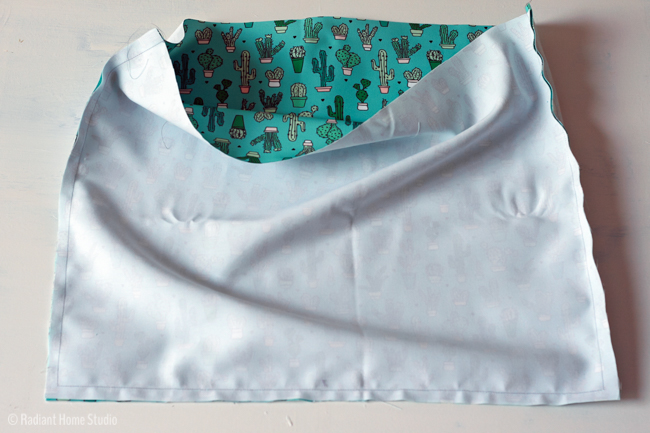
Place the lining pieces right sides together. Check your pocket orientation to locate the top of the bag. Stitch along the other 3 sides leaving a 3″ gap at the bottom center of the bag.
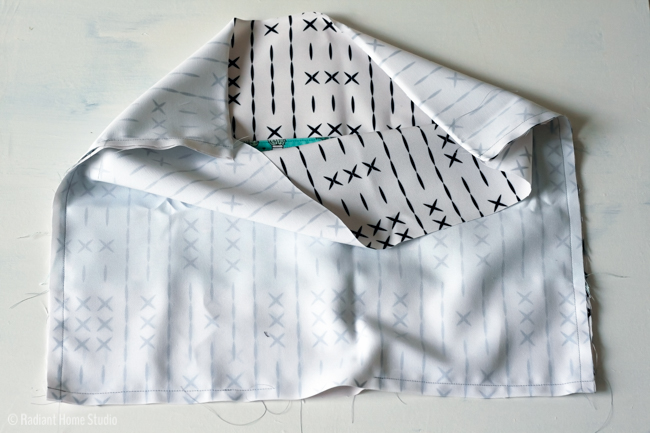
Flatten the bag so that the side seam and bottom seam are aligned. On the corner, measure in 2″ and draw a line. Repeat on the other corner.
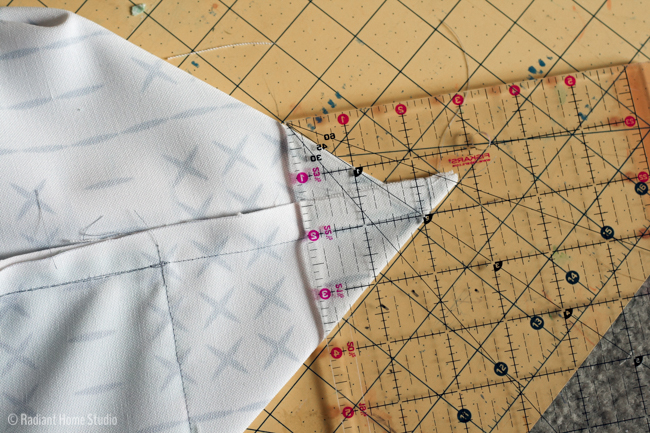
Stitch along the lines in the corner of each bag, backstitching at each end. Trim the excess.
Now you will have a square corner at the bottom of your bag. It should look like this when you open it up.

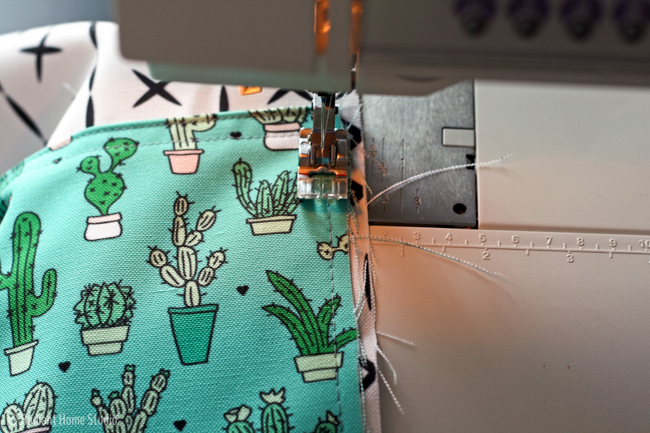
Place the exterior pieces right sides together and stitch along 3 sides, leaving one of the 22″ edges open.
Square the corners of the exterior as you did for the lining.
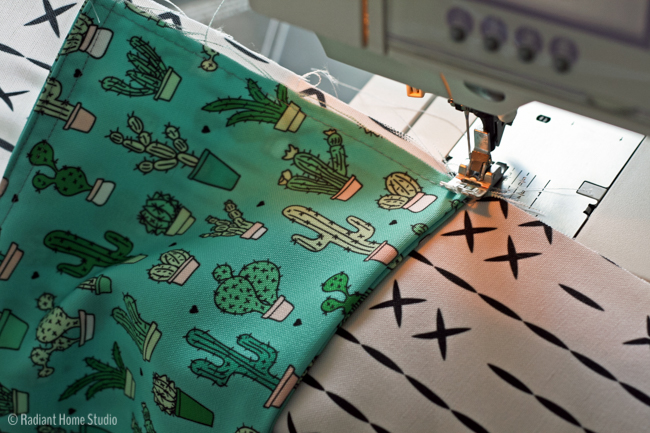
Place the exterior inside the lining with right sides together. Match the side seams and stitch around the top edge.
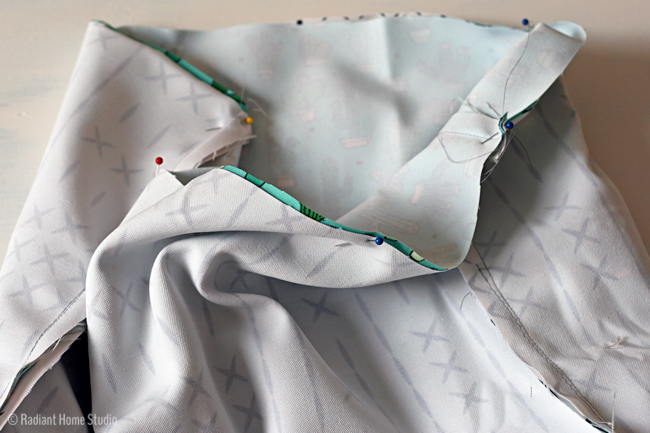
Turn the bag right side out through the small opening in the bag lining.
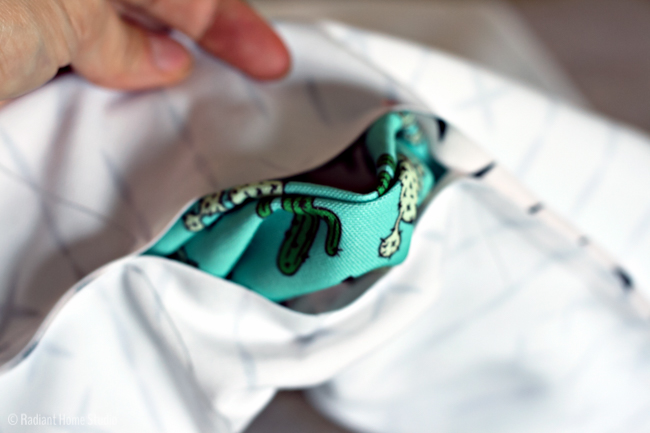
Topstitch around the top edge of the bag at 1/8″ and 3/8″.
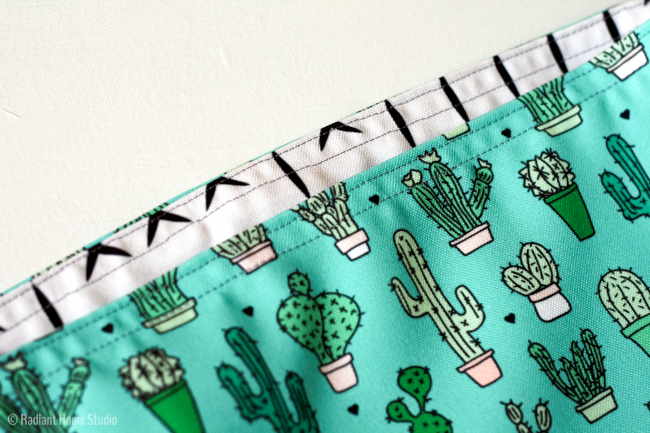
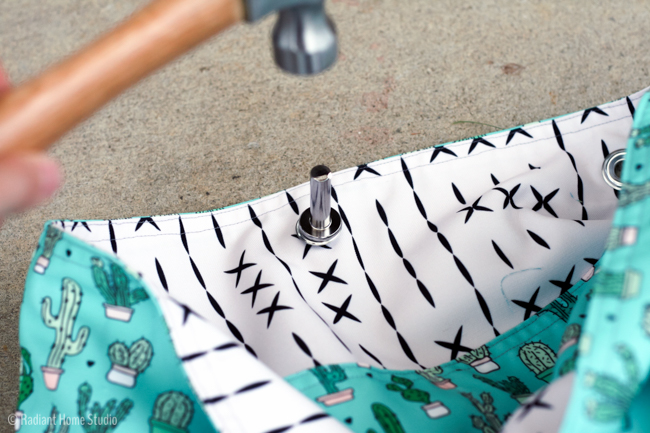
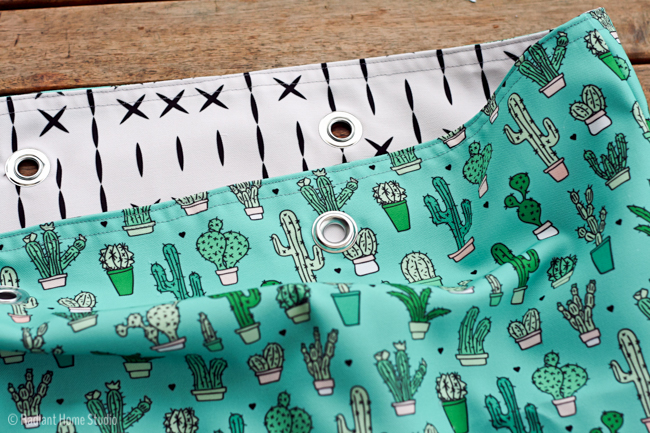
Use chalk to mark grommet placement. Holes should be centered 6″ apart, and 1 1/2″ below the top edge.
If you don’t want to use grommets, or can’t find the right size, you can make buttonholes instead!
Grommet kits come with 4 different types of pieces. The tools are the anvil and setter (the long piece).
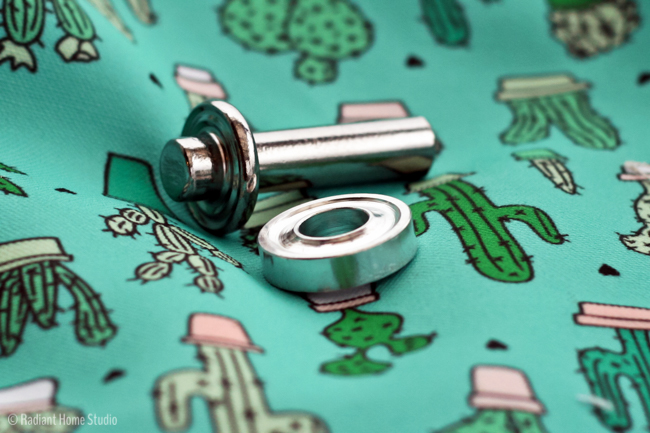
Each grommet is made up of two pieces. On the left is the stud and on the right is the washer.
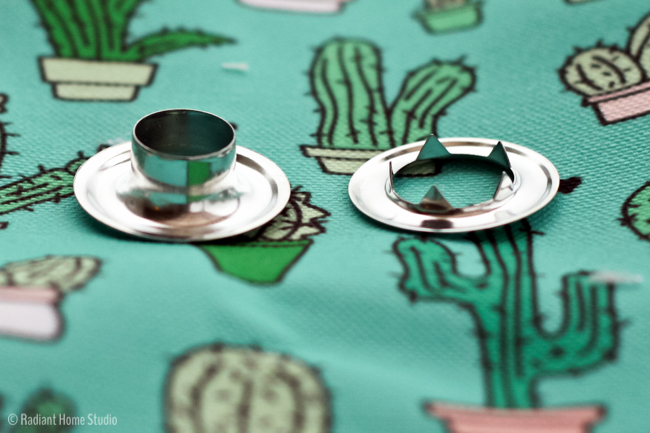
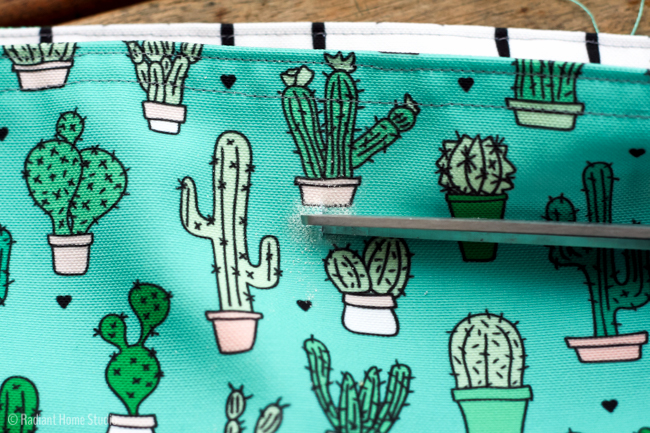
To insert the grommets, you need to cut a small hole the size of the inner circle. First, fold your fabric and carefully snip a hole (through both layers) in the center of the circle.
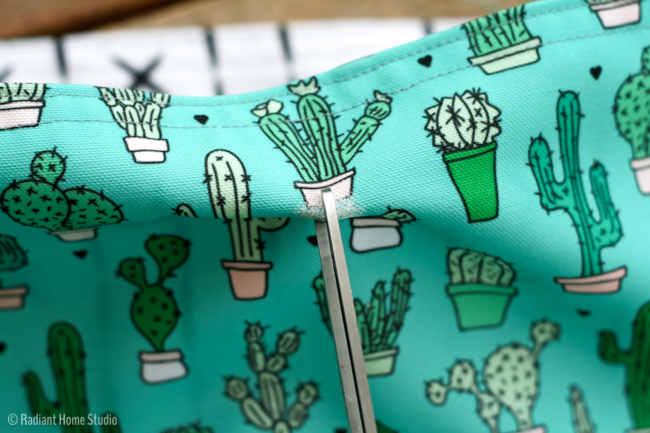
Snip perpendicular to that cut, forming a small plus sign. Then trim the area in the center. A perfect circle is not necessary. And remember that it is always better to make the hole too small than too big!
Push the stud through the hole.
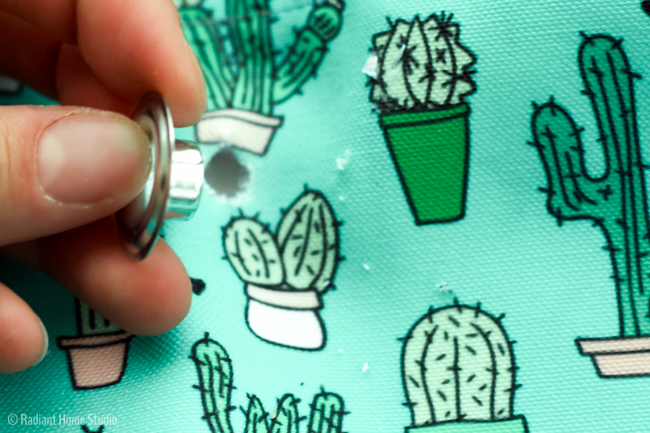
Turn the fabric over and slide the washer (teeth side down) onto the stud.
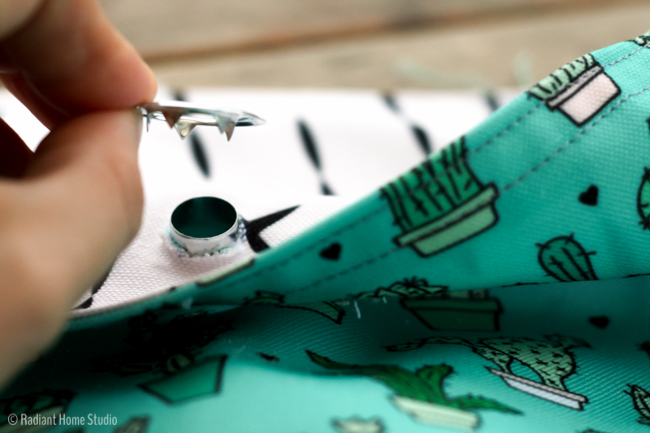
Place the anvil on a hard surface (concrete is best, so you’ll probably need to step outside), with the stud side of the grommet resting on it. Place the setter into the hole and hit it with a hammer a few times.
Repeat for all four grommets.
Decide how long you want to make your handles. I used 30″ of rope for each handle, but you can make them longer or shorter depending on your taste. Insert one end of your rope through one grommet from the inside.

Tie a knot and pull it tight.
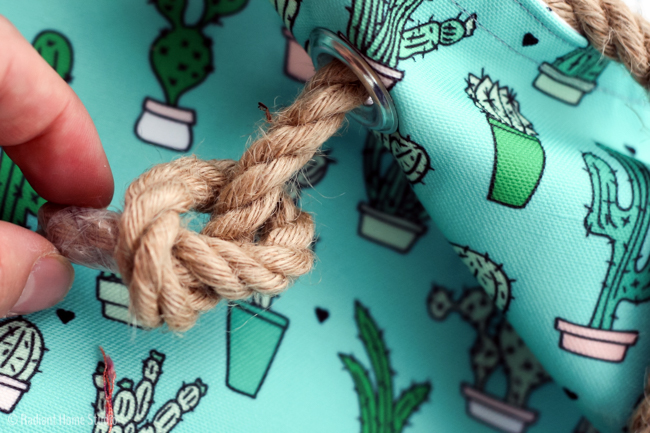
Before you tie the last knot, make sure your handle lengths are even. You don’t want to be carrying around a lopsided bag after all of that hard work!
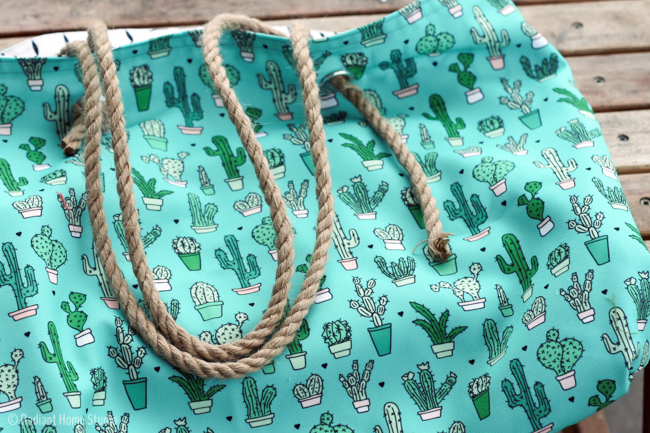
Almost done! Don’t forget to hand stitch that little hole in the lining closed!

That’s it! Pack it up and head out on an adventure somewhere!

Thanks for sharing this as a free tutorial! Looks like a great bag – I’ve pinned it to my Free Patterns & Tutorials Board to share!
Thanks Jaime!
Love the bag, thanks for showing how easy it is to fit grommets:)
What gorgeous fabric and a fantastic design for a bag! It’s so perfect for the summer, I love it!
Thank you Rebecca! The fabric is from Spoonflower, and I love the cactus print for summer!
This looks like the perfect beach tote! I would love for you to link up at the Stitch It, Blog It, Share It Link Party going on now at behindtheseamssewing.com.
~Bonnie
i love everything about this bag. Thanks for sharing! You did such a great job on this tutorial I don’t think I have ever seen one so detailed and easy to understand. Wonderful! Thanks
Thank you Judy! I appreciate the positive feedback!
Great tutorial!! Thank you. I was curious to know how your coastal tote compares to the beach tote? I’m deciding which one to make!
Yeah, good question. The Coastal Tote is the same size with the same pockets. The rope handles go all the way through the bag, making the Coastal Tote a lot sturdier. I have two Coastal Totes that I use as my everyday bags. The pattern also has directions for extra zipper pockets and lots of tips to get a professional looking finish. I also have a coupon code for my instagram followers that makes the pattern $5. It expires today. “instagram500” Thanks for stopping by!
Pockets are referenced as plural, but cutting instructions only mention a singular piece for pockets. I’m missing a step! Please advise.
You are right! I copied and pasted from an older version and not from my most recent edit. Originally I had one pocket piece that was folded in half. Then I decided to use 2 pieces instead. I changed it one place, but not the other. You need 2 pocket pieces, 22″ by 8″. I have edited the tutorial as well. Thank you for pointing out the inconsistency! I hope that helps!
I have 2 great grandsons coming here (San Francisco) from Florida. We all are so excited. I am planning on making these bags for the extra things they will get on their trip. This is the first time I will be using grommets. In all the years I have been sewing, I never even noticed that I missed playing with grommets. This should be lots of fun. Thanks for your detailed instructions. The rope handles will make it look masculine for my little guys.
How fun! I hope you have a wonderful time visiting with your grandsons. And have fun sewing!
Okay that fabric is TOO perfect! I absolutely love this beach tote, thanks for sharing your pattern!!!
Thank you Emily! And thanks for sharing with your followers!
Want to try this.
My sister helped me make this for my first sewing project. I used extra exterior fabric to do 3″ on the inside before the lining started and i absolutely love it!!!
I have 3 to do for myself and family/friends. Perfect xmas present for my Australian summer xmas.
Thanks so much for the pattern!
Rosie
Thanks for telling me Rosie! Great idea! I hope your friends and family love your gifts 🙂
Awesome tutorial, super easy to follow & I LOVE how my new bag turned out.
The only question I had was, do you cut your pockets down from 22″ wide to 21.5″ to account for the 1/4 that you’re placing the pockets from the edge of the lining?
Thanks so much! : )
Thank you! Glad you enjoyed it. I don’t mention placing the pocket 1/4″ from the edge in the directions. It looks like sloppy cutting on my part. Most of the time bag patterns don’t match up exactly unless you have perfect sewing skills. I always trim my edges before the next step to make sure everything is nice and straight. Sorry for the confusion!
Thanks a lot ! it’s very nice. The cactus fabric is so lovely
Thank you! It is a very fun fabric for summer, isn’t it?
Thanks for this great tute! I made two adorable totes – ready for summer!
Thanks!
Hi! Love this tutorial! I was wondering if I wanted to use a regular cotton print on the outside and canvas fabric for inside would that work? Or would I need interfacing for the outside fabric?
The bag is meant to be fairly floppy anyway, so cotton would definitely work. If you want more stiffness, add interfacing, but if you don’t mind floppy, it should work just fine.
well it looks like easy! beautiful! im from argentina, i will try
Very easy! I hope you do!