• SHOP
  • About
    • About Sara
    • Contact me!
    • Design Collaborations
    • Sewing Collaborations
  • Sewing
    • Sewing Tutorials
    • Things I Made
  • Design Portfolio
  • Blog
  • Nav Social Menu

    • Facebook
    • Instagram
    • Pinterest
Radiant Home Studio | Sewing Patterns & Surface Design

Radiant Home Studio

November 11, 2016 ·

How to Make a Waxed Canvas Gift Pouch

Featured· Sewing· Tutorials

It’s time to start thinking about holiday gifts. It always feels too early to start before Thanksgiving, but when you plan to make several handmade gifts, it’s best not to wait until the last minute. I know some of you stay up half the night trying to finish Christmas pajamas at the last minute, right?!

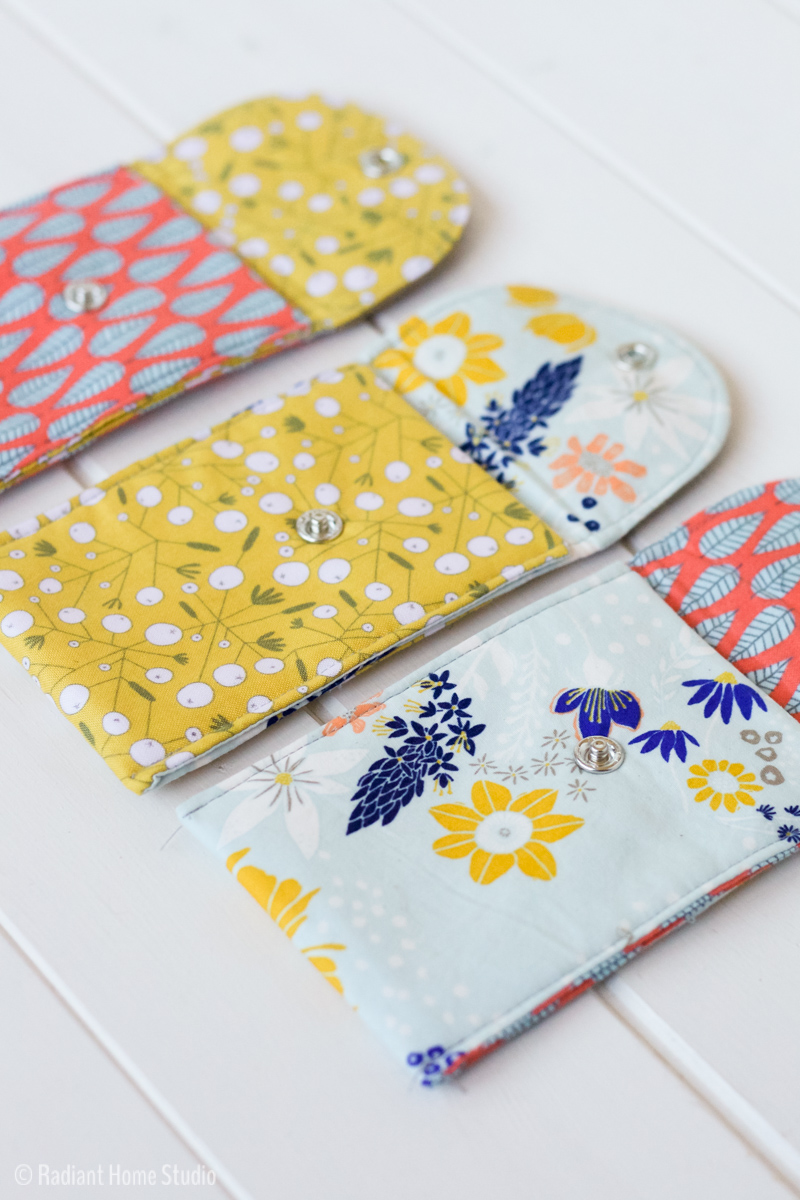
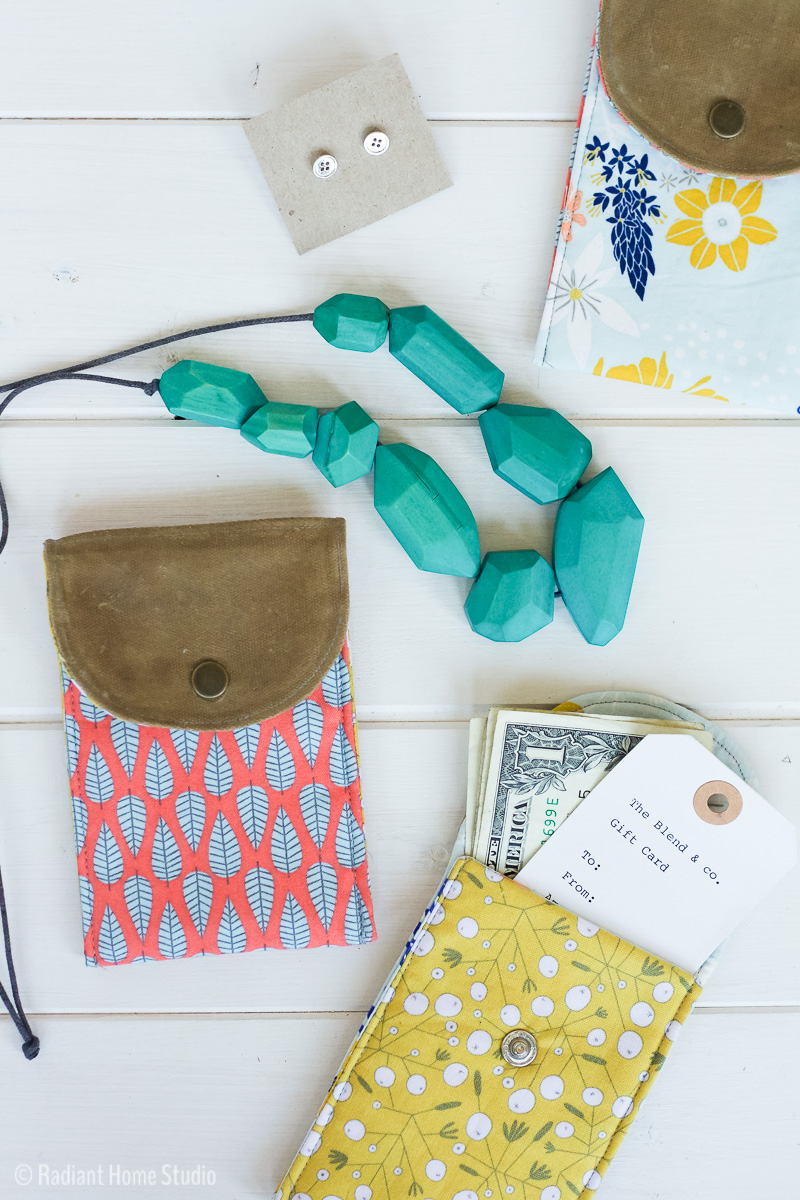
This is a quick and easy project—waxed canvas gift pouches. They are just the right size to wrap gift cards or jewelry. I recommend making 2 or 3 at a time. If you already have everything out, you’ll save a lot of time making them in batches. You can make them in even bigger batches for holiday craft fairs.

How to Make A Waxed Canvas Gift Pouch | Radiant Home Studio

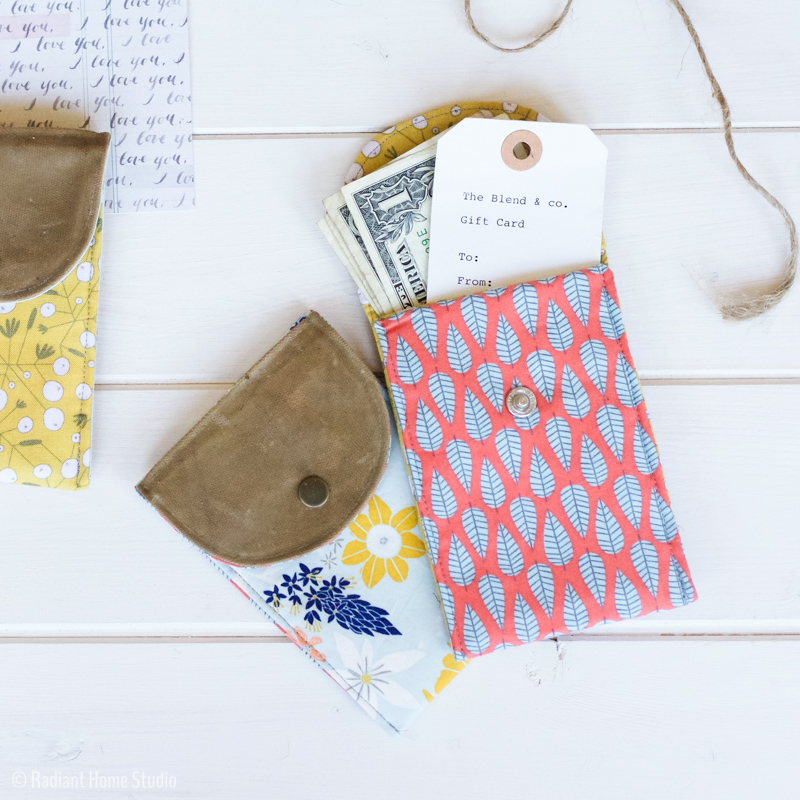
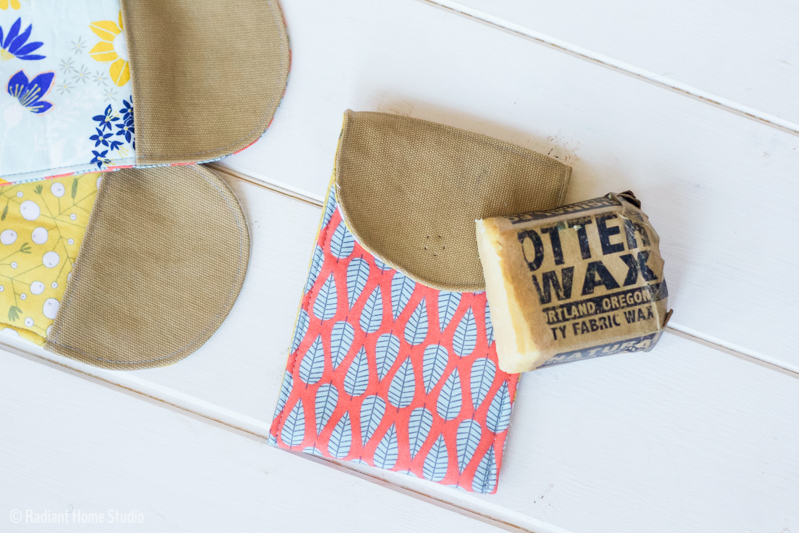
I used waxed canvas on the flap as an accent fabric, but you could also use faux leather, denim, or another layer of quilting cotton in a contrasting color. The fabric requirements are flexible on this project, so use what you have in your scrap bin.

How to Make a Waxed Canvas Gift Pouch

How to Make A Waxed Canvas Gift Pouch | Radiant Home Studio
(Some links may be affiliate links, which means I earn a small commission at no cost to you. Thanks!)

Materials:

2-3 fat quarters of quilting cotton (this will be enough for 6-10 pouches)
1/4 yd. canvas (or faux leather, denim, etc.)
Medium-weight interfacing or fusible fleece (I used Pellon 987F. You could also use 808/809, 931, SF101…this a good way to use up scraps.)
Size 16 metal snaps – 1 set per pouch (I used Snap Source snaps. You could also use KAM Snaps or small pieces of hook-and-loop tape.)
Otter Wax
Coordinating thread

Printable pattern (make sure you set it to print at 100%)

Sewing Instructions:

1. Print and cut out the pattern pieces. For each pouch, cut 2 pouch pieces, 1 flap piece, and 1 interfacing piece.

How to Make A Waxed Canvas Gift Pouch | Radiant Home Studio

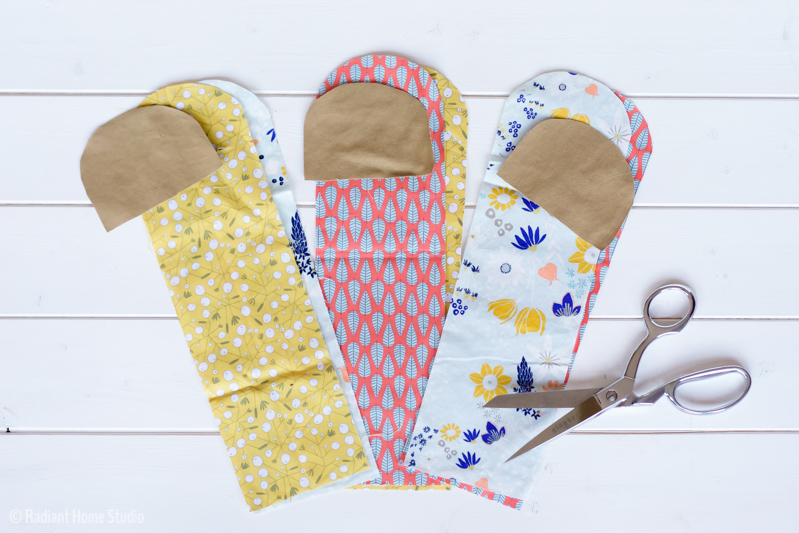
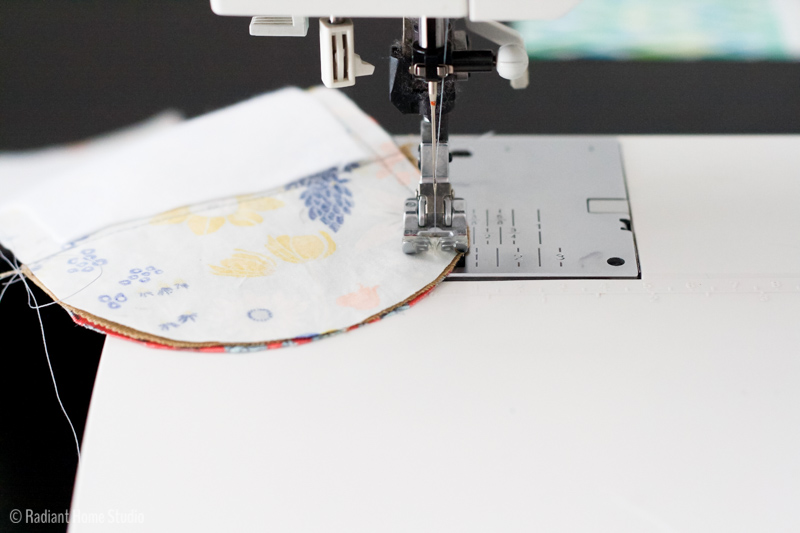
2. Fold the straight edge of the flap 1/4″ toward the back, with wrong sides together. Press. Align the flap piece on the exterior pouch piece so that the rounded edges match, both with right sides up. With the 1/4″ section folded under, topstitch along the straight edge of the flap piece through both layers.

How to Make A Waxed Canvas Gift Pouch | Radiant Home Studio

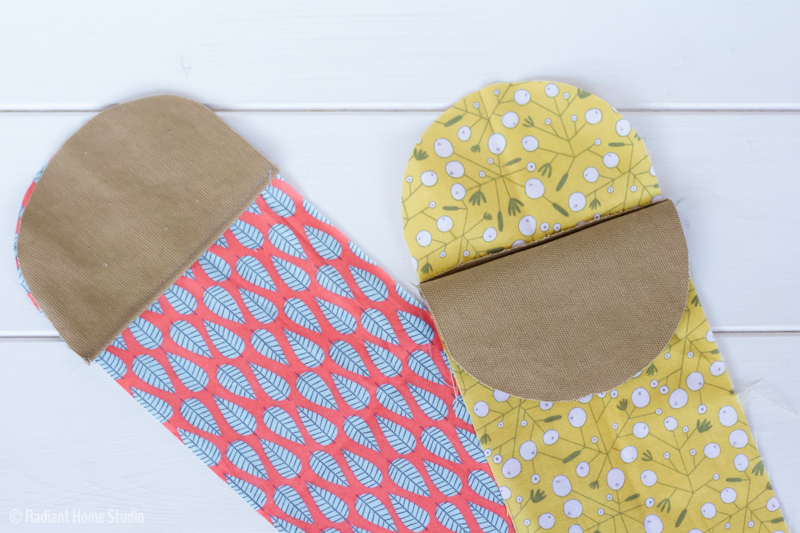
3. Align the fusible interfacing with the stitched line on the wrong side of the exterior pouch piece. Fuse the interfacing using the manufacturers’ instructions.

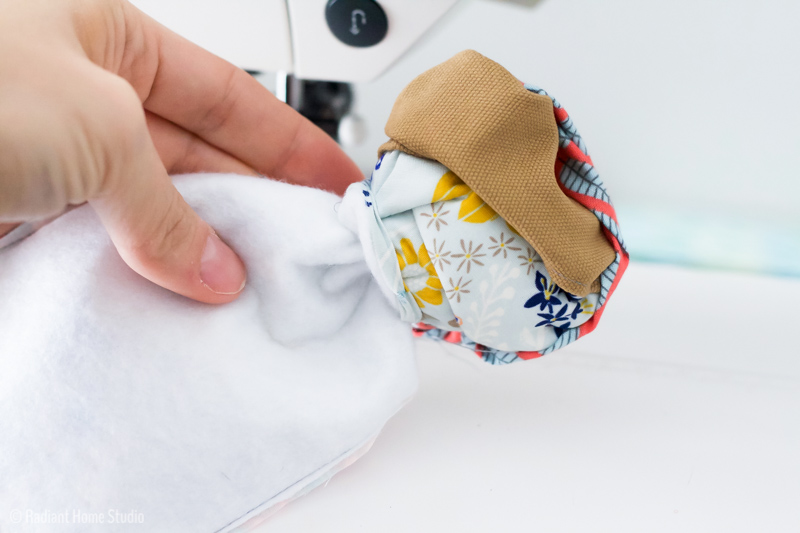
4. Align the exterior and interior pouch pieces, right sides together. Stitch around the entire pouch using a 1/4″ seam allowance, leaving a 2″ opening on one side. Trim the seam allowances and corners to 1/8″.

How to Make A Waxed Canvas Gift Pouch | Radiant Home Studio

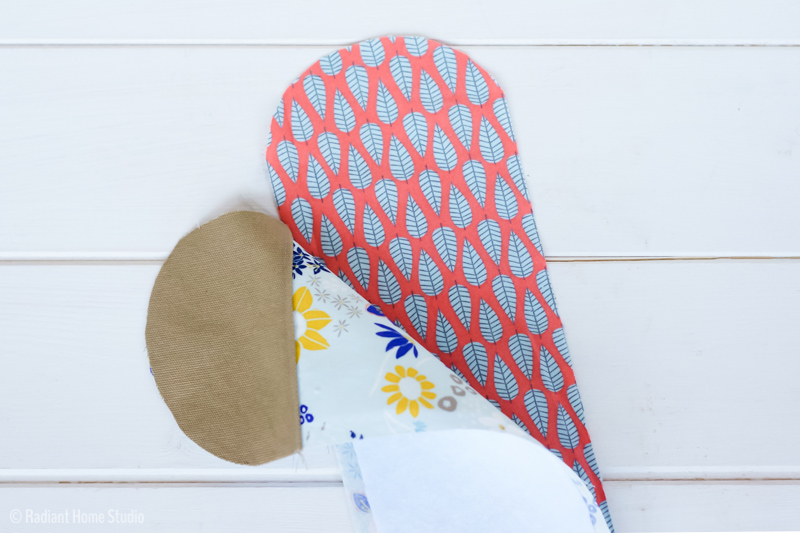
5. Turn the pouch right side out, push out the corners, and press. Make sure to tuck the raw edges in at the opening.

How to Make A Waxed Canvas Gift Pouch | Radiant Home Studio

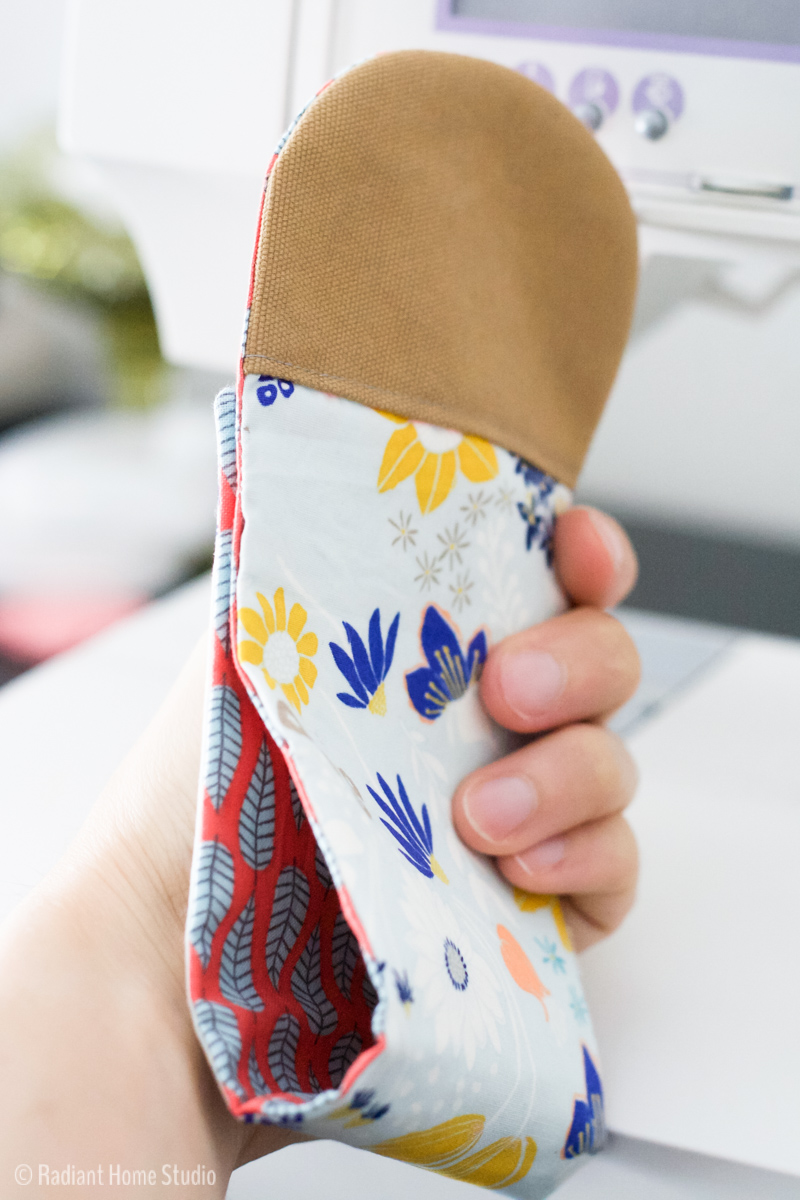
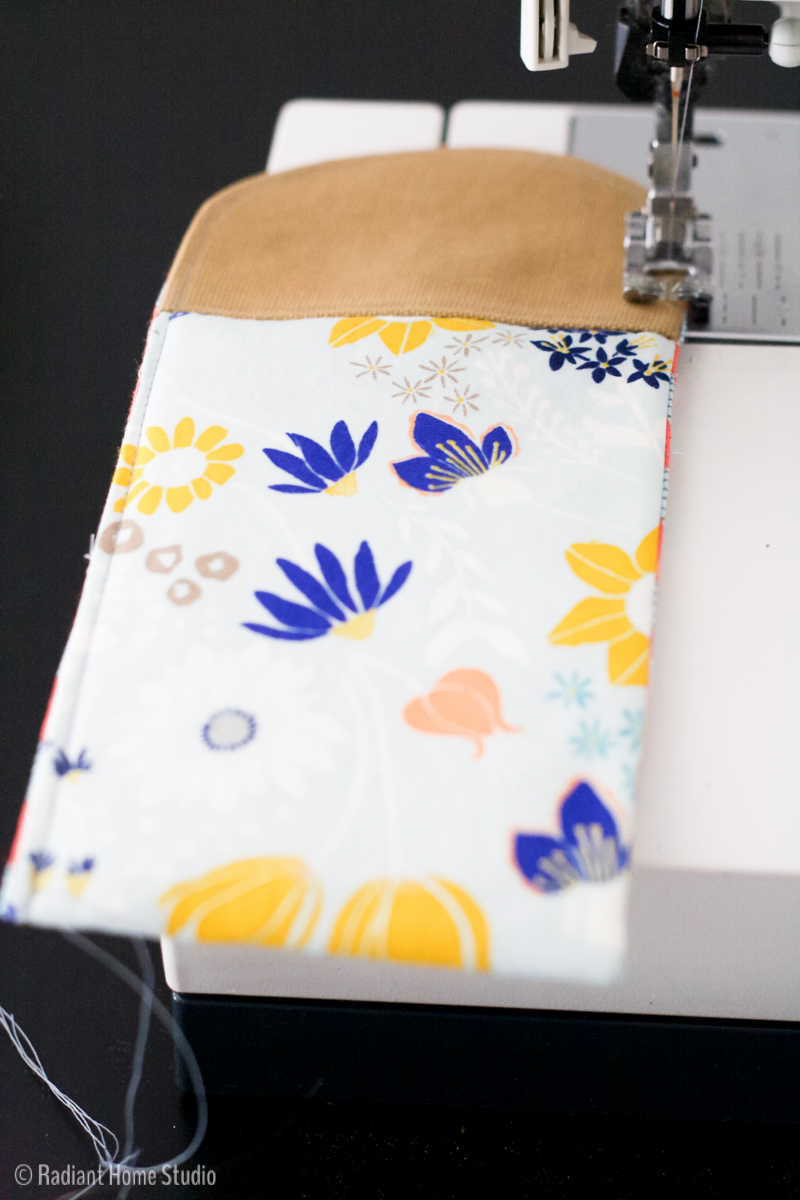
6. Take the straight edge of the pouch and fold it up toward the flap, about 1/4″ below the straight edge of the flap piece. Press. (If you plan to use hook-and-loop tape, add it now.)

How to Make A Waxed Canvas Gift Pouch | Radiant Home Studio

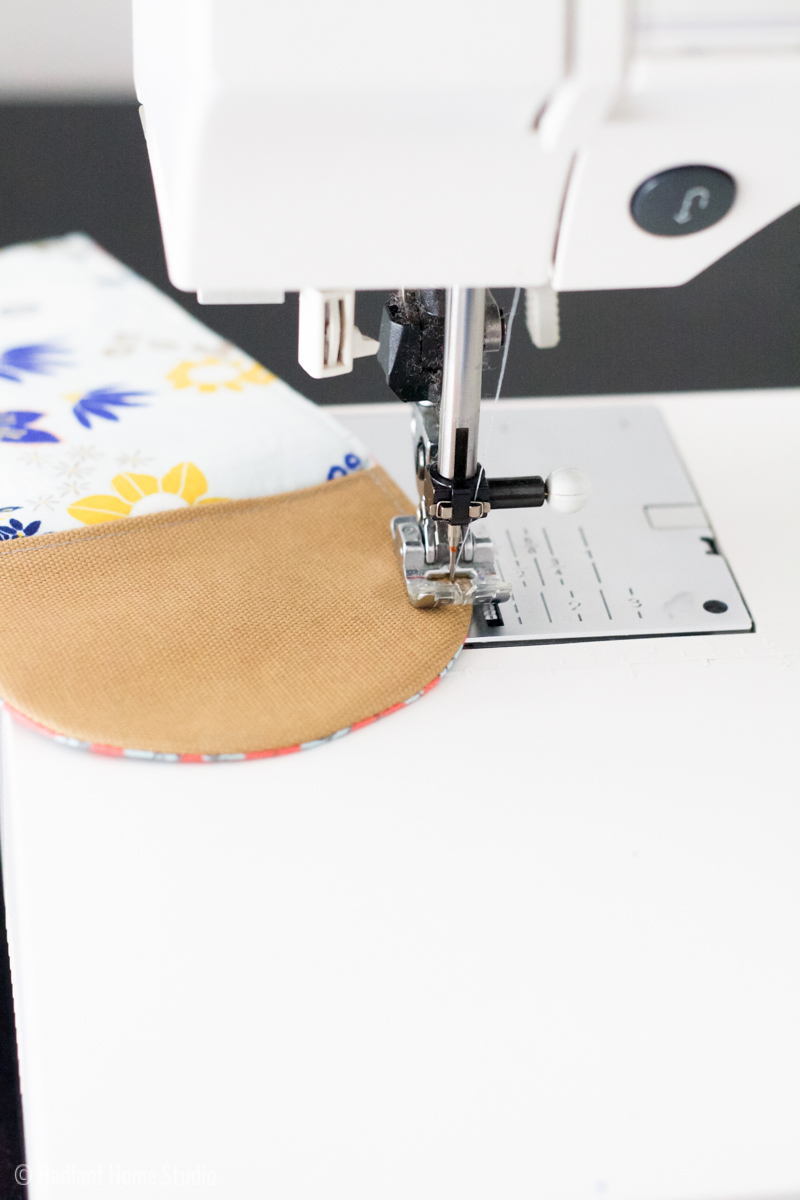
7. Place the folded pouch, with the flap facing up on the sewing machine. Begin sewing, with a 1/8″ seam allowance, at one folded edge and continue around until you get the folded edge again. Backstitch at each end.

How to Make A Waxed Canvas Gift Pouch | Radiant Home Studio

8. If you would like to apply wax to your canvas flap, do that now. The short version of the instructions—rub on some Otter Wax and then rub it in with your fingers. You can use it on denim too, but avoid using it on light colors because it will turn the fabric yellow. If you need more specific instructions, see my directions for making your own waxed canvas.

How to Make A Waxed Canvas Gift Pouch | Radiant Home Studio

9. Add a snap. I like the Snap Source snap setter for metal snaps. You can use the instructions on the package, or look at Anna’s helpful tutorial if you need a visual aid. I’ve also used plastic KAM Snaps with great success.  You could even add a button hole and button. Totally up to you.

waxed-canvas-gift-pouch-23
How to Make A Waxed Canvas Gift Pouch | Radiant Home Studio

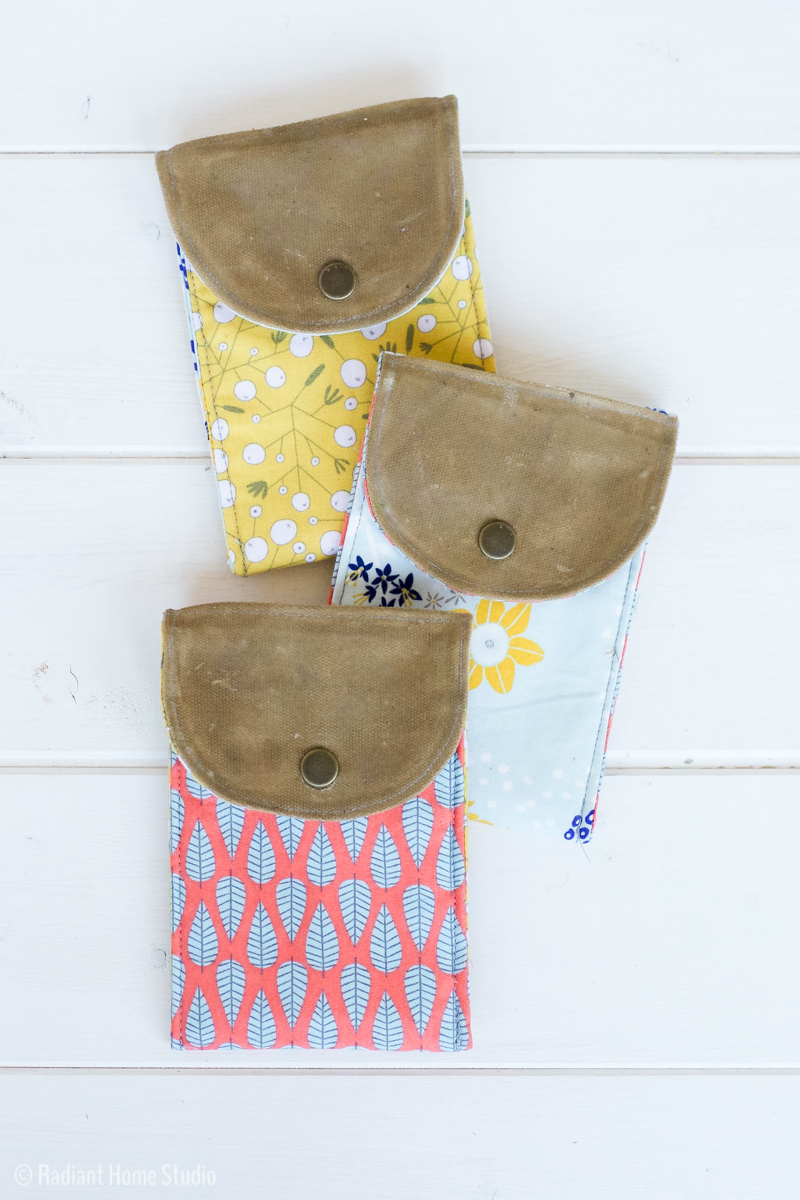
That’s it. Make a lot, load them with gifts,  and give them to your friends…

How to Make A Waxed Canvas Gift Pouch | Radiant Home Studio

Happy sewing!

I’ve linked this post with: Sew Can She, Sew Can Do, Stocking Stuffer Ideas, Women with Intention, Raising Homemakers

SaveSave

SaveSave

Previous Post: « Blue Striped Halifax Hoodie
Next Post: 10 Quick & Easy Handmade Gift Ideas »

Reader Interactions

Comments

  1. Cristina says

    November 11, 2016 at 6:19 pm

    These look so fun! I just saw your Instagram post, so I had to get here in a jiffy to find the pattern and tutorial! Thank you for the free pattern. You rock!

    • Sara Curtis says

      November 12, 2016 at 1:33 pm

      Awesome! You are welcome!

  2. Vicky Myers says

    November 12, 2016 at 5:30 am

    These are just adorable Sara, I have pinned and will definitely be making some. Waxing the fabric just gives the extra edge:)

    • Sara Curtis says

      November 12, 2016 at 1:33 pm

      Thanks Vicky! I love waxed canvas. It’s like adding leather, but easier I think…

  3. Stephanie says

    November 14, 2016 at 12:57 am

    So pretty, pinning!

    • Sara Curtis says

      November 14, 2016 at 6:42 am

      Thank you!

  4. Pam @Threading My Way says

    November 15, 2016 at 2:05 am

    Two gifts in one. Love them, Sara!
    #12DaysofChristmasDIYChallenges

    • Sara Curtis says

      November 15, 2016 at 7:24 pm

      Thank you so much!

    • Pam @Threading My Way says

      November 21, 2016 at 1:02 am

      Hi Sara, I’ve featured your fabulous gift pouches today, Sara, as part of the #12DaysofChristmasChallenges…
      http://www.threadingmyway.com/2016/11/threading-your-way-features_20.html

      • Sara Curtis says

        November 21, 2016 at 9:45 am

        Thank you!

  5. Kathleen says

    November 16, 2016 at 10:21 am

    I loved this! Just in time for Christmas too! I especially appreciated the tutorial and applying the wax. Thank you!

    • Sara Curtis says

      November 16, 2016 at 10:24 am

      You’re welcoming! Thanks for visiting!

  6. Damjana says

    November 18, 2016 at 4:44 am

    Sara,

    these are adorable! I’ve just found them on Caroline’s site where she’s showcasing them. Such a cute creation! (Oh and the prints you’ve used!!! Do you have a special fav shop where you get these? OK, off to browse a bit more, your blog is just adorable!) Have a great day,

    • Sara Curtis says

      November 21, 2016 at 9:47 am

      Thanks! Two of the fabrics were given to me, so I’m not sure who the designers are. The blue floral is Leah Duncan for Art Gallery Fabrics.

  7. Sally says

    November 19, 2016 at 2:24 am

    Love these! I shall make a selection for my Christmas Craft Stall!! Thank you for the turtorial and the download!!

    • Sara Curtis says

      November 21, 2016 at 9:46 am

      They’ll be perfect for that!

  8. Crystal says

    November 19, 2016 at 10:42 am

    The timing of this is so perfect! I have a friend looking to make something just like this for work, so I’m passing it on:) You should come over to Fresh Market Friday Link-up and join the Blogger Holiday Gift Exchange…it’s all about using our creative skills and ideas to bless another blogger. It’s going to be so much fun, and your gift idea is perfect!!

    • Sara Curtis says

      November 21, 2016 at 9:45 am

      Thanks! I’ll check it out!

  9. teresa says

    January 6, 2017 at 1:03 pm

    Thanks for sharing this! I just made my first one and it’s really cute. It’s an easy little project, but I learned the waxing and snaps. It will be fun to try some variations! 🙂

    • Sara Curtis says

      January 9, 2017 at 11:03 am

      Thanks for letting me know!

Primary Sidebar

Hello

Welcome! I’m Sara. I share modern home & accessory sewing patterns, and I create surface designs for licensing. I hope you are encouraged to see beauty in small things and are inspired to try new creative projects!

Shop Sewing Patterns


icon icon

icon icon

Newsletter

Sign up to get access to free sewing patterns & resource library!

Find My Work at:


© Copyright Notice

All images and text copyright ©2013-2020 Radiant Home Studio, unless otherwise noted. Please be kind enough to link back to my site and contact me if you would like to use my images.

Disclosure

I am a participant in the Amazon Services LLC Associates Program, an affiliate advertising program designed to provide a means for me to earn fees by linking to Amazon.com and affiliated sites.

  • Disclosures & Copyright
  • About
  • Contact me!
  • Digital Pattern FAQ’s

Resources I Love:


Featured Posts:

  • How to Make A Waxed Canvas Gift Pouch | Radiant Home Studio

    How to Make a Waxed Canvas Gift Pouch

Sewing Tutorials

Denim Pocket with Grommets and Denim Shoulder Strap| Tote Bag Upgrade | Radiant Home Studio

Sewing Patterns

Surface Design

home page 1 - radiant home studio design

radianthomestudio

surface pattern design • welcoming cards & creative home goods • modern sewing patterns • mom of 7 • beauty in the everyday

Sara Curtis | Pattern Design
I’ve always been a lover of paper goods and scho I’ve always been a lover of paper goods and school supplies, especially these happy little rolls of patterns. Which Washi tape is your favorite? 

#washitape #washitapeaddict #washitapelove #stationeryshop #wholesalestationery #prettytape
Yesterday I received something in the mail that I’ve been waiting about 15 months to see! It’s my Raised fabric from @clothworkswa 🙌🏻. 

It’s just as beautiful as I hoped and I cannot wait to see what you make with it!

Fabric shops…you can order from Clothworks! Give me a shout out if you have some in your quilt shop. 🧵I have some free sewing pattern samples I’d love to send to you! 

Thank you for all your support friends! Some of you have been hanging out with me for years and know that this is about 8 years of dreams finally in my hands. I’m honored that you are here, whether we just met or whether you’ve been here all along. 😘

#fabricdesign #fabricdesigner #clothworks #raisedfabric #radianthomestudiofabric #farmhousefabric #quiltshop #quiltshops #newfabric #newfabricalert #sewinglove #fabricstash
I created this pattern with home decor in mind. I’m a bit of a minimalist at heart (as much as one can be with 7 children!) and simple block print style patterns are my favorite. ♥️

Maybe it adds a little bit of order in a world that can feel a little out of control.✏️ What do you do to bring some order back to your life when it’s feeling chaotic and hard? 

#surfacepatterndesign #blockprintedfabric #wallpaperdesign #interiordesigninspo #geometricpattern #surfacepatterndesigncommunity #seekthesimplicty #simplehomestyle
Working with my people this week! ☀️ Community Working with my people this week! ☀️ Community, good food, sunshine, and laughter is a welcome and refreshing break. It has been such a joy to hug my favorite girls @ash_cascade_design @lissieteehee @bonniechristine and @iamlisajacobs. 🤗
One of my favorites! Last minute reminder that the One of my favorites! Last minute reminder that the Immersion Course closes tonight. I still have bonus one-on-one coaching sessions available if you sign up through my link tonight. 

#surfacepatterndesign #surfacedesign #creativeentrepreneur #makersgonnamake #makersofinstagram #spoonflowermakers
I have a special interview to share! Bonnie Christ I have a special interview to share! Bonnie Christine and I talked about the importance of community in growing a creative business. (because when you're the Community Manager...what else would we talk about!)

Welcoming people and providing a supportive place to learn and grow is important to both of us! The Immersion Course is the most energetic and supportive community experience I have ever been part of. 

If you are looking for a place to learn something new, grow your skills, or level up your surface design business, please consider joining us. 

Last year some of my quilting & art friends joined and I'm watching them design sewing patterns and beautiful products this year.

I'm offering a free coaching group coaching session following Immersion to help you figure out next steps if you sign up through my affiliate link. Five random students will get a free one-on-one session with me! (Right now that everyone...because I still have 3 slots left!) 

Message me with any questions you have about surface pattern design, how learning Adobe Illustrator can give you marketable skills, or how licensing your art and building multiple streams of income can add value to your life. 🙂

#surfacepatterndesign #creativecommunity #creativebusiness #creativemamas #surfacedesign #adobeillustrator #fabricdesigner #stationerydesigner #communitymatters #christiancommunityofcreatives #christianartist #communityovercompetition #sewingpatterndesigner #fashiondesigner
Load More Follow on Instagram
  • Disclosures & Copyright
  • About
  • Contact me!
  • Digital Pattern FAQ’s

Copyright © 2022 · Sara Curtis // beloved theme