• SHOP
  • About
    • About Sara
    • Contact me!
    • Design Collaborations
    • Sewing Collaborations
  • Sewing
    • Sewing Tutorials
    • Things I Made
  • Design Portfolio
  • Blog
  • Nav Social Menu

    • Facebook
    • Instagram
    • Pinterest
Radiant Home Studio | Sewing Patterns & Surface Design

Radiant Home Studio

January 10, 2018 ·

How to Sew a Pennant Banner for Parties

Tutorials

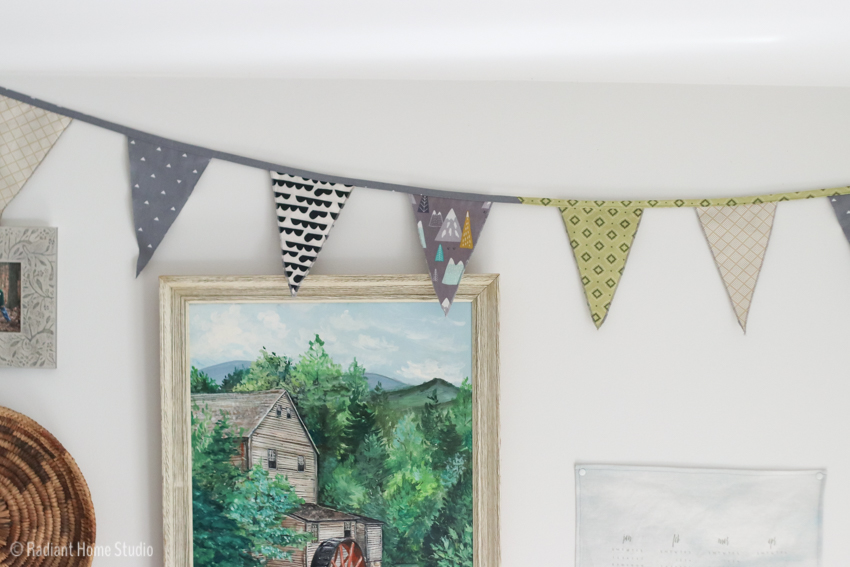
Learn how to sew a pennant banner for parties! They are easy to sew, reusable, and prettier than paper buntings from party stores. Pennant flags are fun home decor for any occasion, including birthdays, baby showers, and weddings!

There are lots of sewing tutorials for sewing pennant banners (or buntings, as some people call them) out there, but I haven’t seen any tutorials with an illustrated cutting guide to help you make the most of your fabric. Since I just made a new one to use for a baby shower, I thought I would take some photos and explain my simple process. I have a simple cutting method that will help you to use most of your fabric with less waste!

How to Sew a Pennant Banner For Parties | DIY Bunting or Mordern Pennant Flags | Radiant Home Studio

I really like to have a couple of all-purpose pennant banners around for parties. I don’t like tacky paper decorations from the dollar store and I hate to buy them only to throw them in the trash after using them. Fabric banners are reusable and don’t take much storage space. If you make a 2 or 3 with different color schemes, you should be able to use them for many occasions.

I’ve had one with girl colors for a few years that we hang up on the girls’ birthdays or for other summer parties. I’ve been planning to make one in another color scheme to use for the boys’ birthdays and other events, like the baby shower we just hosted.

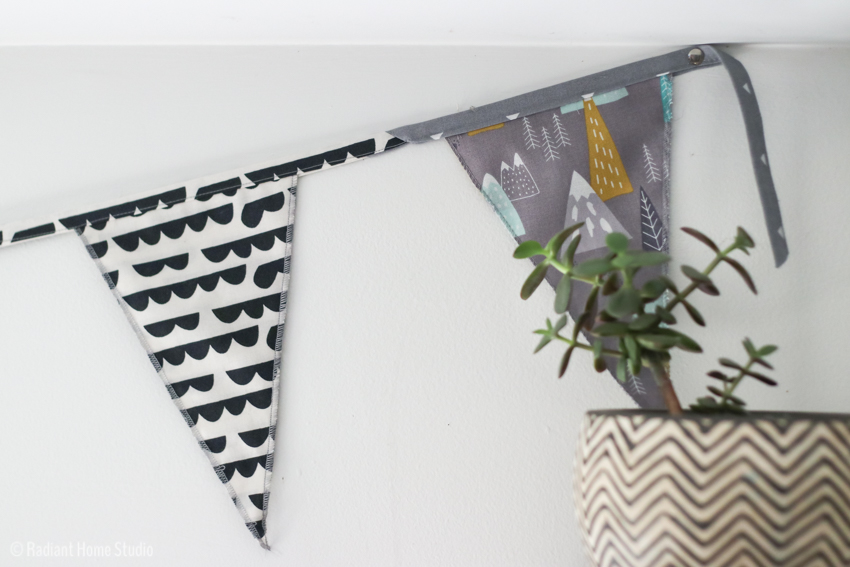
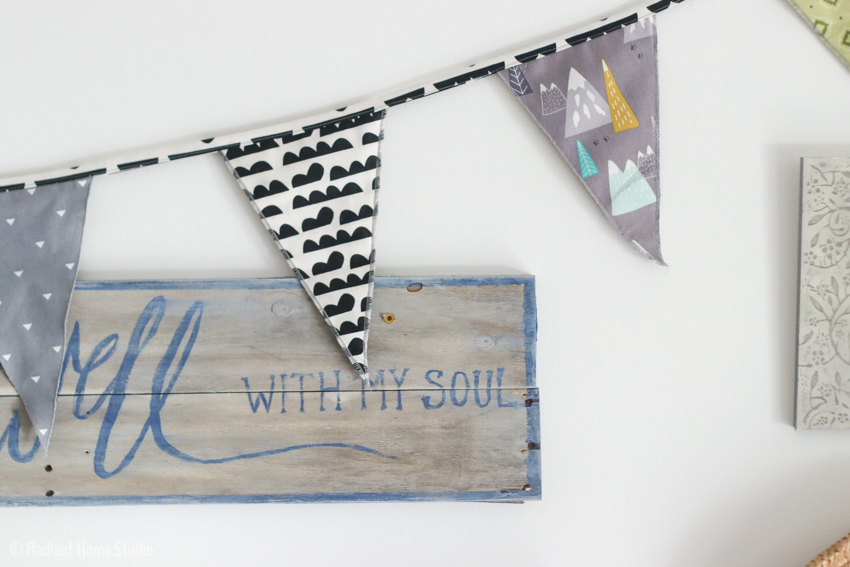
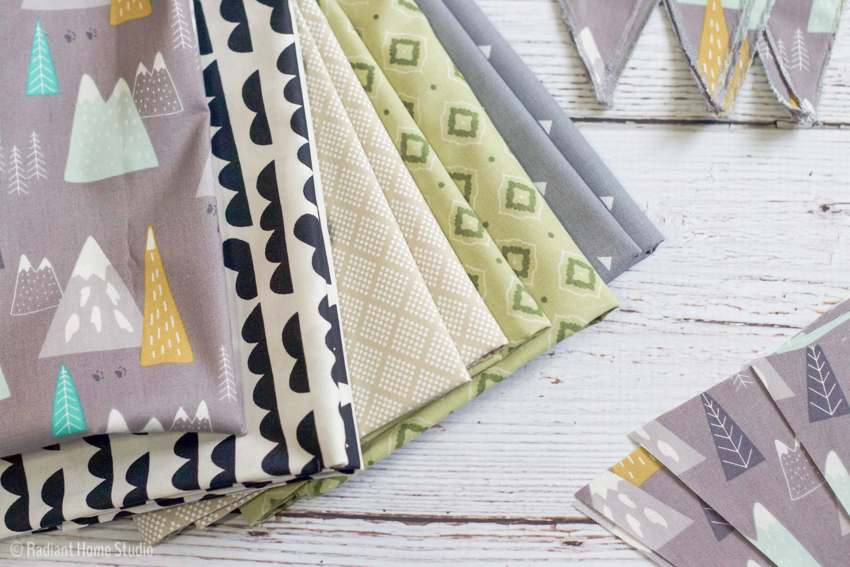
We planned a “winter woodland” baby shower, so I tried to choose fabrics that would work with the baby shower theme that would also be neutral and not too “babyish”. I ended up with some great geometric fabric designs in gray, cream, black, green, and teal. When choosing fabrics, sticking to a small color palette will help the finished banner to have a cohesive style. The fabrics don’t have to match perfectly (for example, some of the grays have different undertones), but keeping to similar colors works best.

Many of the tutorials I saw recommended stitching the flags right sides together, then turning them inside out, and then pressing the seams. You can do this if you really want the seams hidden, but I think it’s unnecessary and takes too much time for a project like this.

How to Sew a Pennant Banner For Parties | DIY Bunting or Mordern Pennant Flags | Radiant Home Studio

(This post contains affiliate links, which means I receive a small commission at no cost to you. Thanks!)

How to Sew a Pennant Banner:

Materials:

3 to 5 coordinating cotton fabrics – 1 yd. of each (or just use up your scraps!)
coordinating thread
bias tape maker (or pre-made binding)
rotary cutter and mat
printable template

How to Sew a Pennant Banner For Parties | DIY Bunting or Mordern Pennant Flags | Radiant Home Studio

Cutting Instructions:

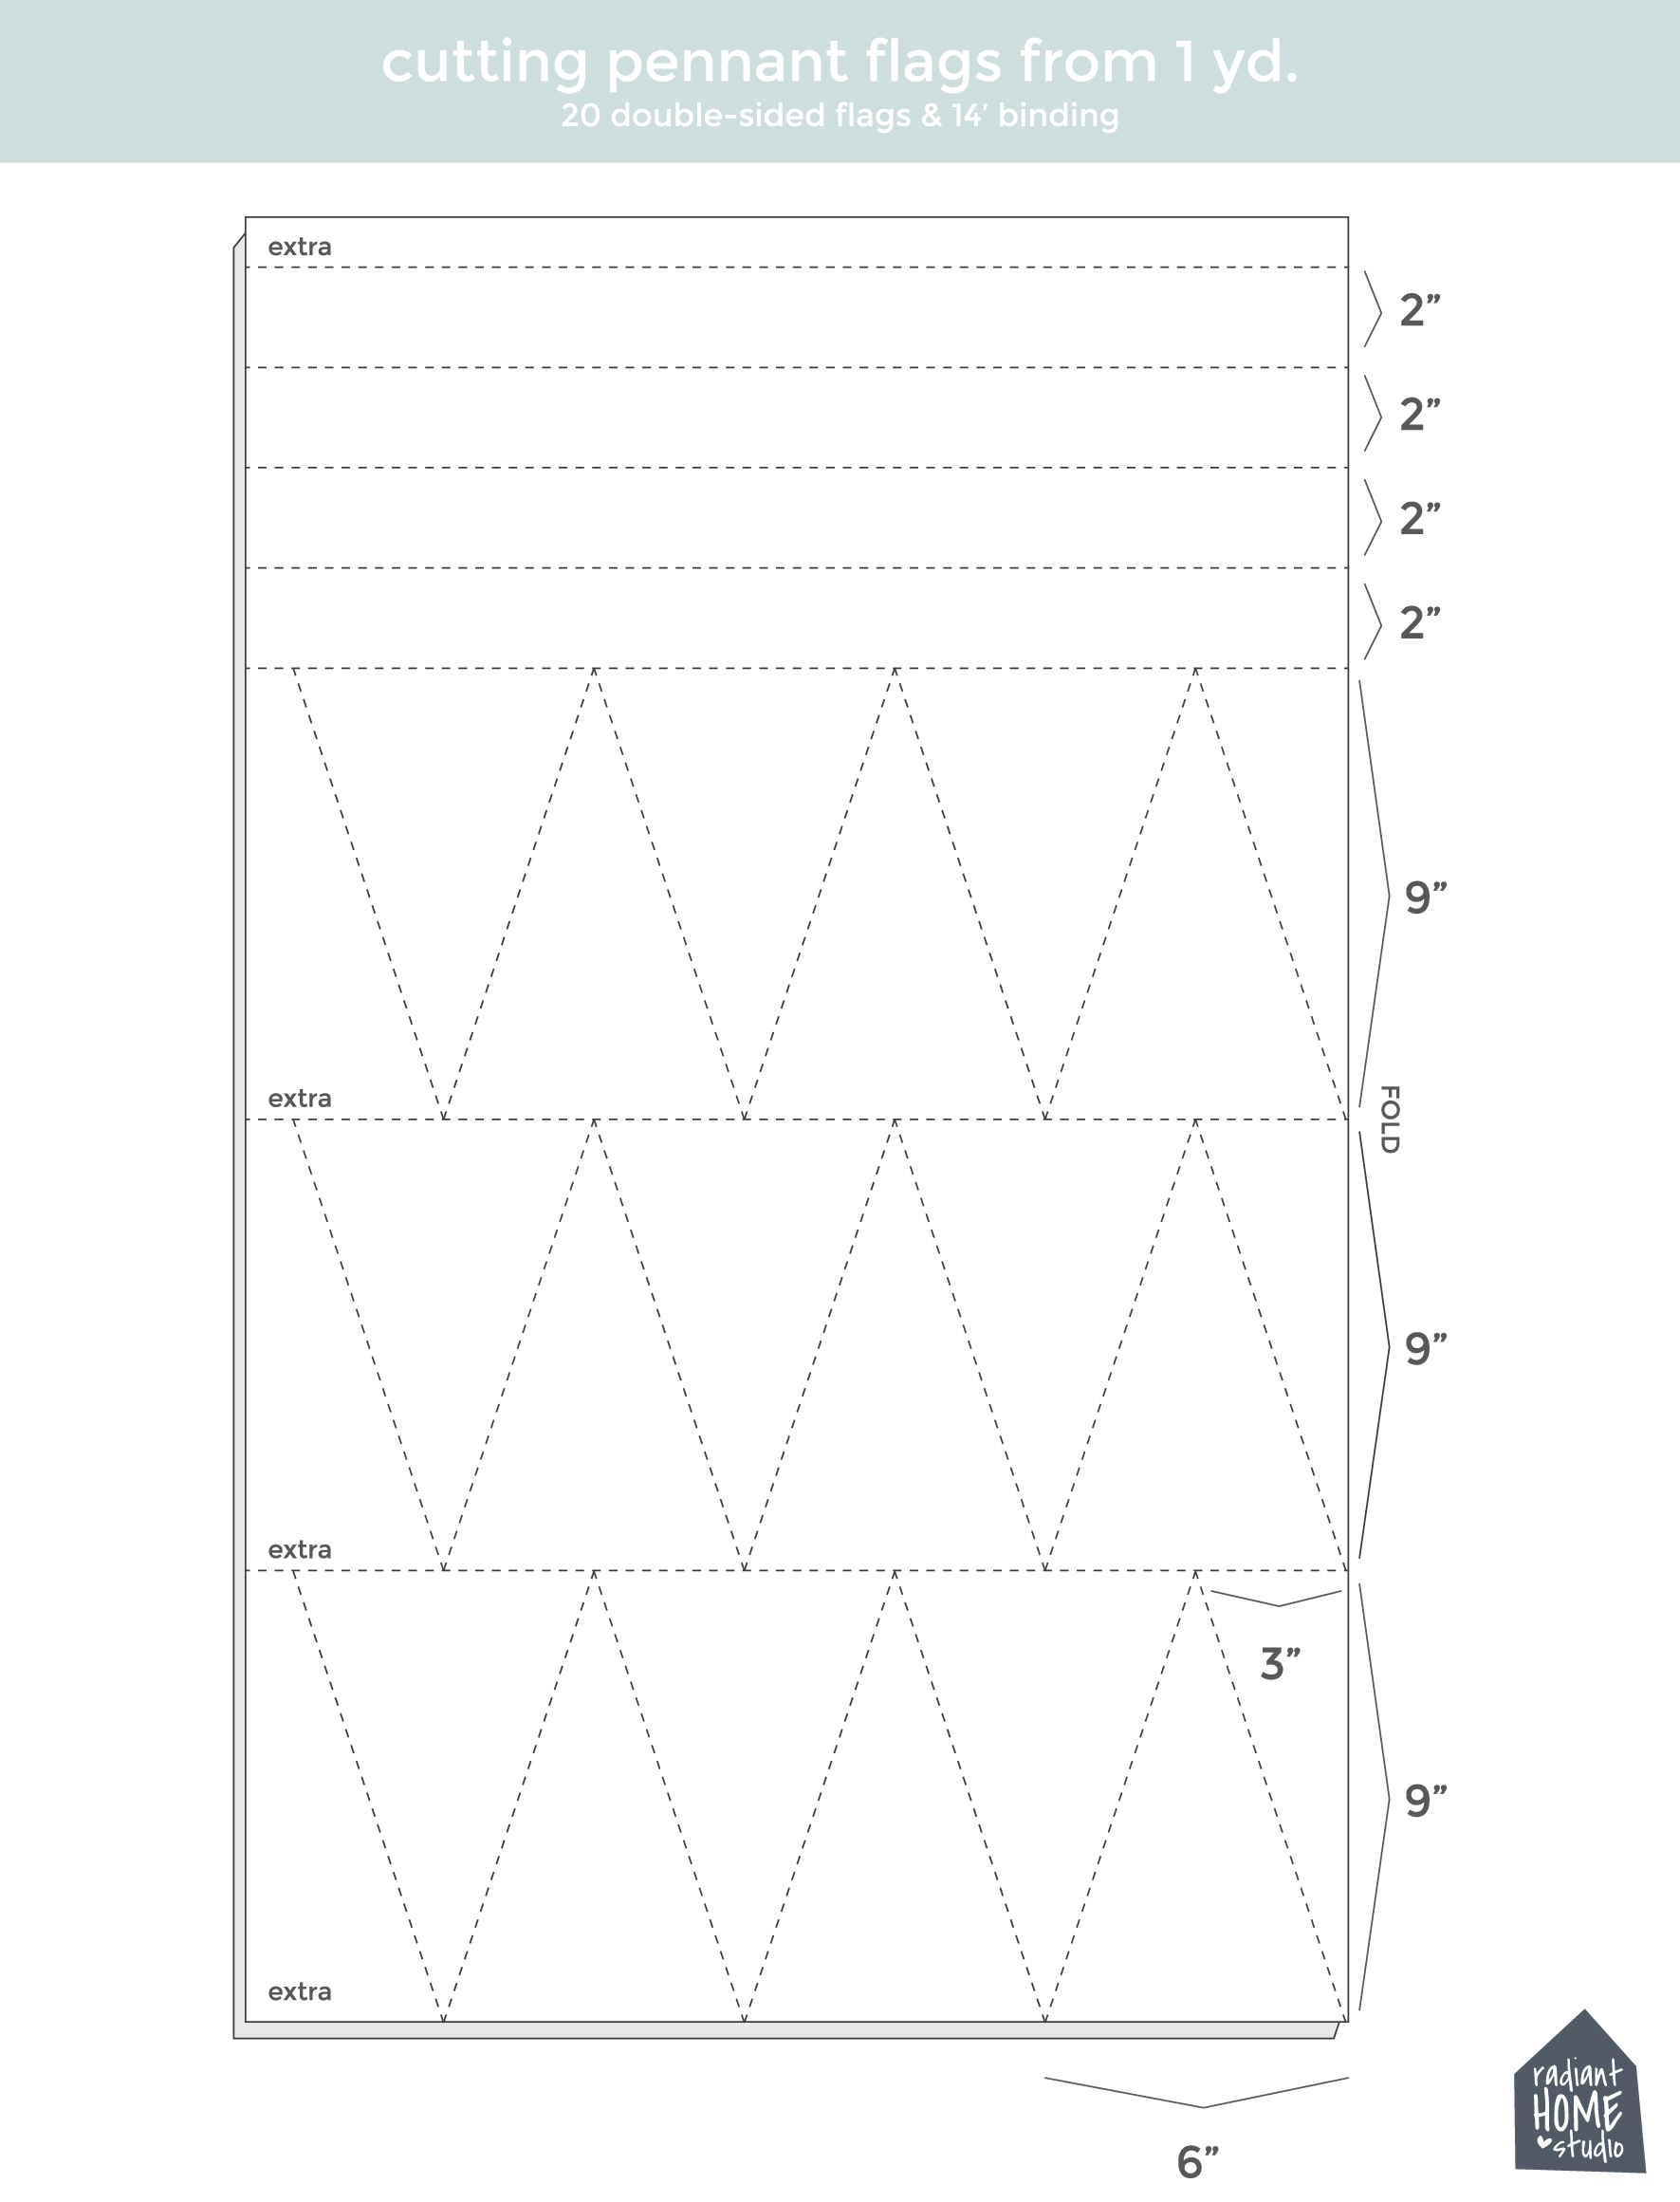
There are two ways to cut the pennant flags. The template works best if you are using up fabric scraps, but if you are cutting from yardage it’s much faster to use the rotary cutting method. I’ve included an illustrated cutting diagram below.

First, even out your edges. I bought my fabric from a big box store and the cuts were 2-3 inches off grain.

Fold the fabric folded in half lengthwise, selvages together, cut three 9″ strips across the fabric.

Line up the folded edge with the edge of the cutting mat. Use the ruler to cut a diagonal line from the bottom folded corner to the top of the strip, 3″ in from the folded edge.

Use the ruler to make another diagonal line from the 3″ cut at the top edge to a spot 6″ in from the bottom edge.

How to Sew a Pennant Banner For Parties | DIY Bunting or Mordern Pennant Flags | Radiant Home Studio

Keep cutting diagonal lines in opposite directions every 6″ until you run out of fabric.

If you are using directional fabric, like the mountains I used, you’ll end up with some flags with the print upside-down. I just paired the right-side-up flags with upside-down flags and made sure I paid attention to which was the back and the front of each flag.

How to Sew Pennant Flags for Parties | Cutting Pennant Flags from 1 yd. of Fabric | Radiant Home Studio

Sewing Instructions:

I’ve used 2 different methods for finishing the edges of the flags. If you have a serger, you can serge the 2 long edges with a rolled hem or narrow 3-thread stitch. (I started out doing this and it was super fast until my serger seized up…)

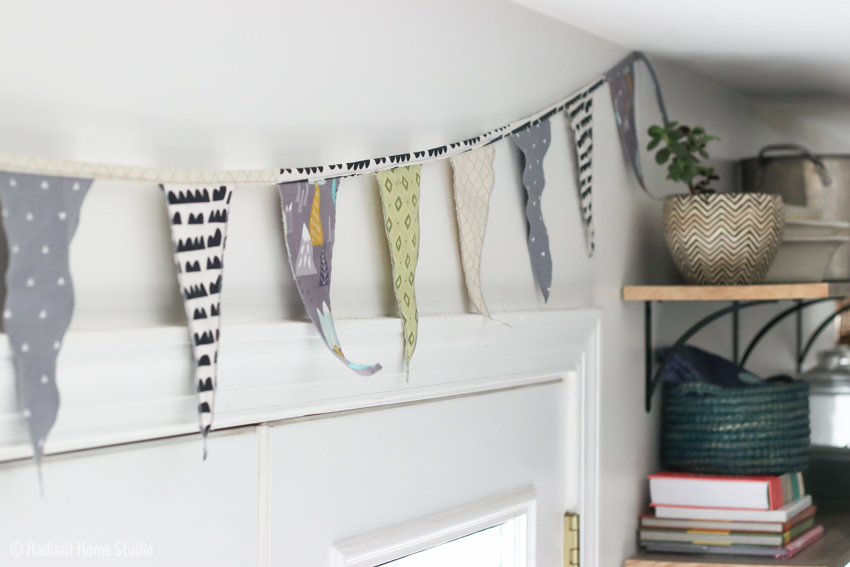
If you don’t have a serger, just use a tight zig-zag stitch. Make sure the needle goes off the edge of the fabric just slightly on the right side of the zig-zag stitch. You might end up with a little bit of a ruffled edge. Just press each flag and trim the threads when you finish.

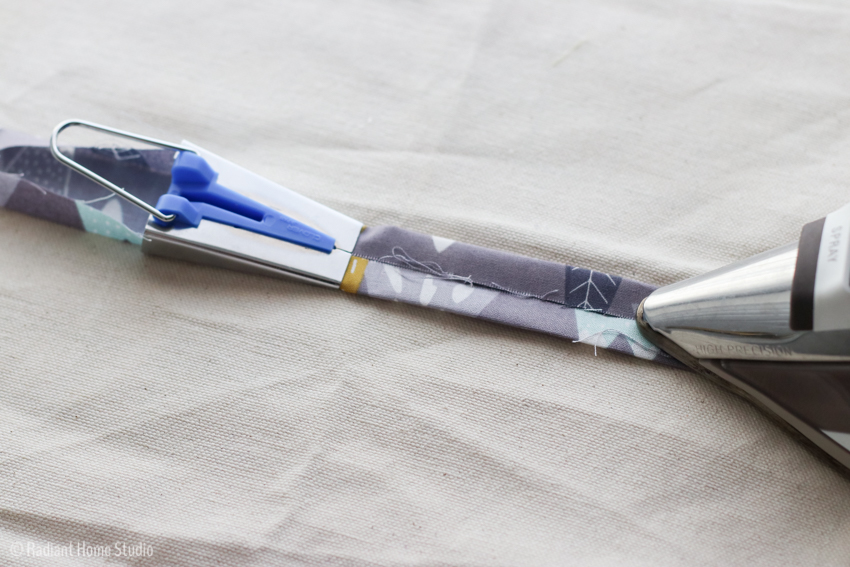
To make the binding, cut 2″ strips of fabric. (Five strips make the banner about 18′ long and will hold about 24 flags. Mine has 8 strips with 35 flags, and I still have some fabric left.) Since this binding doesn’t need to be sewn around curves, it does not have to be cut on the bias. Just cut straight across like you did for the 9″ flag strips. Trim the ends of the strips at a 45° angle. Sew them together in one long strip by matching the ends as shown.

How to Sew a Pennant Banner For Parties | DIY Bunting or Mordern Pennant Flags | Radiant Home Studio

Trim the little corners off the strips and use the bias tape maker and your iron to create the binding.

How to Sew a Pennant Banner For Parties | DIY Bunting or Mordern Pennant Flags | Radiant Home Studio

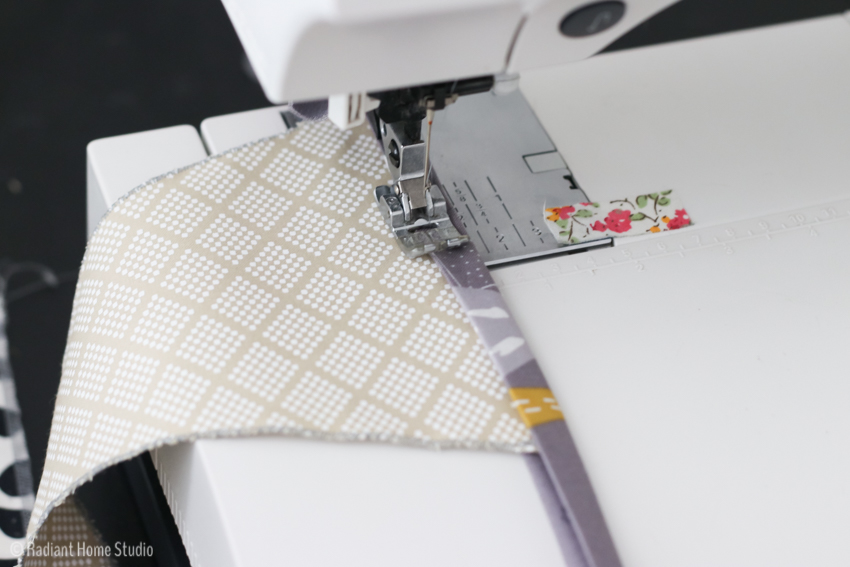
Organize your flags into a pile in the order you want them to hang on the banner.

Place the binding on your sewing machine with the folded edge to the right. Stitch 8-10″ on the open edge and then sandwich the first flag into the binding all the way into the folded edge. Continue stitching over the first flag. Sandwich the next flag in the binding leaving a 3-4″ gap between the flags. Continue stitching until you have added all your flags or until you run out of binding.

How to Sew a Pennant Banner For Parties | DIY Bunting or Mordern Pennant Flags | Radiant Home Studio

You can hang the finished pennant banner with a few thumbtacks.

How to Sew a Pennant Banner For Parties | DIY Bunting or Mordern Pennant Flags | Radiant Home Studio

How to Sew a Pennant Banner For Parties | DIY Bunting or Mordern Pennant Flags | Radiant Home Studio

How to Sew a Pennant Banner For Parties | DIY Bunting or Mordern Pennant Flags | Radiant Home Studio

How to Sew a Pennant Banner For Parties | DIY Bunting or Mordern Pennant Flags | Radiant Home Studio


SaveSave

SaveSave

SaveSave

SaveSave

SaveSave

SaveSave

SaveSave

Previous Post: « Purple Halifax Hoodie with Funnel Neck
Next Post: Waxed Canvas & Leather Zipper Bag »

Primary Sidebar

Hello

Welcome! I’m Sara. I share modern home & accessory sewing patterns, and I create surface designs for licensing. I hope you are encouraged to see beauty in small things and are inspired to try new creative projects!

Shop Sewing Patterns


icon icon

icon icon

Newsletter

Sign up to get access to free sewing patterns & resource library!

Find My Work at:


© Copyright Notice

All images and text copyright ©2013-2020 Radiant Home Studio, unless otherwise noted. Please be kind enough to link back to my site and contact me if you would like to use my images.

Disclosure

I am a participant in the Amazon Services LLC Associates Program, an affiliate advertising program designed to provide a means for me to earn fees by linking to Amazon.com and affiliated sites.

  • Disclosures & Copyright
  • About
  • Contact me!
  • Digital Pattern FAQ’s

Resources I Love:


Featured Posts:

  • How to Make A Waxed Canvas Gift Pouch | Radiant Home Studio

    How to Make a Waxed Canvas Gift Pouch

Sewing Tutorials

Denim Pocket with Grommets and Denim Shoulder Strap| Tote Bag Upgrade | Radiant Home Studio

Sewing Patterns

Surface Design

home page 1 - radiant home studio design

overflowandco

surface pattern design • modern sewing patterns • welcoming gifts & creative home goods • mom of 7 • beauty in the everyday // also @prettynerdypress

Sara Curtis | Stationery & Pattern Design
Favorite place to add stickers? My kids have them Favorite place to add stickers? My kids have them on their water bottles and laptops. My husband adds them to his bullet journal cover to document his travels each year.

A few months ago, I added some inspirational stickers to the shop, but I don’t think I’ve shared them here! 

#stickershop #wholesalestickers #fairewholesale #fairewintermarket #fairewintermarket2023 #stationerylove #loveyourneighbor #practicekindness
Here’s another new pattern! This periwinkle colo Here’s another new pattern! This periwinkle color has been inspiring some new color palettes and combinations recently. 

Faire Winter Market is open for wholesale orders! I’m looking forward to connecting with more community-focused boutiques. 🙋‍♀️

#fairewholesale #fairewintermarket #fairewintermarket2023 #wholesalegreetingcards #papercampalum #surfacepatterndesigner #artlicensing #fabricdesigner #stationerydesigner
Washi tape is stocked and ready to ship! I started Washi tape is stocked and ready to ship! I started a fresh bullet journal a couple of weeks ago and I love using washi to mark sections. What do you use it for?

Today is insider access to Faire Winter Market! If you are a retailer, my Faire store is linked. And if you know a shop owner that sells stationery or accessories, please share! ☺️

#washitapelove #bulletjournalinspiration #fairewintermarket #fairewintermarket2023 #wholesalestationery #prooftoproduct #papercampalum #prettywashitape #encouragingcards #encouraginggifts
Hello Retailers! I’m participating in Faire Wint Hello Retailers! I’m participating in Faire Winter Market with 10% new orders over $150 from Jan. 24th-26th. (Insiders get access on the 23rd.)

If you are just finding me here…welcome! ☺️

My cozy, fresh cards and gifts are designed to promote connection and provide support. I value building community and finding beauty in the everyday! I love to partner with local shops that share these values. 🛍️

I have greeting cards, washi tape, stickers, and bandanas ready to ship! 📦 

@faire_wholesale #fairewintermarket #fairewintermarket2023 #wholesalegreetingcards #giftboutique #stationeryboutique #greetingcarddesigner #overflowandco #prooftoproduct #papercampalum
It has been months since I had the creative drive It has been months since I had the creative drive to make a new pattern! I had other things to do today, but when you feel the energy return you have to go with it. 

I have several unfinished collections that just needed a pattern or two to complete the set. I’ve finished one today! I’m not sure where this will land in the world, but it feels good to be designing again. 🙌

#artlicensing #fabricdesigner #patternfieldapp #teapattern #cozypattern #stationerydesign #fabricdesigner
I’ve got a few new cards in stock for Spring! Th I’ve got a few new cards in stock for Spring! This card is a favorite - happy flowers and an encouraging message about embracing challenges. 

Retailers - new Spring cards will be available for wholesale at the Faire Winter Market next week! 

@faire_wholesale #fairewintermarket2023 #fairewintermarket #wholesalegreetingcards #greetingcards #stationeryshop #proudofyou #embracingchallenges #lifeissobeautiful #shopsmalldurhamnc #shopsmallraleigh
Load More Follow on Instagram
  • Disclosures & Copyright
  • About
  • Contact me!
  • Digital Pattern FAQ’s

Copyright © 2023 · Sara Curtis // beloved theme