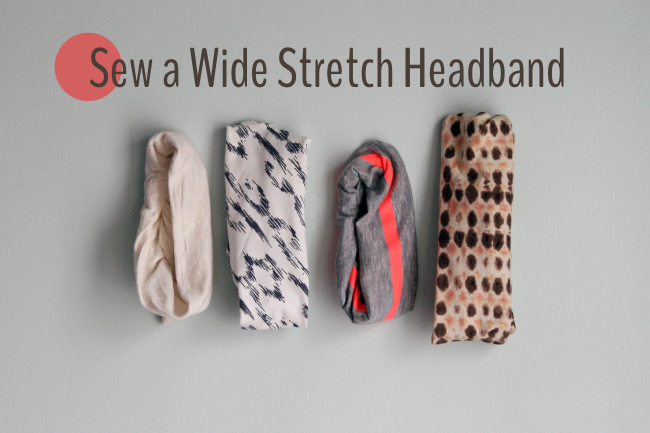
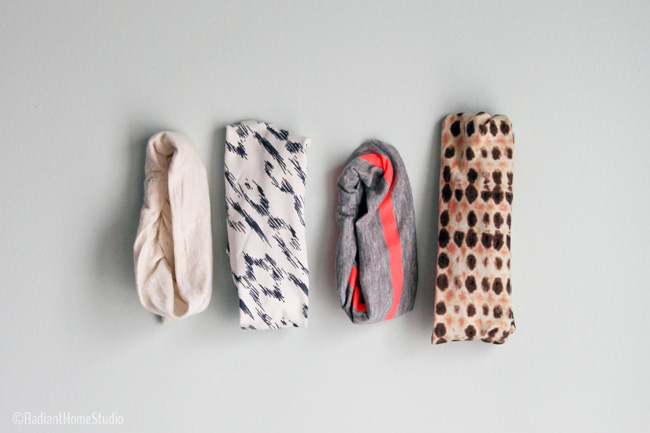
Looking for a little project to use up some of your stretch knit fabrics? I think headbands are the perfect way to use knit scraps! I’ve seen some cute stretch headband tutorials around the web, but none that were exactly what I was looking for.
Here’s a tutorial for a stretch knit headband that I love! They are nice and wide, with concealed elastic in the back for a secure fit. These will stay put during exercise and throughout the day. You can make them in any size, including headbands that will fit babies and kids.
Here’s the tutorial so that you can make your own Wide Stretch Headbands:
How to Sew a Wide Stretch Headband:
Supplies :
• Stretch knit fabric (about 18 x 7 in. with 25% stretch)
• 1/4 in. elastic
• Coordinating thread
• Sewing machine
• Needle
Measure & Cut:
1. To find the ideal length, measure around your head, or the head of the intended wearer (around the hairline where the headband will sit). Take that measurement and multiply it by .8 to find the length of your rectangle.
Length = head measurement x .8
2. To find the width, decide how wide you want the finished headband, multiply by 2 and add 1/2″
Width = (finished width x 2) + 1/2″
3. Cut a rectangle of fabric with the stretch going the direction of the length.
Sewing Instructions:
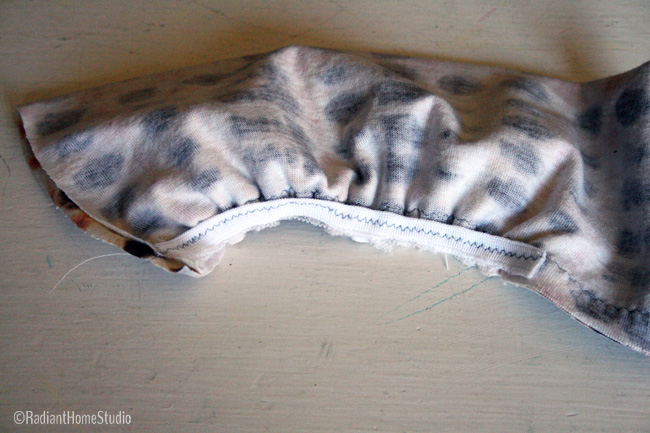
1. Fold the rectangle in half lengthwise, right sides together. Stitch along the long open edge with a narrow zig-zag stitch and a 1/4″ seam allowance.
2. Take one 4″ piece of elastic and place it over the line of stitching. Use a pin to secure it to one end. Pin the other end of the elastic 7″ inward.

Use a zig-zag stitch to attach the elastic to the end of the tube, along the seam line. You will need to stretch the elastic tightly as you stitch.
3. Add another 4″ piece of elastic to the other end using the same procedure.
4. Pull one end through the other so that the right sides are facing. Pin the edges together, aligning the elastic seams. Make sure there are no twists inside the tube!
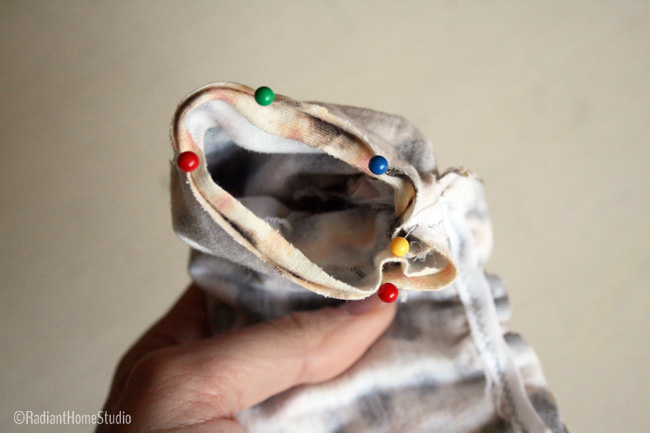
5. Stitch around the circle with a narrow zig-zag stitch, leaving a 1 1/2″ opening. Make sure the stitching crosses the elastic seams. The red pins mark my start and stop points.
6. Reach through the opening and turn the headband right side out.
7. Use a needle and thread to stitch the small opening closed.
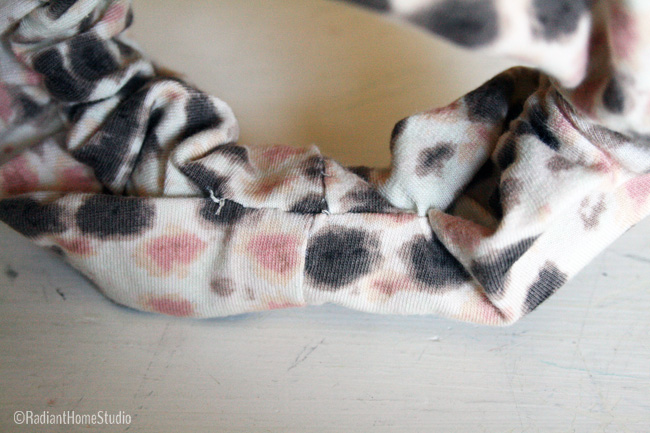
8) Press the headband so that the seam is centered on the underside.

9. At the place where the elastic seams come together, fold the pressed edges together, enclosing the joined elastic seams. Hand stitch the pressed edges together, about 1″ on each side of the seam.
And that’s it…you are done!
Make them for yourself and all your friends! Happy sewing!


I’m excited to try this! Thank you for sharing, Sara!
You are very welcome!
These are so cute! Great tutorial. I’d love if you came by and shared at The Makers link party over on my blog. 🙂
Thanks Alexis! I’ll check it out 🙂
These are great —- I have a large head and cannot find a headband to fit that does not spike a headache. I have been a sewer for ever and yet never thought of making my own headbands! Going to try this this weekend. Thanks!
I always have a hard time finding cute ones for little girls’ heads! Hope you love them!
This needs a pic of one being worn! 🙂
You’re right…but I take all of my own pictures and couldn’t manage to take a flattering picture of my head by myself 🙂
Hi Sara, I am getting stuck at step 4. I have ended up with an inside out headband with a small opening but it can’t be turned right side out. I’m on my second attempt to make this. Please could you possibly explain step 4 again? I’d really like to make this! Thank you. Joy
Hi Joy,
So you should have an inside out tube of fabric at this point. Stick your thumbs inside the tube and start scrunching it up (like when you scrunch up a knee sock to put it on). When you get to the end, pull the bottom end up through the center of the tube, so the right sides of the fabric are together. Align the side seams, and stitch around the circular part, leaving the gap. Turn it right side out.
If this still isn’t working, google some infinity scarf tutorials. It’s the same process on a smaller scale. Maybe the infinity scarf tutorial photos will make more sense to you!
Thanks so much for the quick reply, Sara. I’ll give it a go. Joy
Just what i’ve been looking for! I’m a total novice, not a sewer at all, so my question might be silly but I will be converting the measurements to cms and I’m just wondering if all the multiplications are applicable as they are or would they be slightly different when working with cms?
Many thanks!
Hi Sharon! So, with this particular pattern, the stretchy fabric is very forgiving and approximations will work just fine. The rectangle should be slightly shorter than the measurement around your head and about twice as wide as you want the finished headband to be. Use a 1 cm seam allowance. You can use 10-12 cm of elastic on each end. I think those are the main measurements, but if there is anything else just go ahead and estimate.
it will be mucheasier when u show it in videos
Thank you for the suggestion 🙂 I don’t have currently have video equipment, but I will consider it for later.
Thank you, such a simple and pretty headband!
Thank you Sherry!
I am sewing the elastic on…using the instruction to extend the elastic on the headband 7in. when I stretch the elastic and sew, the thread is bunching….and the machine stops? Am I stretching it too much? Any suggestions. Thank You.
Hi Jackie,
It’s hard to tell without seeing exactly what you are doing, but elastic can be tricky. Make sure you are using a zig zag stitch. You’ll need to sew for about an inch before stretching. When you start stretching, you’ll need to keep tension on the back and front of the elastic by pulling both directions. Let the machine determine the speed, but keep the elastic taut both ways. If you only stretch the front, you’ll be keeping the machine from pushing the fabric through. I hope that helps!
Sara
I like the concept, however can these headbands be made without a sewing machine?
I think it would be fine to make them by hand. Look up a tutorial for how to sew a stretch stitch by hand though. A straight stitch might break under tension. 🙂