• SHOP
  • About
    • About Sara
    • Contact me!
    • Design Collaborations
    • Sewing Collaborations
  • Sewing
    • Sewing Tutorials
    • Things I Made
  • Design Portfolio
  • Blog
  • Nav Social Menu

    • Facebook
    • Instagram
    • Pinterest
Radiant Home Studio | Sewing Patterns & Surface Design

Radiant Home Studio

July 11, 2015 ·

Add a Kantha Stitch Pocket {Tote Bag Upgrade}

Sewing· Tutorials

This is part 1 of a two part tutorial. In part 1, I’ll show you how to make the Kantha stitched pocket. In part 2, I’ll show you how to add Kantha stitched tote bag handles and how to apply grommets.

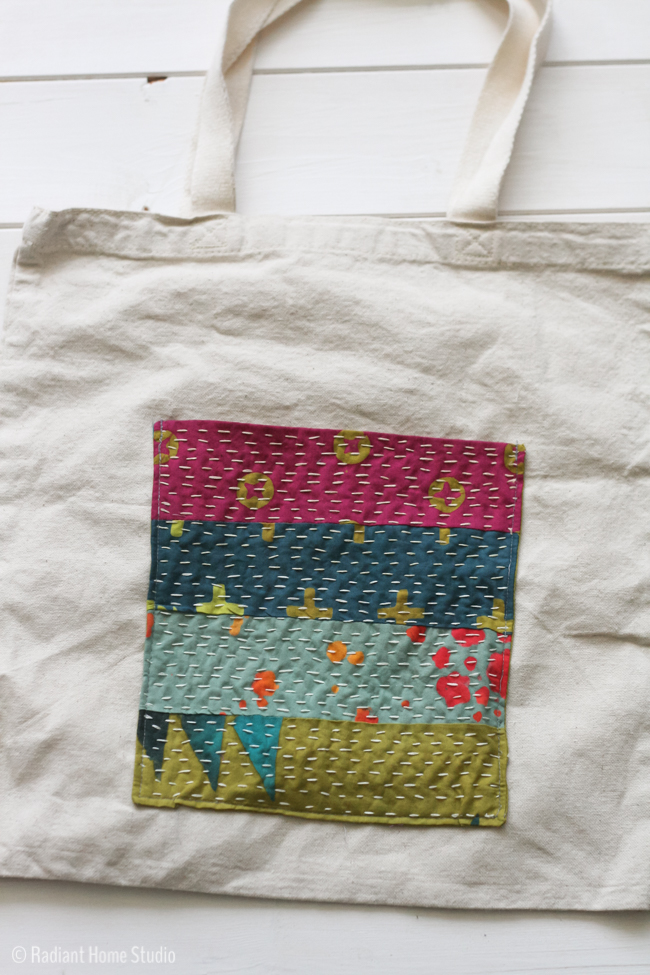
With our move last month, I totally skipped the regular Tote Bag Upgrade post. I hope this one is worth the wait! It’s an Indian inspired tote bag with a patchwork Kantha stitched pocket. I also added matching straps and attached them with grommets.

Kanth Stitched Pocket {Tote Bag Upgrade} | Radiant Home Studio

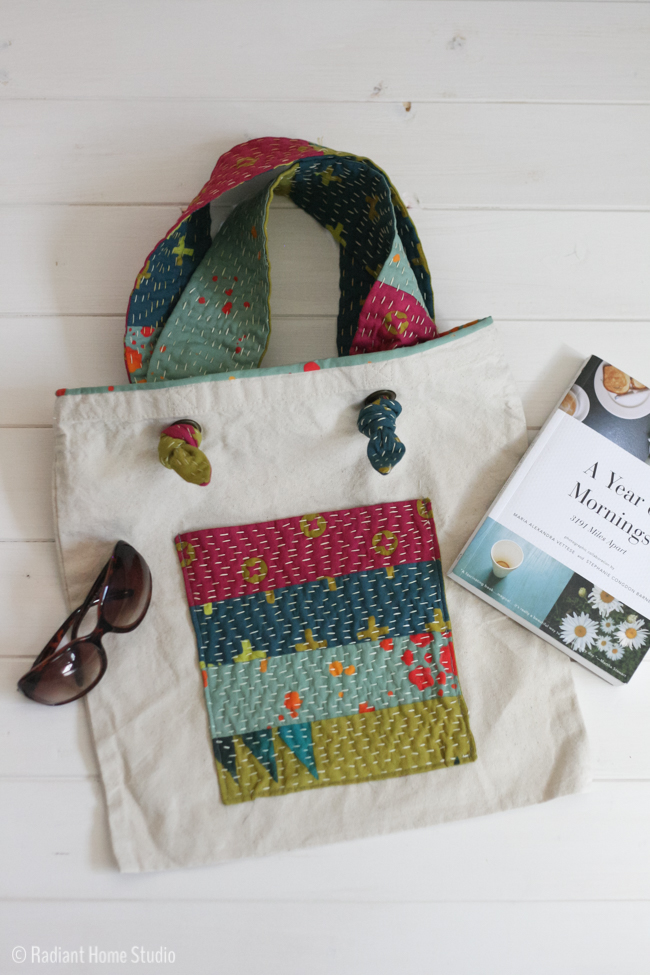
I’ve always enjoyed embroidery, but I’ve been on a Kantha stitching kick recently. I started small with the kantha needle book project. I’ve had lots of positive feedback about that tutorial, so I decided to upgrade a plain tote bag with some Indian inspired patchwork and Kantha stitching.

If you aren’t familiar with Kantha stitching, it’s basically a running stitch. In Japan it’s called sashiko, in India, it is called Kantha, and in English, we call it a running stitch. There are small nuances, meanings, and histories that make each stitching technique unique, but for our purposes, you’ll just need to make a simple running stitch. Kantha quilts are historically made with scraps, so patchwork style pockets and straps with bright colors really add to the exotic feel of the project.


Kantha Stitched Pocket {Tote Bag Upgrade} | Radiant Home Studio

Materials (includes materials needed for pocket and straps):

• canvas tote bag
• 4 fat quarters of quilting cotton or batiks in bright colors
• 3 skeins of embroidery floss & embroidery needle
• 8″ x 8″ square of mid-weight fusible interfacing (I used Pellon 931F.)
• 4 grommets size 3/8″
• 1/4 yd. of fusible fleece (I used Pellon 987F.)
• 1 yd. fusible hem tape

Preparation (for pocket pieces only):

• cut 4 rectangles (9″ x 3″) from various colors of quilting cotton for pocket
• cut 1 square (8″ x 8″) from quilting cotton for pocket lining

Kantha Stitch Pocket Tutorial:

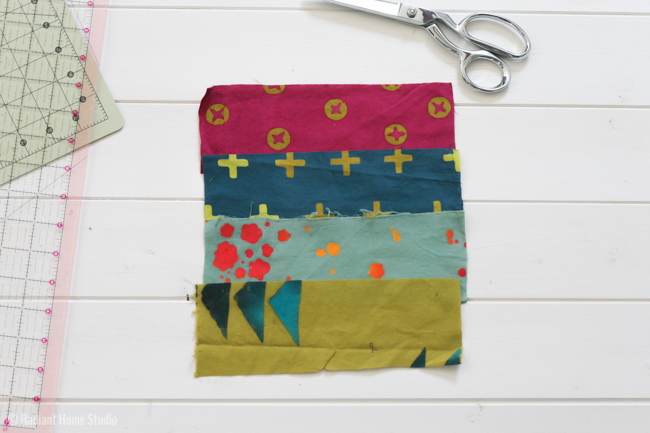
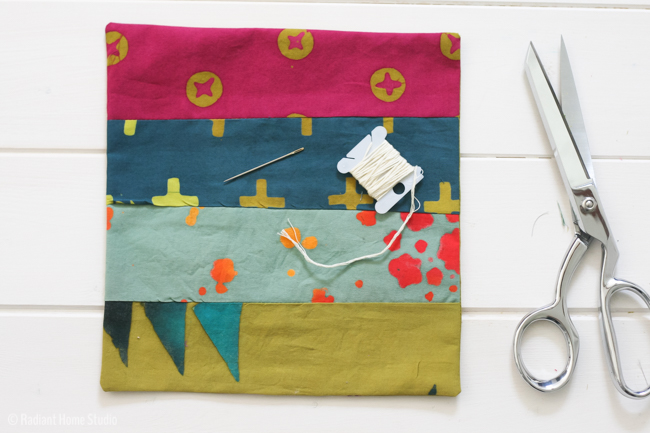
1. Lay out the four pocket rectangles in the order you want them. Starting at the top, place the upper rectangle right sides together with the one below it and stitch together using a 1/2″ seam allowance. Continue until you have sewn the 4 strips together and then press the seams open. This is the pocket front.

Kantha Stitched Pocket {Tote Bag Upgrade} | Radiant Home Studio

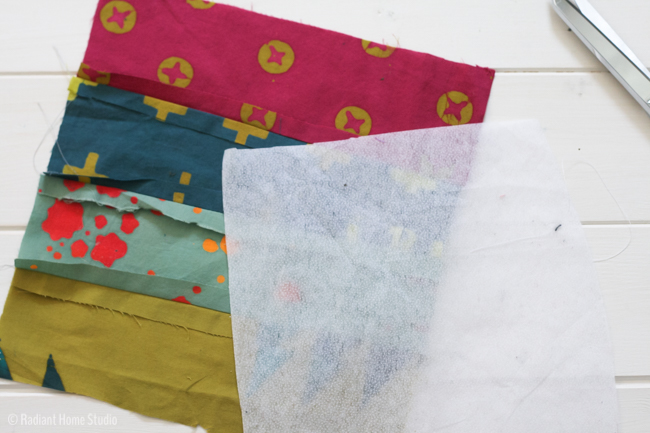
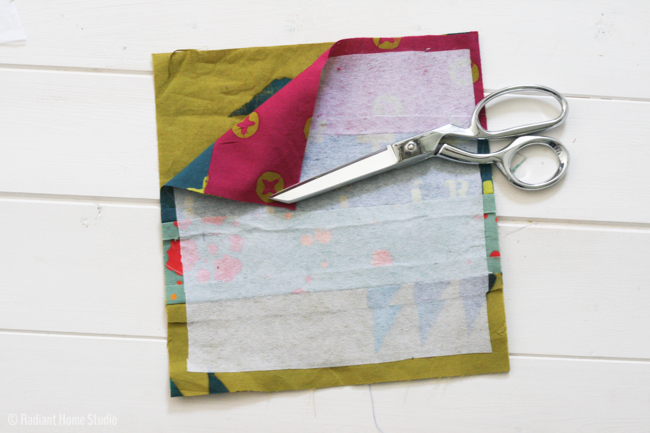
2. Fuse the square of mid-weight interfacing to the wrong side of the pocket front.

Kantha Stitched Pocket {Tote Bag Upgrade} | Radiant Home Studio

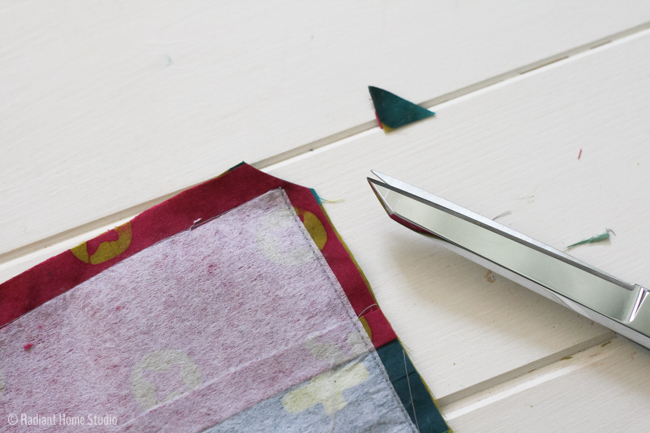
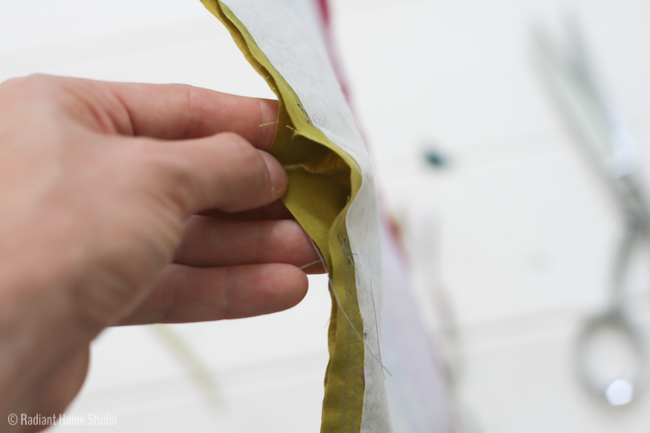
3. Place the pocket front right sides together with the pocket lining. Starting in the center of one of the straight sides (not on a corner), stitch around all 4 sides. Pivot at each corner and leave a 2″ opening on one of the straight sides. Trim the corners.

Kantha Stitched Pocket {Tote Bag Upgrade} | Radiant Home Studio

Kantha Stitched Pocket {Tote Bag Upgrade} | Radiant Home Studio

4. Turn the pocket right side out. Push out the corners with a knitting needle or similar object. Press it flat.

Kantha Stitched Pocket {Tote Bag Upgrade} | Radiant Home Studio

5. Thread your needle with 3 strands of embroidery floss. Begin stitching the pocket using a running stitch. I like to bury my knot in the seam. Switch rows between the layers. You can also stitch quickly by using a long needle and loading it with several stitches before pulling it through. Continue embroidering with a running stitch until you have covered the entire pocket.

Kantha Stitched Pocket {Tote Bag Upgrade} | Radiant Home Studio


Kantha Stitched Pocket {Tote Bag Upgrade} | Radiant Home Studio

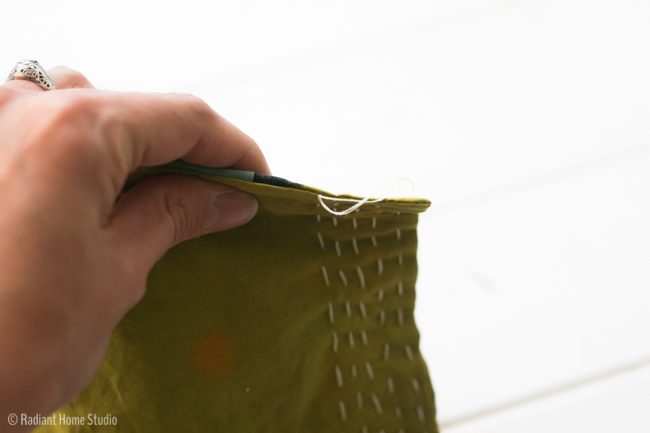
A note about the stitching…don’t worry about getting the spacing perfect. I think the beauty of the Kantha stitching is in the imperfections. It looks beautiful even when the stitches are crooked and uneven because it is obvious that someone (you!) put your time into hand making every stitch!

6. Place the pocket on the bag, toward the bottom center. Pin it in place. Stitch the pocket to the bag by edge stitching along the sides and bottom of the pocket. Don’t stitch through both layers of the bag! (Ask me how I know…I stitched the pocket on 3 times!) You can secure the top edges by using a narrow zigzag stitch or by backstitching.

Kantha Stitched Pocket {Tote Bag Upgrade} | Radiant Home Studio

Kantha Stitched Pocket {Tote Bag Upgrade} | Radiant Home Studio

That’s it for the pocket! I’ll post part 2, the straps and grommets, next week.

Kantha Stitched Pocket {Tote Bag Upgrade} | Radiant Home Studio

For the strap & grommet tutorial, click here for part 2!

Previous Post: « Watercolor Floral Prefontaine Shorts
Next Post: Add Kantha Stitched Straps {Tote Bag Upgrade} »

Reader Interactions

Comments

  1. Bethany says

    July 11, 2015 at 11:44 pm

    This tote is a beautiful upgrade. The Kantha stitch is lovely. One of my resolutions for the year is to learn hand embroidery. I’ve completed two (very beginner) projects so far. This would be a good one to try!

    • Sara Curtis says

      July 13, 2015 at 8:58 am

      Thank you Bethany! Yes, it’s great for beginners. Like I said in the post, the imperfections and wonky stitches are what make it beautiful and unique. You really can’t mess it up!

  2. Anne says

    July 13, 2015 at 9:44 pm

    This is beautiful!! I’ve got a Craft Gossip post scheduled for tomorrow morning that links to your tutorials:
    http://sewing.craftgossip.com/?p=83436 –Anne

    • Sara Curtis says

      July 14, 2015 at 7:52 am

      Thank you for sharing Anne! I appreciate how you check back in for new tutorials regularly 🙂

  3. Francesca says

    August 24, 2016 at 5:06 am

    Hi, this bag is beautiful.
    Could you please tell me where the fabrics come from?
    Thank you!
    Best regards
    Francesca

    • Sara Curtis says

      August 24, 2016 at 1:49 pm

      Thank you! They are from the Alison Glass Handcrafted line. http://alisonglass.com/2014/09/30/alison-glass-handcrafted/

  4. Janice LaRue says

    November 14, 2016 at 12:18 pm

    I love this! I will make a pocket to cover a commercial advertisement on a tote I love.

    • Sara Curtis says

      November 14, 2016 at 2:36 pm

      Awesome! That’s exactly what I had in mind with this project.

Primary Sidebar

Hello

Welcome! I’m Sara. I share modern home & accessory sewing patterns, and I create surface designs for licensing. I hope you are encouraged to see beauty in small things and are inspired to try new creative projects!

Shop Sewing Patterns


icon icon

icon icon

Newsletter

Sign up to get access to free sewing patterns & resource library!

Find My Work at:


© Copyright Notice

All images and text copyright ©2013-2020 Radiant Home Studio, unless otherwise noted. Please be kind enough to link back to my site and contact me if you would like to use my images.

Disclosure

I am a participant in the Amazon Services LLC Associates Program, an affiliate advertising program designed to provide a means for me to earn fees by linking to Amazon.com and affiliated sites.

  • Disclosures & Copyright
  • About
  • Contact me!
  • Digital Pattern FAQ’s

Resources I Love:


Featured Posts:

  • How to Make A Waxed Canvas Gift Pouch | Radiant Home Studio

    How to Make a Waxed Canvas Gift Pouch

Sewing Tutorials

Denim Pocket with Grommets and Denim Shoulder Strap| Tote Bag Upgrade | Radiant Home Studio

Sewing Patterns

Surface Design

home page 1 - radiant home studio design

radianthomestudio

surface pattern design • welcoming cards & creative home goods • modern sewing patterns • mom of 7 • beauty in the everyday

Sara Curtis | Pattern Design
I’ve always been a lover of paper goods and scho I’ve always been a lover of paper goods and school supplies, especially these happy little rolls of patterns. Which Washi tape is your favorite? 

#washitape #washitapeaddict #washitapelove #stationeryshop #wholesalestationery #prettytape
Yesterday I received something in the mail that I’ve been waiting about 15 months to see! It’s my Raised fabric from @clothworkswa 🙌🏻. 

It’s just as beautiful as I hoped and I cannot wait to see what you make with it!

Fabric shops…you can order from Clothworks! Give me a shout out if you have some in your quilt shop. 🧵I have some free sewing pattern samples I’d love to send to you! 

Thank you for all your support friends! Some of you have been hanging out with me for years and know that this is about 8 years of dreams finally in my hands. I’m honored that you are here, whether we just met or whether you’ve been here all along. 😘

#fabricdesign #fabricdesigner #clothworks #raisedfabric #radianthomestudiofabric #farmhousefabric #quiltshop #quiltshops #newfabric #newfabricalert #sewinglove #fabricstash
I created this pattern with home decor in mind. I’m a bit of a minimalist at heart (as much as one can be with 7 children!) and simple block print style patterns are my favorite. ♥️

Maybe it adds a little bit of order in a world that can feel a little out of control.✏️ What do you do to bring some order back to your life when it’s feeling chaotic and hard? 

#surfacepatterndesign #blockprintedfabric #wallpaperdesign #interiordesigninspo #geometricpattern #surfacepatterndesigncommunity #seekthesimplicty #simplehomestyle
Working with my people this week! ☀️ Community Working with my people this week! ☀️ Community, good food, sunshine, and laughter is a welcome and refreshing break. It has been such a joy to hug my favorite girls @ash_cascade_design @lissieteehee @bonniechristine and @iamlisajacobs. 🤗
One of my favorites! Last minute reminder that the One of my favorites! Last minute reminder that the Immersion Course closes tonight. I still have bonus one-on-one coaching sessions available if you sign up through my link tonight. 

#surfacepatterndesign #surfacedesign #creativeentrepreneur #makersgonnamake #makersofinstagram #spoonflowermakers
I have a special interview to share! Bonnie Christ I have a special interview to share! Bonnie Christine and I talked about the importance of community in growing a creative business. (because when you're the Community Manager...what else would we talk about!)

Welcoming people and providing a supportive place to learn and grow is important to both of us! The Immersion Course is the most energetic and supportive community experience I have ever been part of. 

If you are looking for a place to learn something new, grow your skills, or level up your surface design business, please consider joining us. 

Last year some of my quilting & art friends joined and I'm watching them design sewing patterns and beautiful products this year.

I'm offering a free coaching group coaching session following Immersion to help you figure out next steps if you sign up through my affiliate link. Five random students will get a free one-on-one session with me! (Right now that everyone...because I still have 3 slots left!) 

Message me with any questions you have about surface pattern design, how learning Adobe Illustrator can give you marketable skills, or how licensing your art and building multiple streams of income can add value to your life. 🙂

#surfacepatterndesign #creativecommunity #creativebusiness #creativemamas #surfacedesign #adobeillustrator #fabricdesigner #stationerydesigner #communitymatters #christiancommunityofcreatives #christianartist #communityovercompetition #sewingpatterndesigner #fashiondesigner
Load More Follow on Instagram
  • Disclosures & Copyright
  • About
  • Contact me!
  • Digital Pattern FAQ’s

Copyright © 2022 · Sara Curtis // beloved theme