Would you like to learn how to alter the waist on men’s pants? One area of my sewing knowledge that I would like to work on is tailoring men’s clothes. A while back, one of my husband’s friends said something like, “Your wife sews. Can’t she just make you a suit?” Umm…no. At least, not yet. Traditional dressmaking and tailoring are two very different skill sets.
I’ve been sewing patches on uniforms and hemming trousers for years. I became frustrated that the military tailoring service machine-stitched things that should have been hand-stitched. Then I ventured to take apart a suit coat sleeve to add a uniform stripe to the end of the sleeve. Taking them apart made me realize that men’s clothes are easier in many ways (more boxy, more straight stitching…). As long as you remember the order that you took out the stitches, putting them back together is pretty simple.

(This post may contain affiliate links, which means I receive a small commission at no cost to you. Thanks!)
A few months ago, I let out a pair of trousers from an old suit. Dress pants are typically easier to alter because they are made with a seam in the back waistband specifically for that purpose. They also have extra seam allowances in the back rise so that the pants can be let out by 2 inches. Finally, the dress pants I have worked with typically don’t have a belt loop at the center back seam. You can see below where the old stitching lines were compared to the new line of stitching.
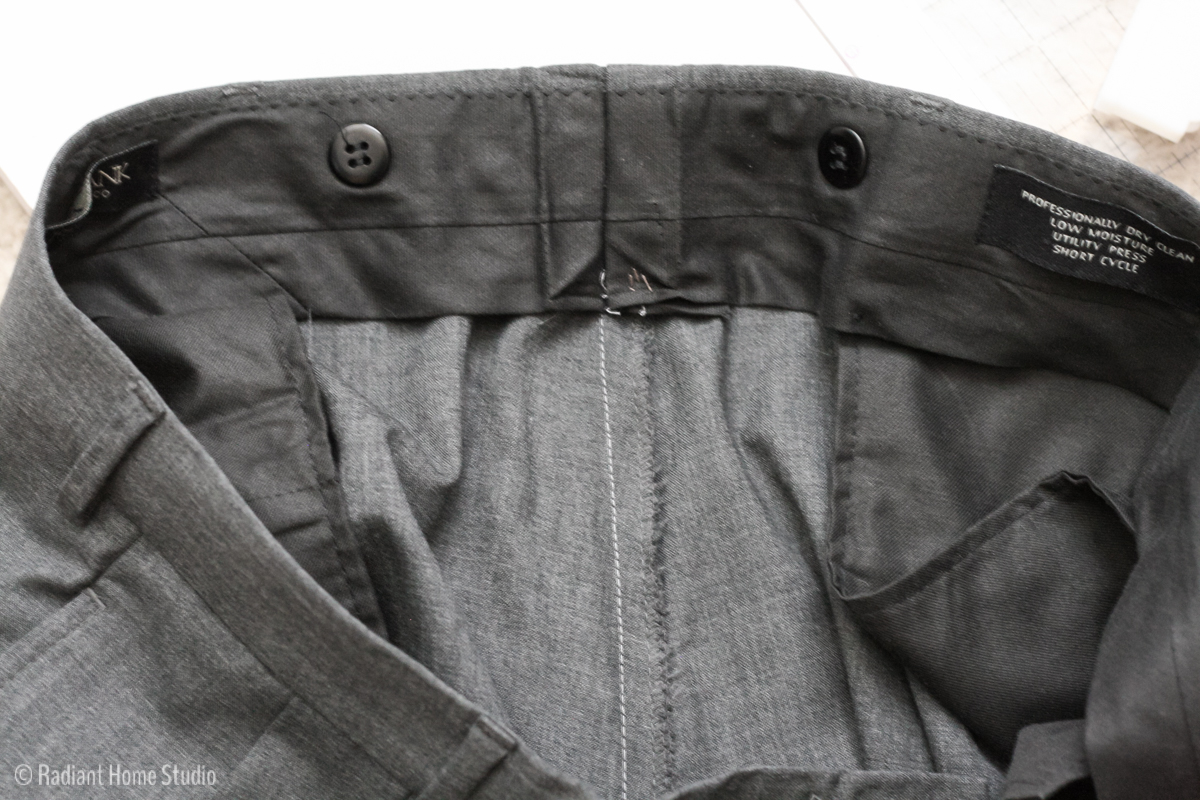
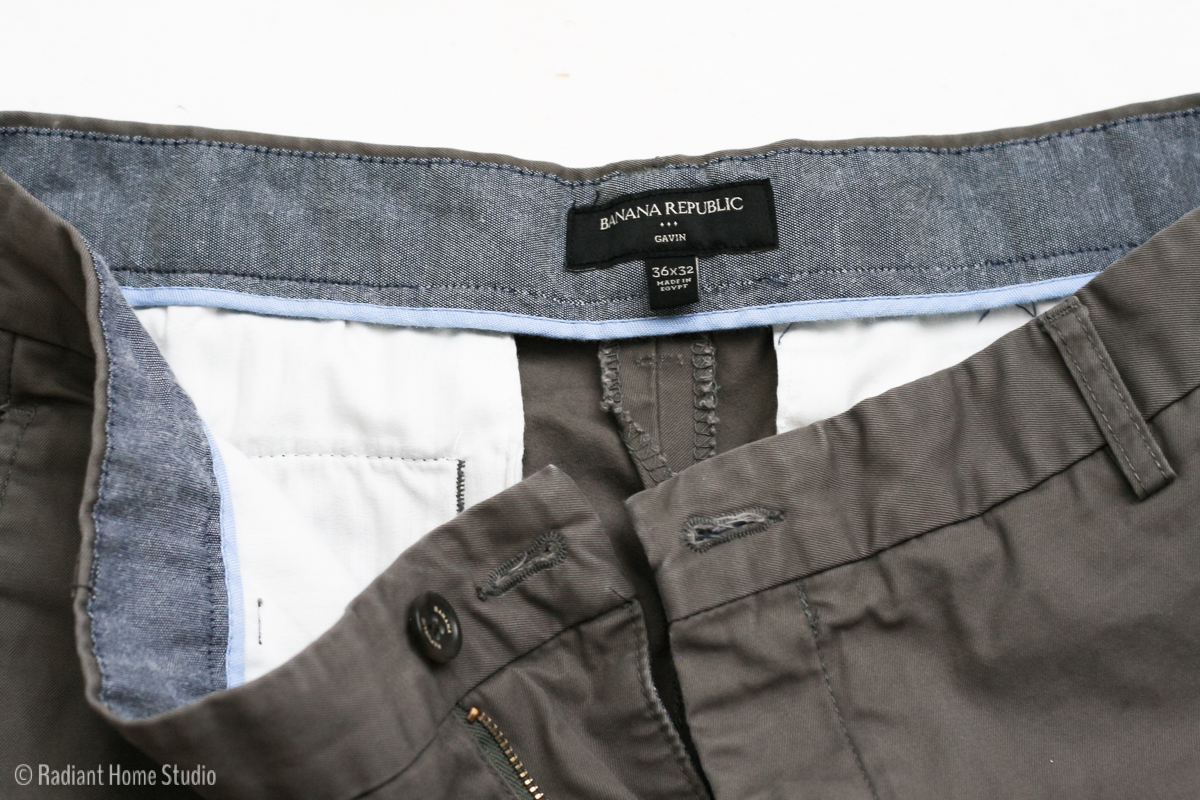
Today, I took in the waist on some casual pants. Ready-to-wear, casual pants won’t have extra seam allowances to let out the waist, but you can easily make them a couple of inches smaller.
Though this tutorial shows you how I made the waist smaller in casual pants, you can follow the same process for letting out the waist in proper trousers as well.
I recommend that you have successfully sewn a couple of garments before trying this alteration. You’ll need a basic understanding of garment pieces and construction, as well as basic knowledge of your sewing machine and stitches. You’ll also need a good seam ripper, some tailor’s chalk, and a good pair of sewing scissors.
How to Alter the Waist on Men’s Pants:
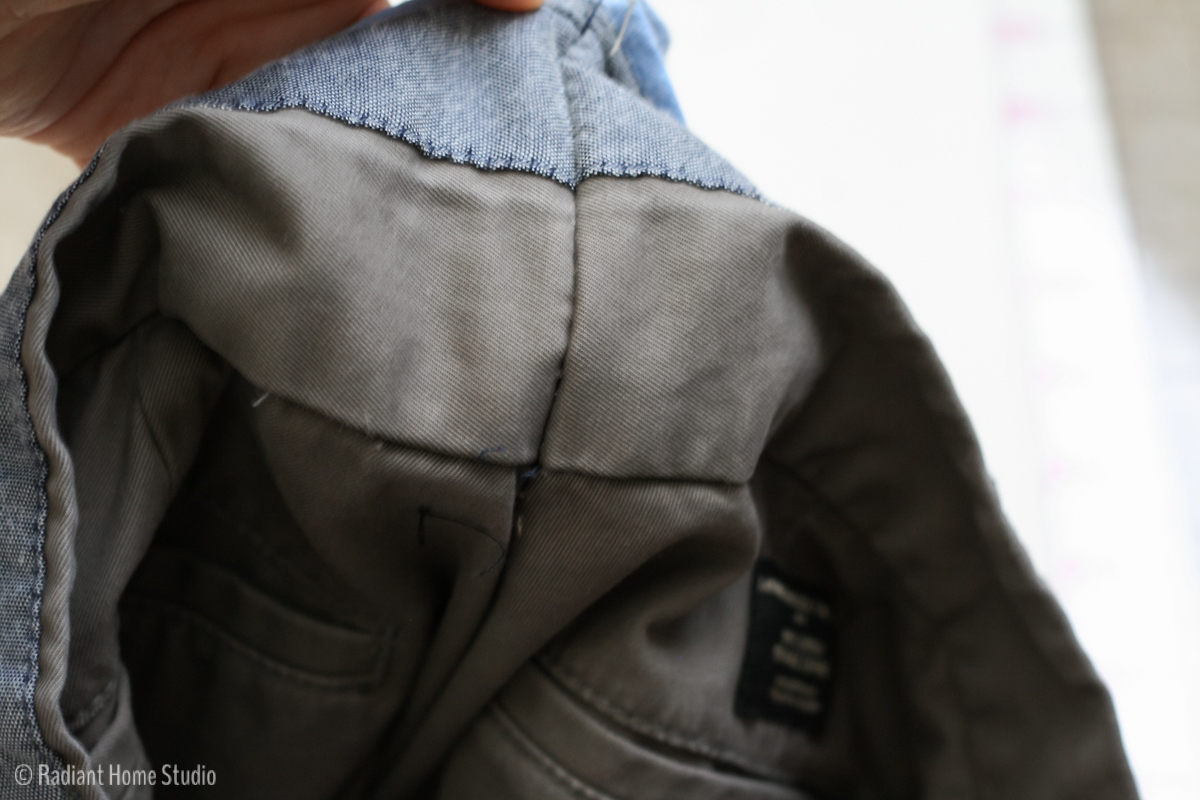
First, start picking out the seam along the waistband. You’ll need to take out the stitching about 4 in. on each side of the center seam.

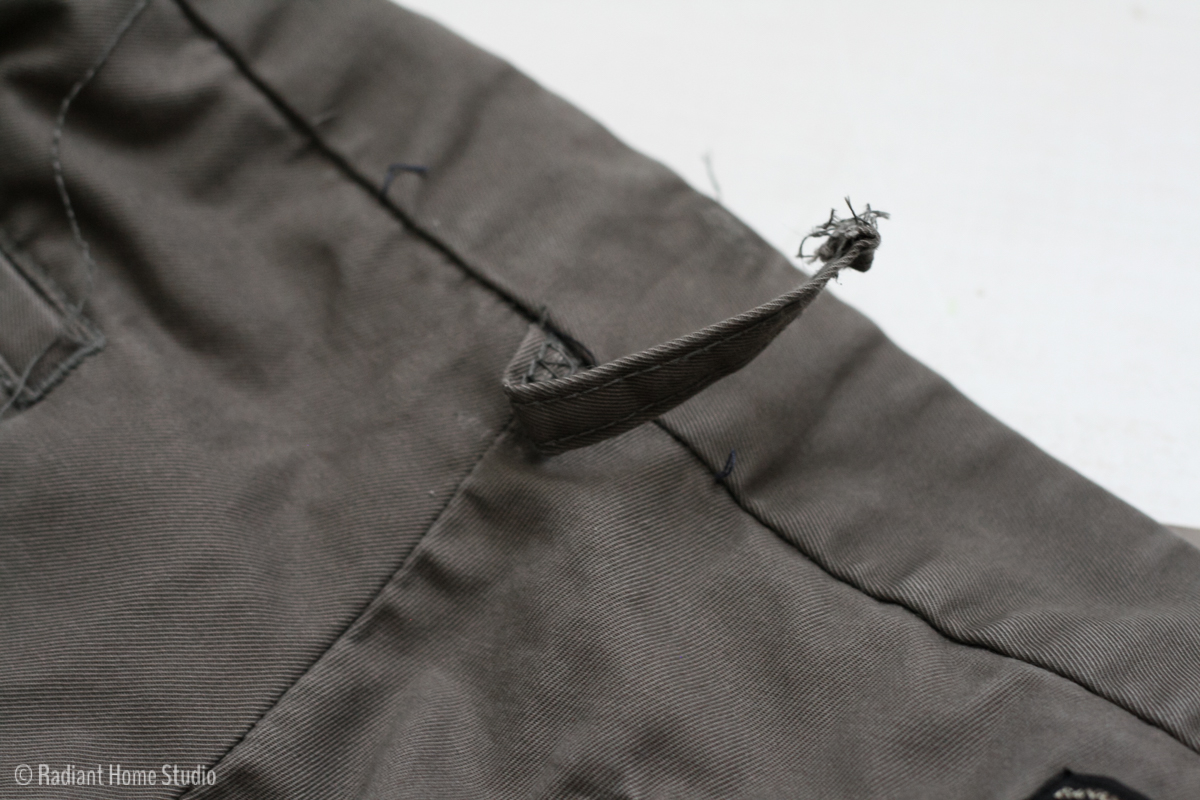
If you have a belt loop in the way, remove that. If you want to remove the tag, do that too.
Turn the pants inside out and place one leg inside of the other. This will give you the best access to the back rise seam.
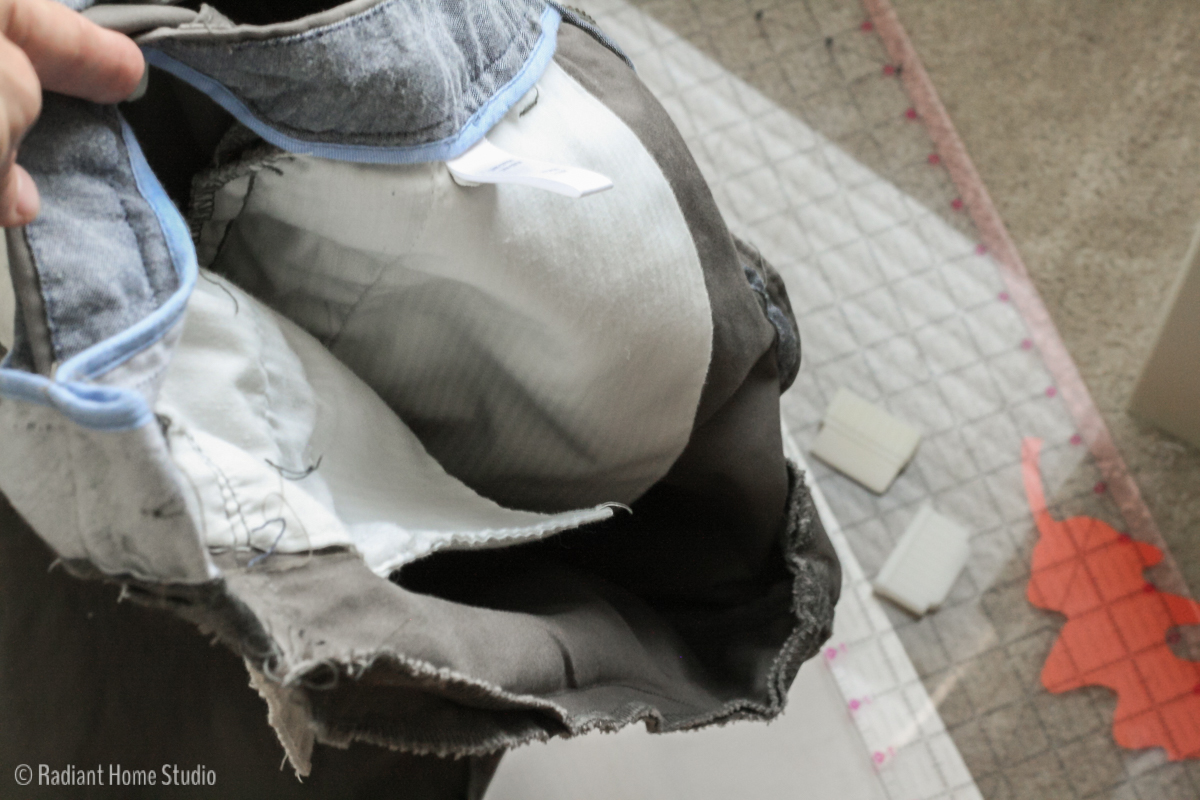
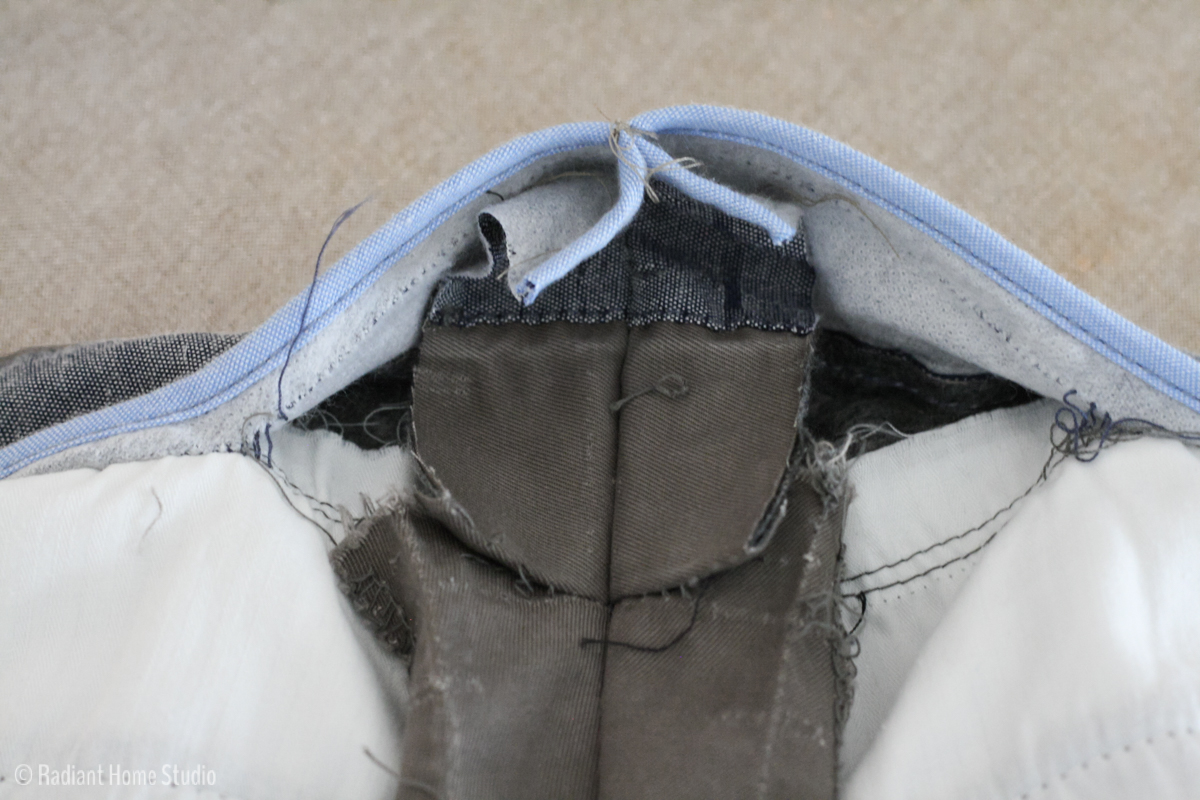
Open up the waistband and press the back rise seam flat. Draw a line using tailor’s chalk, starting at the waist and tapering down to the lower part of the back rise seam.
I took these in a total of 2 in. Since you are taking in the material on both sides of the seam, divide the amount you need to take in the pants by 1/2. My line in 1 in. away from the seam. As you can see, you don’t want to take them in any more than this. The back pockets will be too close together and you will need to make more alterations to keep the fit and proportions correct.

This is important: baste the waistband section before stitching! Let me show you why. This is the first time I basted (pardon the blur)…the seams did not line up properly and the finished alteration would have looked very unprofessional. I took it out and tried again. The 2 minutes it takes to do this extra step is worth it!

Second time after basting…much better!
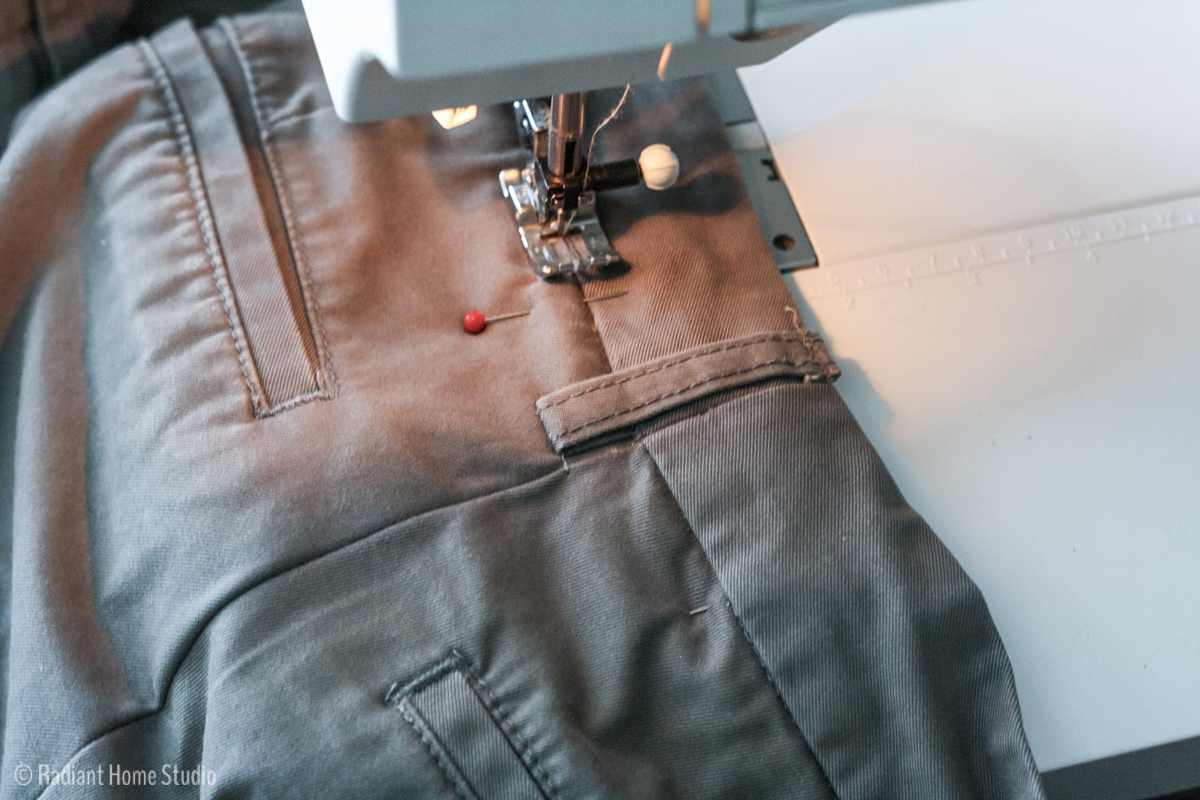
Next, stitch along your chalk line. I noticed that my pants had some type of heavy-duty chain stitching. I think it’s important to pay attention to the original details. I’m guessing they chose a stronger stitch to reinforce this seam. You definitely don’t want your husband to bend over at work and have the back seam rip wide open! Copy what’s there as much as possible.
The closest stitch I could find on my machine is the triple stitch (the illustration looks like 3 straight vertical lines), so that’s what I used. Sew along the original stitching line for an inch or so when you get to the end. Make sure you backstitch where the lines of stitching meet to reinforce that spot.

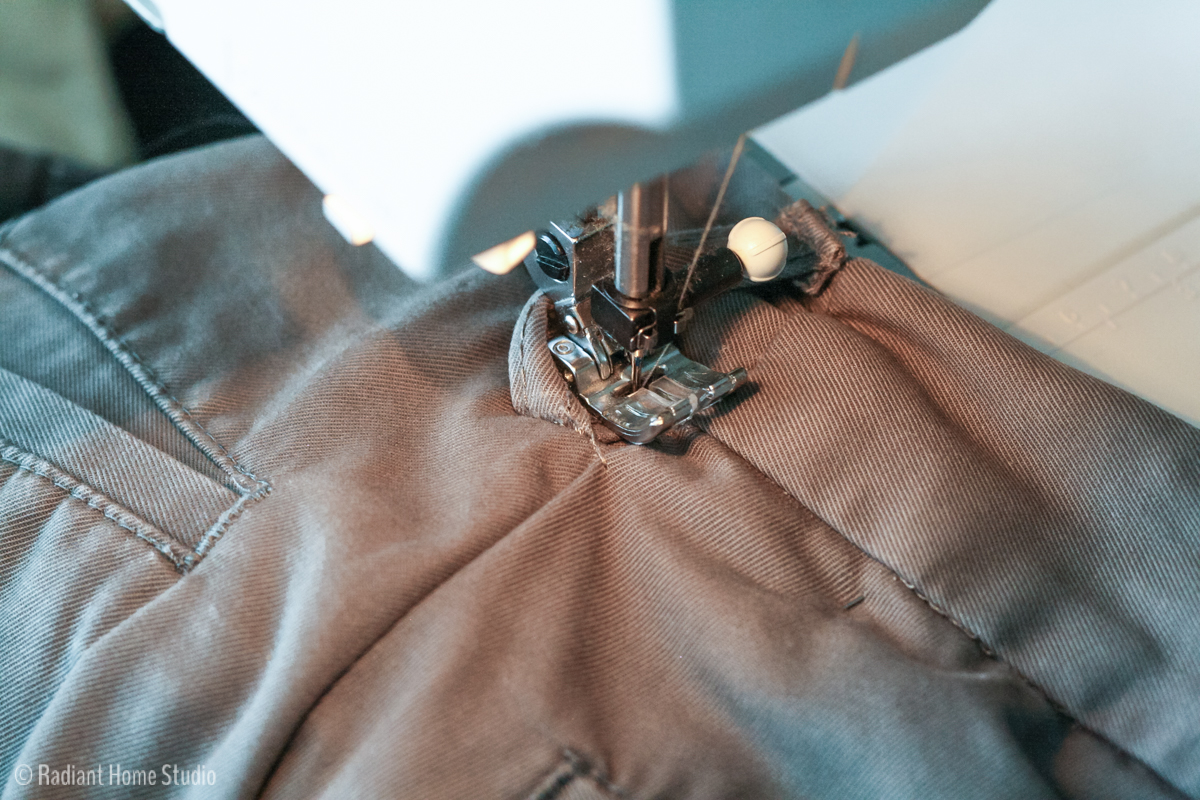
Open it up to see if everything is smooth and straight. If so, you can pick out the original stitches. These pants were not made to be tailored as easily as dress pants, so the waistband didn’t have a center seam. I decided to go ahead and cut the waistband at the fold to reduce the bulk. If for some reason I wanted to let the waistband out again, I’d have to make them about 1/2 in. smaller than the original. I’m not planning to do that, but I wanted to leave my options open.
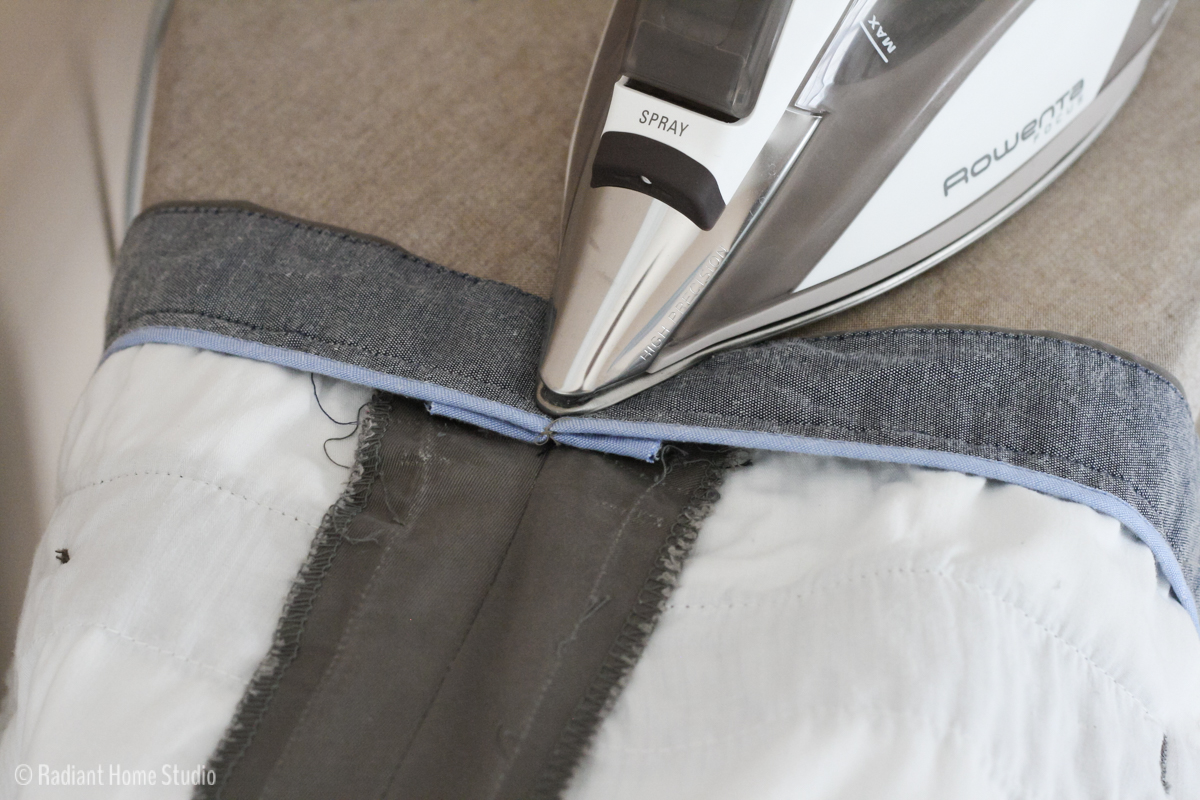
Press the back rise seam open. Pressing well will set the stitches and also give the seam a crisp, professional look.
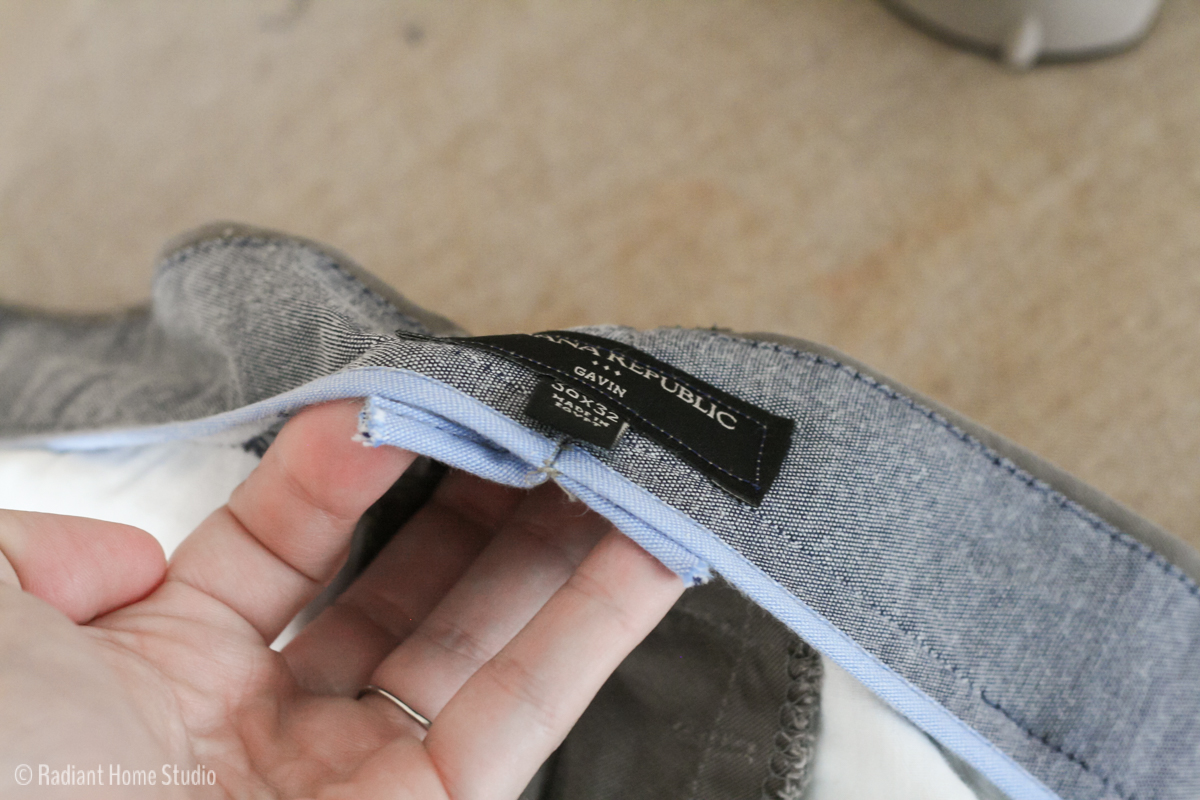
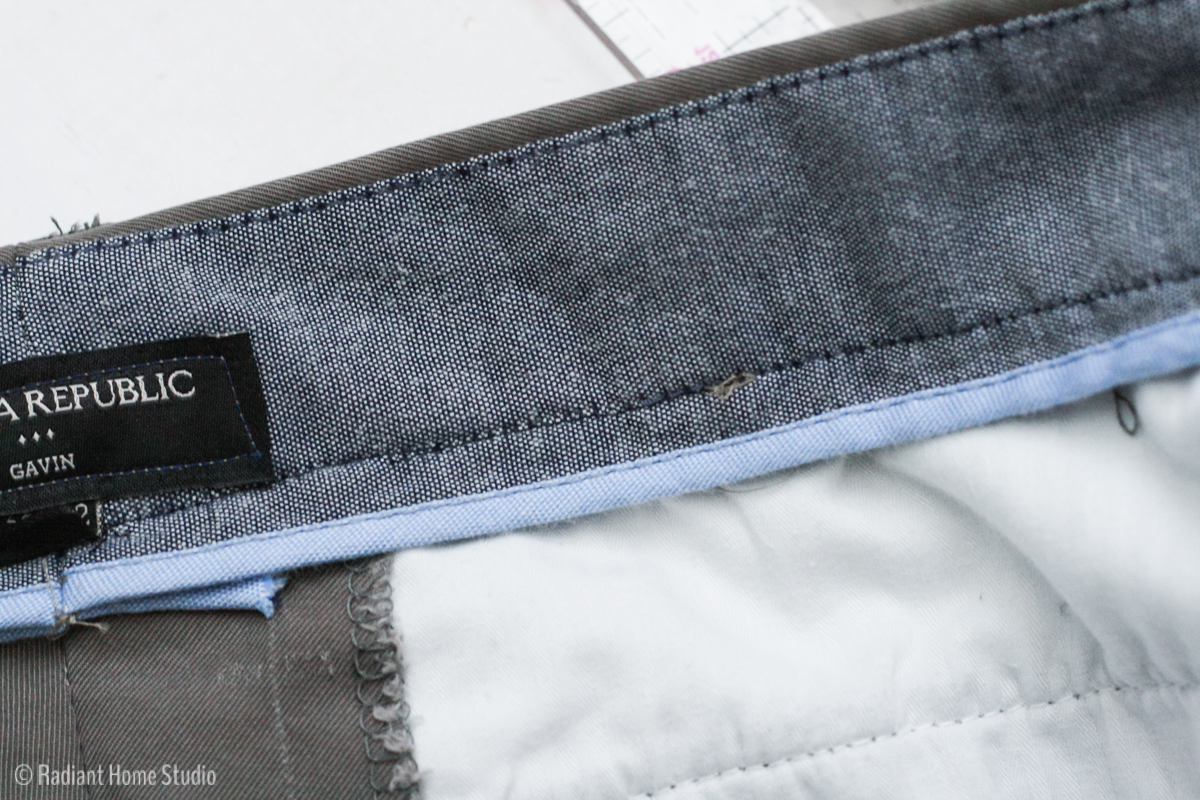
Reattach the belt loop. I chose to place mine to the side of the seam. You could cover the seam, but the result will be more bulk in the seam.

Reattach the tag (just to the waistband facing), if you like. You can use it to help keep the waistband seams flat.
To stitch the waistband back down, use a couple of pins to hold everything in place. Stitch in the ditch (the seam line, where it won’t show) on the outer waistband. Be careful not to stitch over the belt loop. Stitch partially under it.
Then cut the thread and move the loop to the other side of the presser foot, and finish stitching.
The finished inside seam…
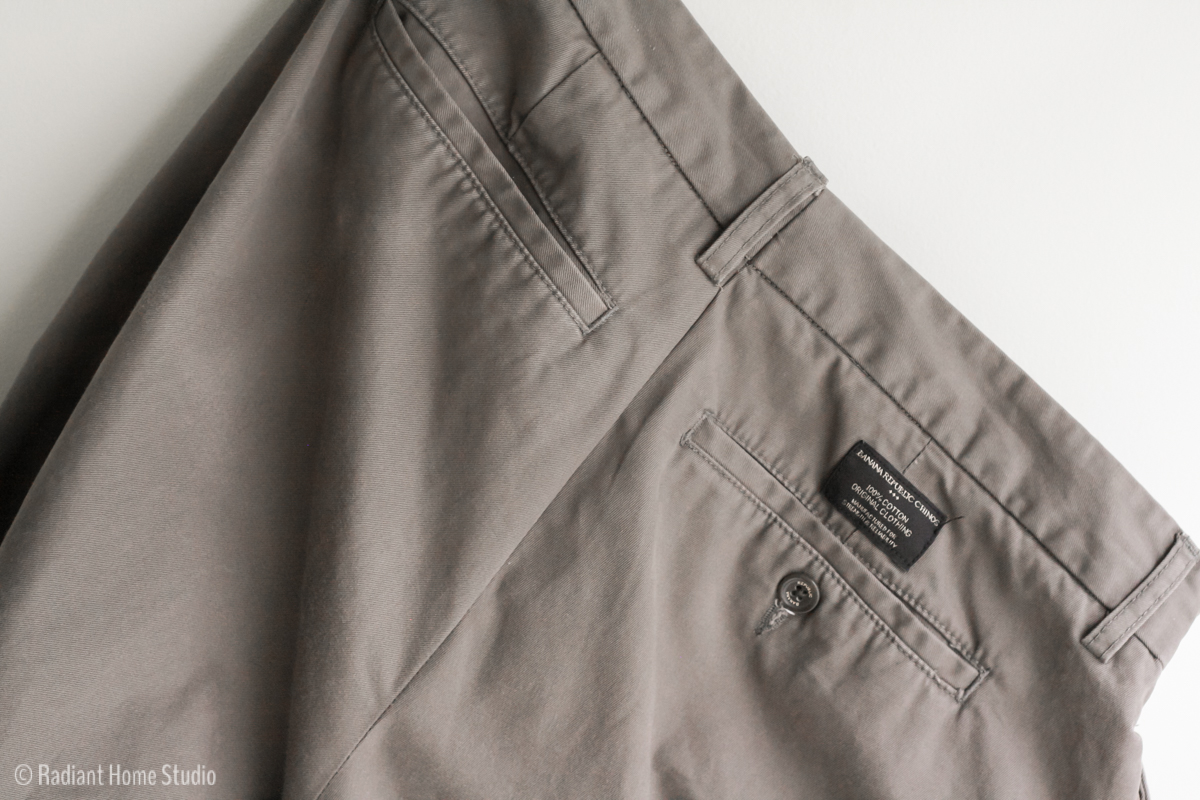
And the finished alteration from the outside…
Scared to ruin perfectly good pants? Just practice on a thrift store pair. If it doesn’t work out, cut them up and make some pants for your kids or a bag. If it does work out, your husband will thank you for saving him the tailoring fees or the cost of new pants.


Great tutorial and I love the pictures – I’m very visual.
Thanks! Sometimes the practical things aren’t as pretty, but hopefully it’s useful!
wow this is a great tutorial and a very useful one. Thank you
Two quick questions, from someone that has never done anything like this before-
What does baste mean?
~and~
Can I do this without a sewing maching?
Thanks!
Sure…
Baste means that you sew the seams with long stitches, either by hand or with your longest machine stitch. The purpose is to make sure everything is lined up properly and that the pieces don’t shift. It this case, it allows you to check the fit before stitching the final seam. Basting stitches are removed after stitching the seam.
I would recommend using a machine to make alterations. I think it could be done by hand, but you would have to make very tiny stitches, particularly at the thick parts. I’m not sure you could get it tight enough to have a professional looking finish in the end. Perhaps you can a borrow a machine from a friend that sews? You’ll only need to know how to thread it and use a straight stitch.
Can you show how to take up darts and side seam also? So that one can take about 3 inches out of slacks? I know its more work but can be done if one knows how. Looks like you might know lol. Thanks
I haven’t done that particular alteration and don’t have a pair of pants that need to be fixed right now, but I’ll see if I can explain. Go ahead and pick the stitching out of the waistband all the way around to the side seams. (And any extra belt loops.) You can start at the bottom of the darts and stitch out from the original seam about 1/4-1/2″. That will take another inch out of the waistband. The side seams might be a little more tricky because of the pockets. Pick out the stitching several inches like you would for the back seam. If the pocket is close to the seam, take the bulk out from the back side. So you’ll have a large seam allowance on the back side and the original seam allowance on the front side near the pocket. You’ll want to try them on your man at this point to make sure you have the right fit. If there is extra bulk in the hips, you can stitch further down the side seam to blend it in. Then follow the directions for reattaching the waistband and belt loops. Hope that helps!
Sara
When buying suits, my husband is in a size 50 jacket however most suits come with pants that are six inches smaller in the waist than the chest so most of the suits we’ve found are size 44 waist but he is a size 40 waist. Do you think that is too much to take in and still allow the pants to look right.
Hi Susan,
I would not recommend taking in the pants by 4″ without a professional tailor. The proportions in the thighs will be off and the pockets may be too close to the seams. I would suggest going to a tailor that can sell you the suit in separate pieces or that can do the alterations for you.
Sara
I have this same issue, 50″ chest, 40″waist. I have bought (jos A Bank) suits off e-bay and made the pants waists into 40″. It takes a little time, and they have always looked great in the end. I’ve never had the rear pockets appear to be too close together. But, i do end up with a spare belt loop :/.
Then again…. “i’m no tailor”
Good to know! Thanks for sharing your experience. I’m sure this will be helpful to someone!
Thanks Sara!!
This is the best step by step tutorial I’ve seen thus far!
Thank you! It was one of those things I had to sew for my husband anyway, so I figured I may as well take photos while I did it. I can’t believe how much traffic it gets. I’m so glad it’s helpful!
Hi Sara,
Great tutorial! Easy to understand and follow. Ill be bookmarking your site/blog for sure!
Thank you!
ive try to alter my mans trouser so now my problem is the tailor that has been altering she cut trouser outside out.So now im sewing according to your figures.so now she make mistake front pockets came closer to back pocket what must I do now to fix that sticht
I’m sorry your tailor seems to be making so many mistakes! It would be easier to help if you had a picture. You can make adjustments to the side seams in the same order as the back seam. Open up the waistband, adjust the side seams, and sew it back down. I wish I could be more helpful, but without seeing it, I’m not sure I understand the question.
Great site. My husband lost alot of weight so I am going to alter suit pants. Your pics were a great help. I previously had to take up sleeves which is difficult, but now I know how the jacket is put together. I had difficulty getting the buttons straight, thinking some stabilizer might help. But again, very easy to follow.
I’m so glad it was helpful! I never expected this tutorial to get so much traffic, but it seems a lot of people are searching for help with alterations. Thanks for letting me know you used it!
Hi, I wonder if you have hints for shortening the front rise?
That’s not something I have attempted, but the best way to learn is to take apart a pair of pants that you don’t care about and put them back together. If you pay attention to the order in which you take out stitches, you can put it back together the same way. Trouser fronts can get tricky with zippers in the way, so you may have an alteration that requires you to reconstruct the pants completely. Hard to tell without seeing the issue. Hope you can make it work though!
Thank you for the encouragement, and for posting good instructions!
excellent tutorial – and really, it’s relevant for so many alterations besides men’s dress pants. My husband is quite lean – 28 waist and very narrow hips – EVERYthing requires altering. I’m going to take a pair he no longer wears and try this (funny how he hasn’t parted with clothes that are WAY to large for him now. LOL)
Best regards,
Jennifer in KS
Thank you! Yes. It really works on any trousers, men’s or women’s. It helps to be more specific like that for google searches, so people find what they are looking for. Good luck with your alterations!
Thank you for this. I have a pair of lined linen ladies trousers. The waist is now too big. I’m going to follow your instructions. They are very clear. It will involved more work because I need to alter the satin lining as well.
Great! I’m sure you can figure it out. Just put it back together the same way you take it apart 🙂
I finished the alteration today. I even sewed the label back on. It took a long time because I tacked it before stitching and the lining had to be altered as well. I’ve got a perfect fit now. Thank you so much.
Great! So glad to be of help 🙂
I understand taking in the waist but how do I let the waist out when there are no seams on the waistband. These are a man’s casual slacks made from linen type fabric.
Hmm. You’ll have to add the seam. I think a tailor would do the same. Since most tailored pants have one, it shouldn’t look out of place. 🙂
Hi Sara,
I have not been sewing very long, but I have been reading up on different skills and practicing. I found your tutorial very easy to follow and it made perfect sense. My brother is thin and tall and we cannot find pants that fit him, so this will be very helpful!
Thank you! So glad to help! More people have used this tutorial than I ever expected. Who knew a “boring” sewing project could help so many people? 🙂
Thank you so much for the detailed instructions. My husband had purchased some pants not too long ago and now has lost weight. So here I go.
Good luck!
I just ran into this tutorial and I can see it’s helpful cos I am making progress with it practicing recently. Please kindly furnish me with details on how to fix suit trouser back pocket and the required inches needed from the waist top and the width when making a trouser.
The information is very helpful, and I will let you know how the pants turn out. Thanks
Great! Thank you!
Si tus pantalones te han quedado un poco estrechos de la cintura, o si compraste un par demasiado pequeño en un intento de optimismo, no es bueno que te rindas para modificar de acuerdo a tu estilo la cintura
Good idea.