• SHOP
  • About
    • About Sara
    • Contact me!
    • Design Collaborations
    • Sewing Collaborations
  • Sewing
    • Sewing Tutorials
    • Things I Made
  • Design Portfolio
  • Blog
  • Nav Social Menu

    • Facebook
    • Instagram
    • Pinterest
Radiant Home Studio

Radiant Home Studio

January 11, 2016 ·

Denim Pocket With Grommets {Tote Bag Upgrade}

Sewing· Tutorials

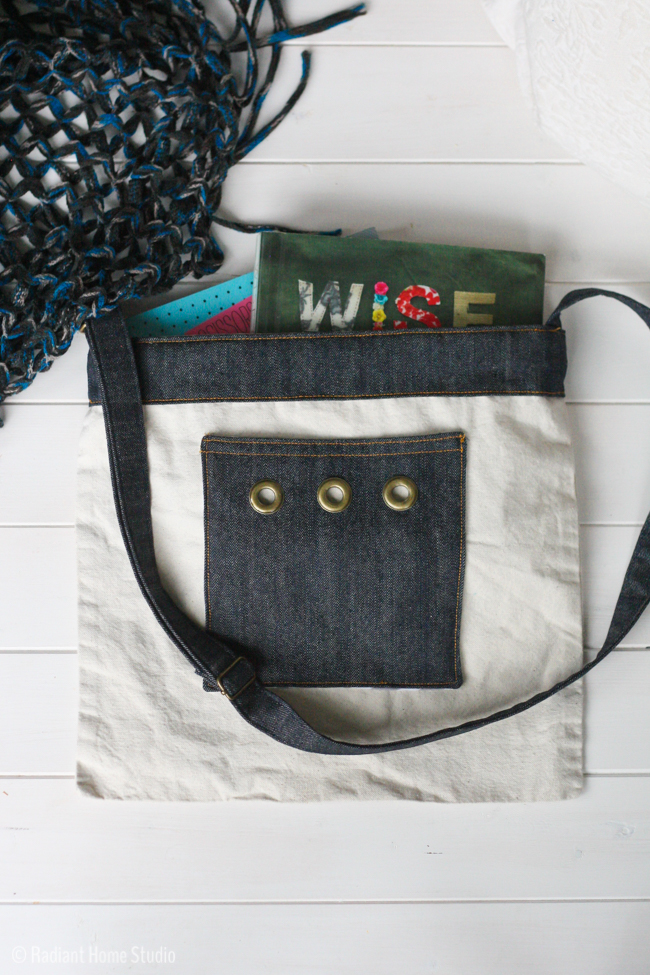
Here’s another tote bag upgrade tutorial! This one features a denim pocket with grommets and a sliding shoulder strap. With all of the Birkin Flares and Ginger Jeans everyone is making, I figured a lot of people have denim scraps that need to be used. If you aren’t into making your own jeans, you can probably cut up an old pair of jeans to use for this tutorial. You might have to piece together the strap, but it would be a fun way to use up those hole-in-the-knee jeans you’ve been hoarding in your sewing closet “just in case” you want to make something with them.

Denim Pocket with Grommets and Denim Shoulder Strap| Tote Bag Upgrade | Radiant Home Studio
(This post includes affiliate links, which means I make a small commission at no cost to you. Thanks!)

Both the pocket and the strap are really simple additions that only require straight stitching. You can also use the strap and pocket tutorials separately, or mix and match them with other upgrade ideas I have shared. I used topstitching thread (practice for the jeans I’m planning to make next week…) but you can use whatever you have on hand. The grommet detail on the pocket is just for fun. If you’ve been scared to try grommets, this is a low-risk way to experiment with them.

Materials:

• canvas tote bag
• 1/3 yd or scraps of denim
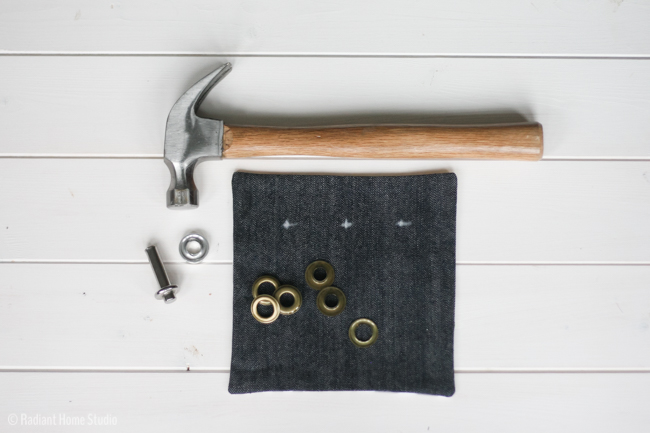
• 3 grommets size 7/16″ or 3/8″ (I like to buy the starter set that includes the tools. You’ll also need a hammer.)
• 1 D-ring size 1″
• 1 strap slide size 1″
• scrap of medium or heavy-weight fusible interfacing
• topstitching thread (optional)

Cutting & Preparation:

Cut from denim:

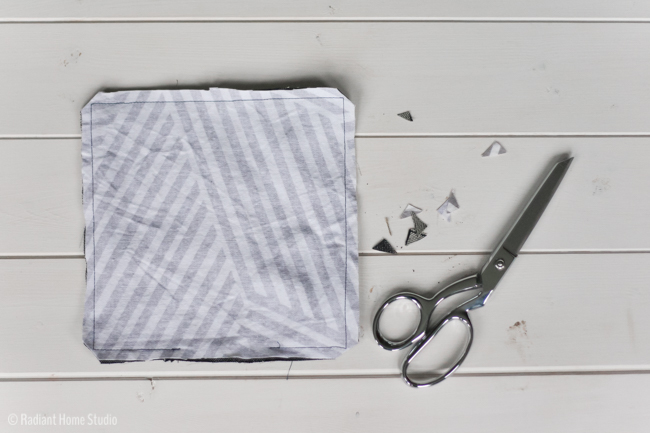
• (2) 8″ squares (I used a printed fabric for the inside of my pocket. Feel free to use any fabric you like.)
• (2) rectangles 3″ x the width of your bag plus 1″ (for example, my bag was 15″ wide, so my rectangles were 3″ x 16″)
• (1) rectangle 60″ x 4″ (If you have 56″ wide fabric, that’s probably plenty. For 44″ wide fabric, you can piece together 2 strips.)

Cut from interfacing:

• 2″ x 6″ rectangle

Sew a Denim Pocket With Grommets:

1. Place the 8″ square pocket pieces right sides together. Stitch around the outside using a 1/4″ seam allowance, pivoting at the corners, and leaving a 3″ opening in one side. Fuse the strip of interfacing to the wrong side of the denim, centering it over the area where the grommets will be positioned, 1 1/2″ from the top edge. Trim the corners and turn right side out through the opening. Use a blunt pointed object ( I like to use a knitting needle) to push out the corners. Press all of the seams and corners, tucking in the extra seam allowance at the opening to make the edge straight.

Denim Pocket with Grommets and Denim Shoulder Strap| Tote Bag Upgrade | Radiant Home Studio

Denim Pocket with Grommets and Denim Shoulder Strap| Tote Bag Upgrade | Radiant Home Studio

2. Mark the grommet holes using chalk or water-soluble marker. Fold the pocket in half to find the center. Mark the first hole at the center point and 1 1/2″ from the top edge. Mark the side grommets by folding each side to the center point and marking the hole halfway between the center grommet and the side at 1 1/2″ from the top edge.

Denim Pocket with Grommets and Denim Shoulder Strap| Tote Bag Upgrade | Radiant Home Studio

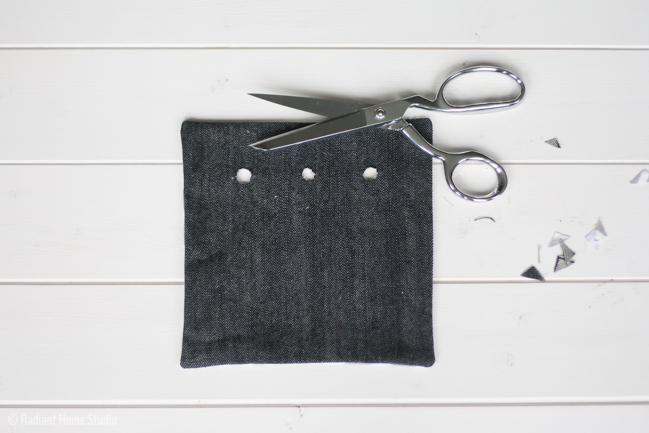
3. Cut out a 3/8″ circle at each marking. I find that it is easiest to cut a plus sign and then work around, cutting out the excess. The circles do not have to be exact.

Denim Pocket with Grommets and Denim Shoulder Strap| Tote Bag Upgrade | Radiant Home Studio

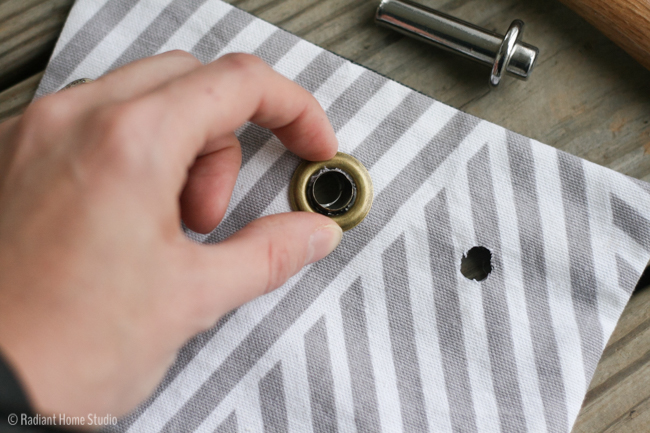
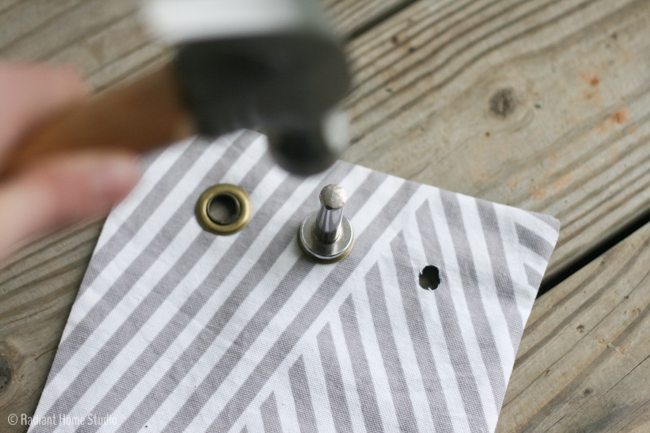
4. Apply the grommets to each hole. Place the stud through the front of the pocket, and place the flat side down on the anvil. Place the washer over the stud, put the setter in place, and tap with a hammer several times. It’s best to do this step outside on a hard surface like concrete. If you need more detailed directions, see my beach tote tutorial post.

Denim Pocket with Grommets and Denim Shoulder Strap| Tote Bag Upgrade | Radiant Home Studio

Denim Pocket with Grommets and Denim Shoulder Strap| Tote Bag Upgrade | Radiant Home Studio

Denim Pocket with Grommets and Denim Shoulder Strap| Tote Bag Upgrade | Radiant Home Studio

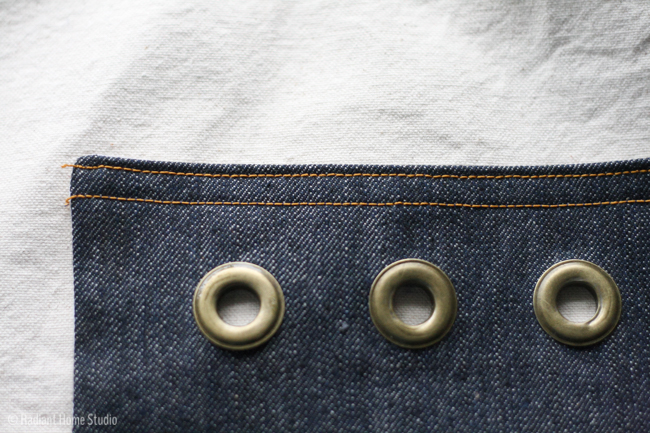
5. Topstitch along the top edge of the pocket at 1/8″ and 3/8″.

Denim Pocket with Grommets and Denim Shoulder Strap| Tote Bag Upgrade | Radiant Home Studio

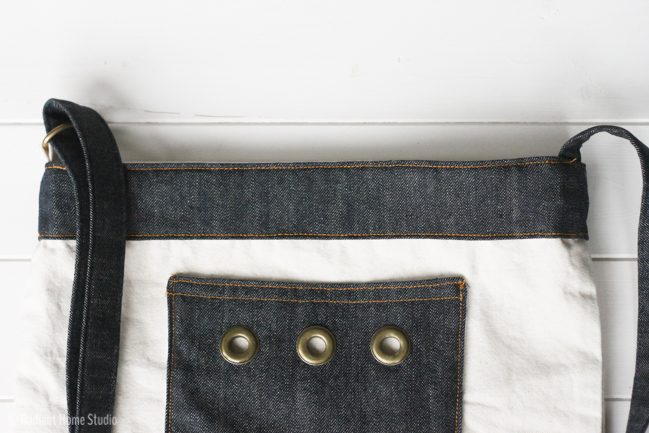
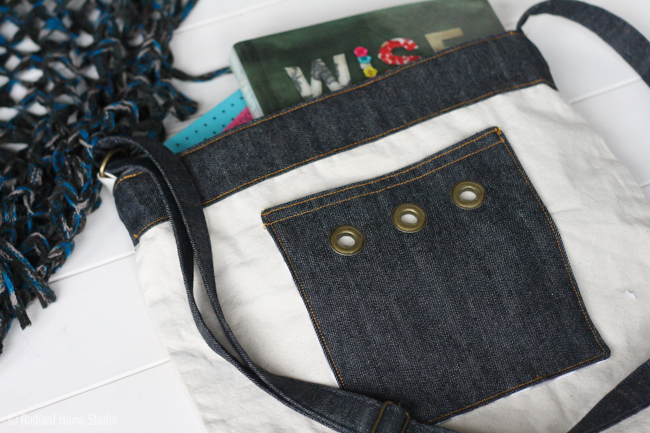
6. Place the pocket onto the tote bag about 4″ from the top edge and centered across the width of the bag. Secure it with pins. Topstitch around the side and bottom of the pocket edges, pivoting at the corners, and backstitching at the top. You’ll have to maneuver the fabric around under the presser foot which can be kind of tricky. Just sew slowly and smooth out the part of the bag you are sewing as you go.

Denim Pocket with Grommets and Denim Shoulder Strap| Tote Bag Upgrade | Radiant Home Studio

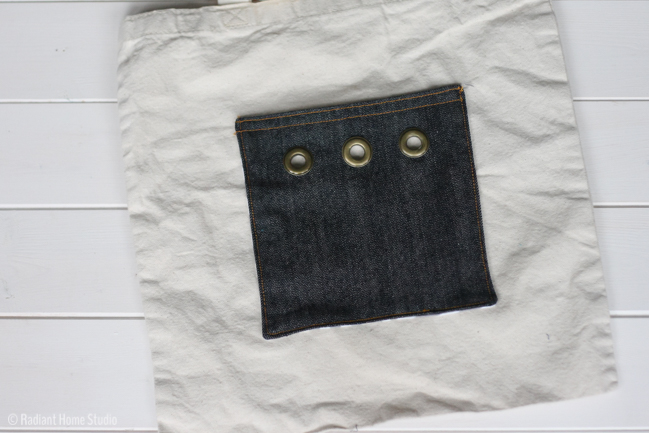
The pocket is finished! You can leave the bag as it is, or move on to the shoulder strap.

Add a Sliding Shoulder Strap to Your Tote Bag:

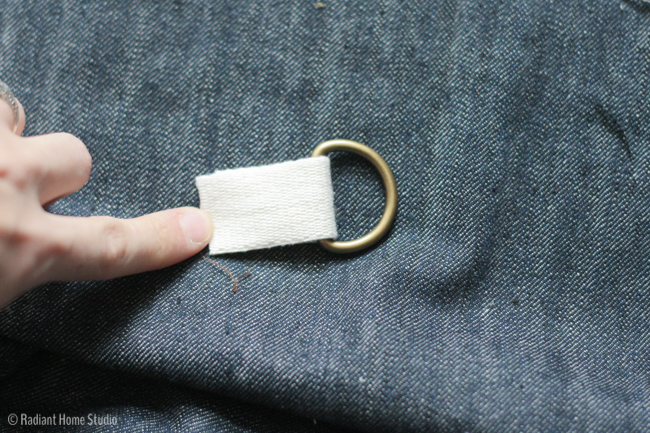
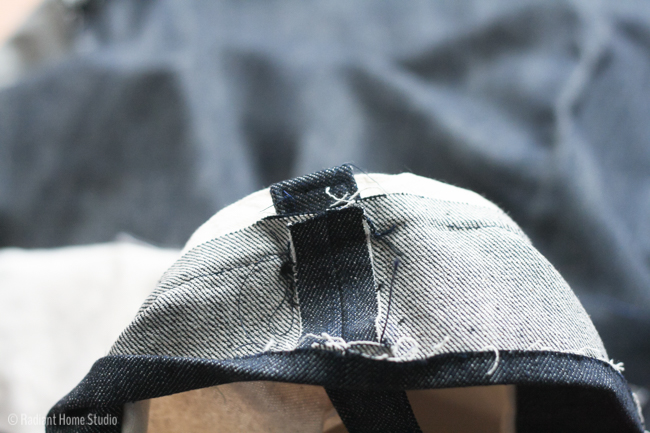
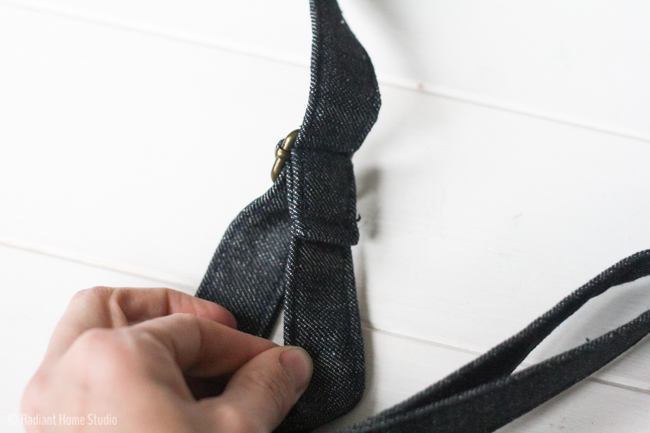
7. Cut off the original tote bag straps. Use a 3″ piece of strap to create a loop around the D-ring.

Denim Pocket with Grommets and Denim Shoulder Strap| Tote Bag Upgrade | Radiant Home Studio

Denim Pocket with Grommets and Denim Shoulder Strap| Tote Bag Upgrade | Radiant Home Studio

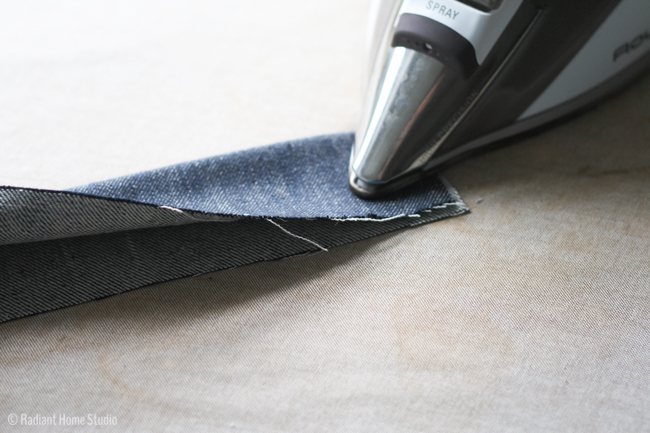
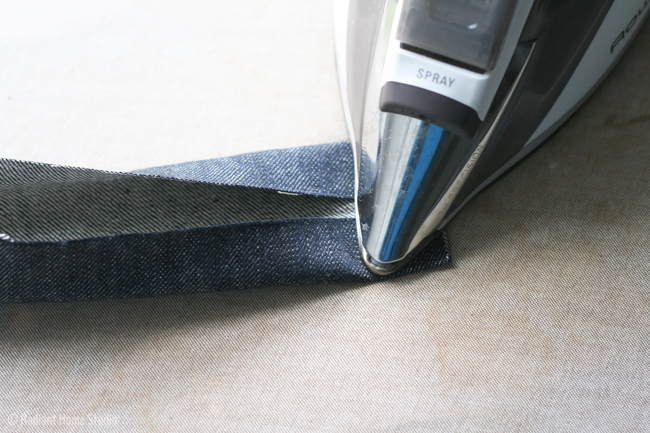
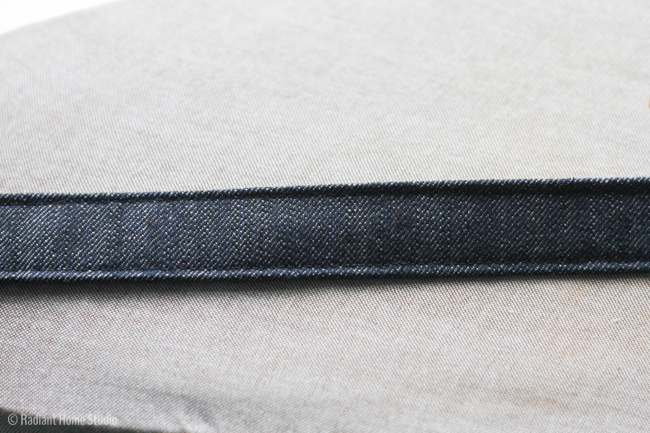
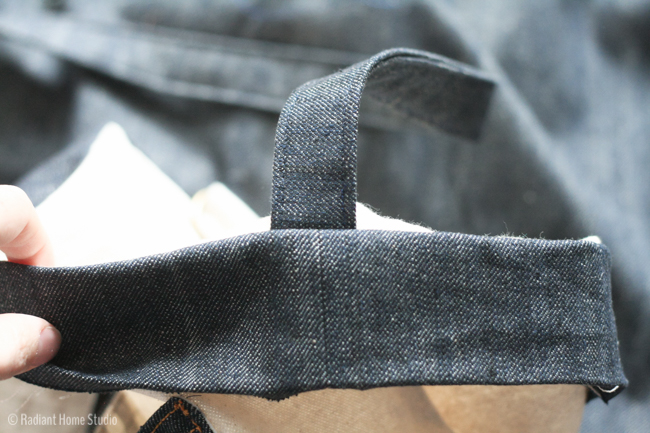
8. Now create the strap. (If you are using a material that is lighter weight than denim, you’ll need to add some interfacing to the strap piece at this point.) For the strap piece (60″ x 4″) in half lengthwise with wrong sides together and press. Fold the lengthwise raw edges in toward the center to meet the crease. Press again. You should have 4 even sections.

Denim Pocket with Grommets and Denim Shoulder Strap| Tote Bag Upgrade | Radiant Home Studio Denim Pocket with Grommets and Denim Shoulder Strap| Tote Bag Upgrade | Radiant Home Studio

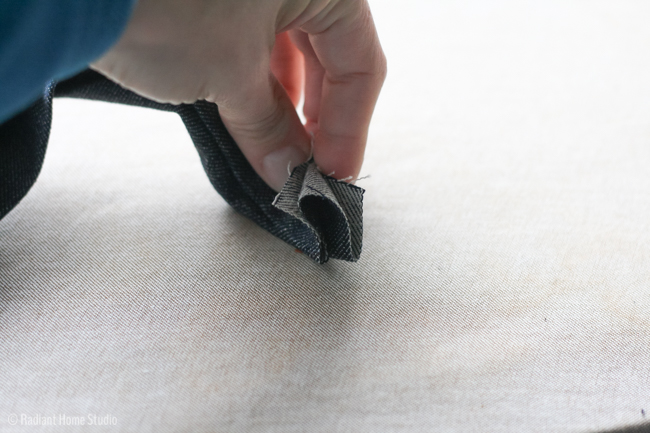
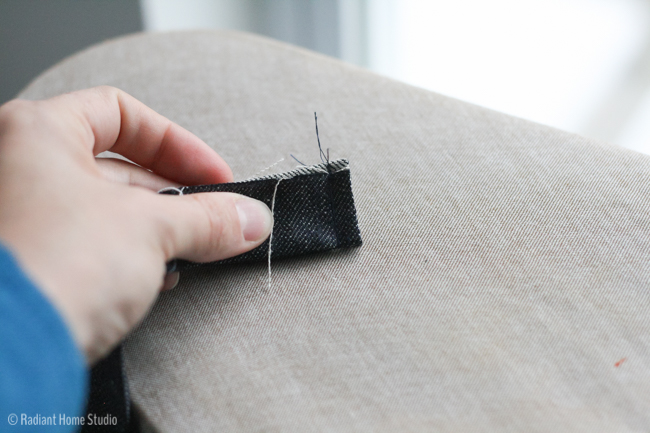
9. With the raw edges folded into the center crease, fold the center crease so that the right side of the fabric are facing. Stitch across one short end with 1/4″ seam allowance. Trim and turn right side out. Press.

Denim Pocket with Grommets and Denim Shoulder Strap| Tote Bag Upgrade | Radiant Home Studio

Denim Pocket with Grommets and Denim Shoulder Strap| Tote Bag Upgrade | Radiant Home Studio

Denim Pocket with Grommets and Denim Shoulder Strap| Tote Bag Upgrade | Radiant Home Studio

10. Finish the strap by topstitching the long edges.

Denim Pocket with Grommets and Denim Shoulder Strap| Tote Bag Upgrade | Radiant Home Studio

11. Place the 3″ strips right sides together. Stitch on each short end with a 1/2″ seam allowance, creating a loop. Press under 1/2″ on one of the raw edges.

Denim Pocket with Grommets and Denim Shoulder Strap| Tote Bag Upgrade | Radiant Home Studio

Denim Pocket with Grommets and Denim Shoulder Strap| Tote Bag Upgrade | Radiant Home Studio

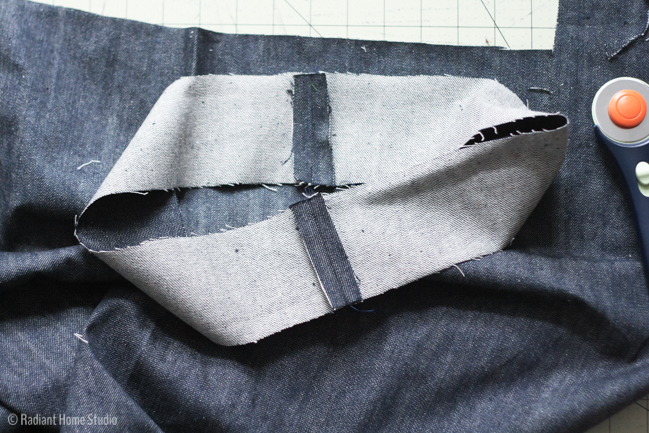
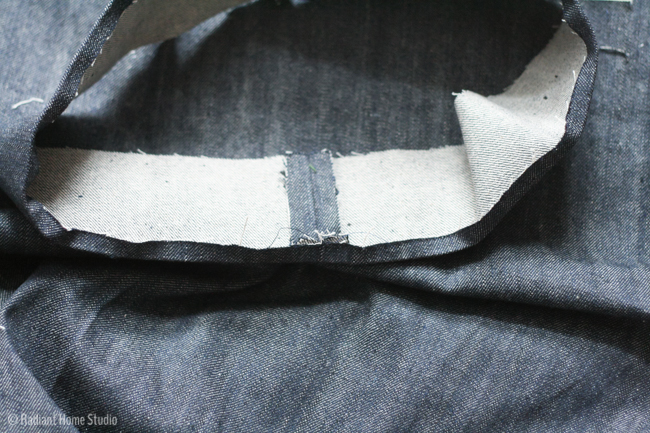
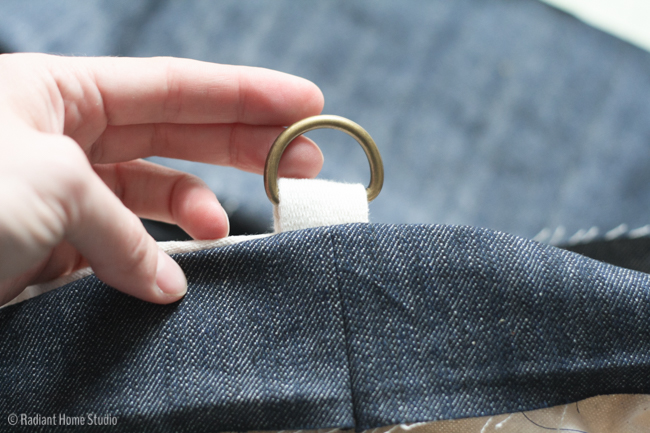
12. Turn the tote bag inside out. Place the 3″ loop around the tote bag with the right side of the strip to the wrong side of the bag. It’s best to sew under the pre-made hem, which is usually about an inch wide. Line up the unfolded edge of the loop about 1/2″ below the top edge of the bag. At one side seam, insert the raw edge strap end. At the other side seam, insert the strap with the d-ring attached. Stitch around the top of the bag, just below the original hem stitch (usually about 1″ from the top of the bag).

Denim Pocket with Grommets and Denim Shoulder Strap| Tote Bag Upgrade | Radiant Home Studio

Denim Pocket with Grommets and Denim Shoulder Strap| Tote Bag Upgrade | Radiant Home Studio

Denim Pocket with Grommets and Denim Shoulder Strap| Tote Bag Upgrade | Radiant Home Studio

Denim Pocket with Grommets and Denim Shoulder Strap| Tote Bag Upgrade | Radiant Home Studio

Denim Pocket with Grommets and Denim Shoulder Strap| Tote Bag Upgrade | Radiant Home Studio

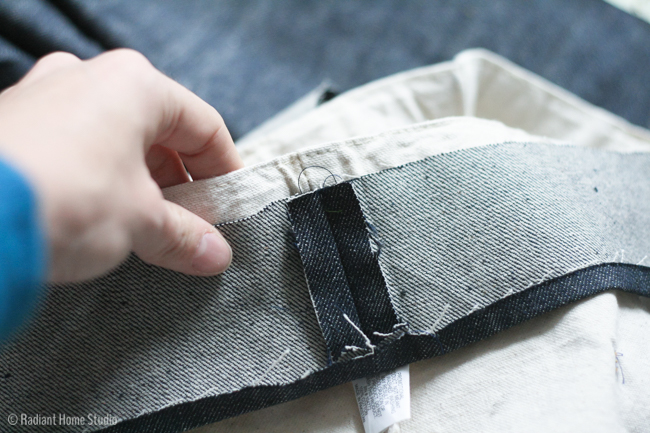
13. With the raw edge of the denim band folded under, topstitch both edges of the denim band all the way around the bag.

Denim Pocket with Grommets and Denim Shoulder Strap| Tote Bag Upgrade | Radiant Home Studio

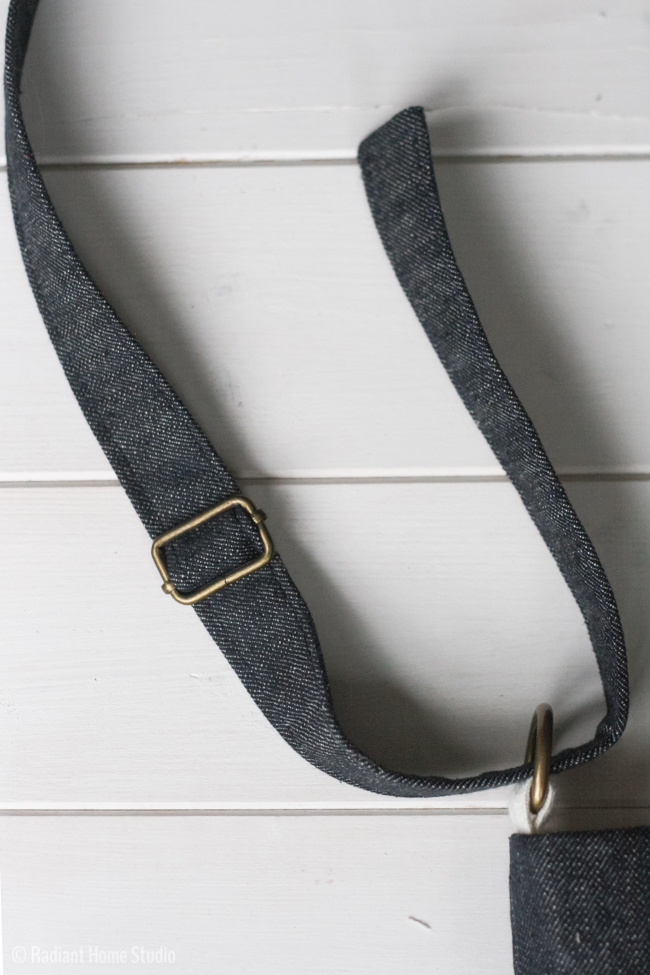
14. Thread the finished end of the strap through the strap slide and then through the D-ring (outside to inside). Thread the end back through the strap slide, under the first strap. Fold the finished end back on itself (about 1″) and stitch it down.

Denim Pocket with Grommets and Denim Shoulder Strap| Tote Bag Upgrade | Radiant Home Studio

Denim Pocket with Grommets and Denim Shoulder Strap| Tote Bag Upgrade | Radiant Home Studio

Denim Pocket with Grommets and Denim Shoulder Strap| Tote Bag Upgrade | Radiant Home Studio

And you are finished!

Denim Pocket with Grommets and Denim Shoulder Strap| Tote Bag Upgrade | Radiant Home Studio

Denim Pocket with Grommets and Denim Shoulder Strap| Tote Bag Upgrade | Radiant Home Studio

If you make a bag, I’d love to see it. Tag it with #totebagupgrade on Instagram!

SaveSave

Previous Post: « Tessellation Quilt Finish
Next Post: Behind-the-Scenes: Taking Blog Photos »

Reader Interactions

Comments

  1. Jaime says

    January 11, 2016 at 11:20 am

    Oh my goodness – easy but such an upgrade! Pinned to my free patterns & tutorials pinterest board!

    • Sara Curtis says

      January 11, 2016 at 1:45 pm

      Thanks Jamie! It’s amazing how a few simple rectangles can make such a difference, right?

  2. Claire says

    January 12, 2016 at 7:49 am

    I love working with denim. I love the way you have used the scraps here and what a great tutorial. Thanks

    • Sara Curtis says

      January 16, 2016 at 12:05 pm

      Thank you!

  3. Denise/DIY Crush says

    January 13, 2016 at 4:35 pm

    Wow! Love your detailed tutorial! Nice change to make a store bought tote bag look unique! Must try ASAP! I’d love to have you come to my craft party and link this post up. The party is new Thursdays at 7pm EST. Have a fabulous week!

    • Sara Curtis says

      January 16, 2016 at 12:05 pm

      Thank you! I will link up this week 🙂

  4. Melissa says

    January 16, 2016 at 5:42 pm

    I really like this upgrade. The denim and grommets a cool, yet casual detail.

    • Sara Curtis says

      January 18, 2016 at 9:57 am

      Thanks Melissa!

  5. Lesley says

    January 24, 2016 at 11:39 am

    Thanks for a lovely easy tutorial 🙂

    • Sara Curtis says

      January 26, 2016 at 9:13 am

      Thanks!

  6. Neide Antunes says

    February 11, 2016 at 6:53 am

    Tenho uma bolsa “encalhada” que dá pra fazer essa customização.
    Vou fazer, ainda hoje!
    Obrigada por compartilhar!

  7. Pam @Threading My Way says

    November 15, 2016 at 2:00 am

    Great way to jazz up a plain tote, Sara. The grommets on the pocket are very effective – really take it up a notch. #12DaysofChristmasDIYChallenges

    • Sara Curtis says

      November 15, 2016 at 7:23 pm

      Thank you!

Primary Sidebar

Hello

Welcome! I’m Sara. I share modern home & accessory sewing patterns, and I create surface designs for licensing. I hope you are encouraged to see beauty in small things and are inspired to try new creative projects!

Shop Sewing Patterns


icon icon

icon icon

Newsletter

Sign up to get access to free sewing patterns & resource library!

Find My Work at:


© Copyright Notice

All images and text copyright ©2013-2020 Radiant Home Studio, unless otherwise noted. Please be kind enough to link back to my site and contact me if you would like to use my images.

Disclosure

I am a participant in the Amazon Services LLC Associates Program, an affiliate advertising program designed to provide a means for me to earn fees by linking to Amazon.com and affiliated sites.

Footer

Sign up to get access to free sewing patterns & resource library!

Favorite Adobe Illustrator tool? I love recoloring Favorite Adobe Illustrator tool? I love recoloring patterns. I probably spend way too much time with the recolor tool and not enough time making new patterns. 🤷🏻‍♀️

Last day to join the Immersion Course! If you have ever dreamed of making beautiful designs, Bonnie can teach you how to get what’s in your head into the computer and then how to make money from licensing your designs to companies for use on products. 

As a member of Bonnie’s support team, I’ll be there to make sure you don’t feel lost. There’s room for you...as Bonnie often reminds us!

#surfacepatterndesign #surfacepatterndesigner #surfacepatterncommunity #printandpattern #radianthomestudiopatterns #floralpattern #alltheflowers #artlicensing #flowersfordays #mutedflorals
Look what just came in the mail! Notebooks! This w Look what just came in the mail! Notebooks! This was a test batch to check quality and I’m thoroughly impressed.

I’ll be listing extra in the shop soon, but first dibs go to anyone that signs up for the Immersion Course using my link. I’ll be sending a small gift package and scheduling a course success/ coaching call with you!

Just a reminder that the last day to enroll in Immersion is tomorrow! If you are like me and overthink things until the last day, you are not alone. 

I know it’s a huge decision. I have an Immersion stories highlight if you want to know more or go to my profile to find a link to the info page. Message me all your questions! 

#immersioncourse #immersioncourse2021 #designernotebooks #learntodesign #learnillustrator #surfacepatterndesigner
Just got an order of stickers in! I’m debating a Just got an order of stickers in! I’m debating about putting them in the shop as a separate product or adding them to orders. I think I need a few more to make a pretty coordinating set! 🌹

Reminder: there’s still a couple more days to enroll in the Surface Pattern Design Immersion Course or the free mini-course from Bonnie! Links in my profile...as always. Keep messaging with questions! ☺️
It’s been a minute since I showed my face here! It’s been a minute since I showed my face here! ☺️

I wanted to get a little personal today. If you’re here for sewing & crafty stuff...stay tuned. I’m not abandoning you. 🙂 If you saw my stories last week, you may have learned that I’m deep in design mode for a few weeks, working with @bonniechristine on the Surface Pattern Design Immersion Course.

When I discovered Spoonflower (about 8 years ago!) and realized I could create my own fabric, I had this far off “maybe someday” dream to create a collection of designs for a fabric company.

I spent many years learning bits and pieces of design and business skills. But a couple of years ago I got more serious about making my dream a reality. 

Last year, I made an investment in myself and I joined the Immersion Course with Bonnie Christine. It was truly the community support and confidence that I gained that propelled me forward this year. Just a few weeks after Immersion ended I signed a licensing deal for children’s wall art with Oopsy Daisy and a few months after that...I signed a contract with a fabric company!

You guys...Bonnie is SO genuine and generous in everything she does. ❤️ It spills over into this beautiful and inspiring community that cheers each other on every step of the way. 

This year, Bonnie invited me to join her support team to help encourage new students through the course and provide technical support for all those tricky Illustrator issues. 🙌🏻

This course is for anyone that wants to invest in their creative career. My “wildest dream” came true this year. I’m actually feeling a bit lost right now because I need a bigger dream!

Whether you have a few years of experience like I did when I joined or you have never used design software...Bonnie will walk you through the ENTIRE process. This is like a college-level course on design and creative business. We have many older students starting a second career, people that just graduated design school but don’t know how to practically start an art-based business, and people from dozens of countries around the world. It’s a beautiful, diverse community filled with people taking steps toward their creative business goals.

More below...
We had our first day of fake spring yesterday. It We had our first day of fake spring yesterday. It was warm for one day and it’s back to being cold. 🤷🏻‍♀️

I always draw flowers anyway. I’m hoping some of the local botanical gardens open back up this year. We have some really great inspiration nearby and flowers will start blooming soon!

It’s the little bits of beauty that inspire me the most. What are you looking forward to this Spring?
Just a reminder that I have this heart garland tut Just a reminder that I have this heart garland tutorial linked in my profile if you want to make some happy Valentine’s decor this week.

My girls are origami experts, so we worked together on these video tutorials last year. It’s a good family project for older kids! 💕

#heartcrafts #valentinesdecor #valentinecrafts #mycolorfulhome #cozymodernvibe #diyvalentinesdecor
This another favorite pattern of mine. As my style This another favorite pattern of mine. As my style has developed, I’ve embraced the imperfect lines and tend to work with graphic, but organic shapes. I like unexpected little pops of color or shapes that emerge from layering.

My iPad is at the fix-it shop, so of course, I’m feeling inspired today. ☺️ Maybe I should try some actual sketching and planning on paper with a pencil...😜

#radianthomestudiodesign #fabricdesign #surfacepatterndesign #surfacepatterncommunity #surfacepatternlife #licensingartist #artlicensing
Remember last year, the girls and I made this cute Remember last year, the girls and I made this cute origami heart garland tutorial? ❤️💙💛🧡

I don’t usually decorate with themed stuff, but these are fun to make and add some joyful, non-tacky hearts around the house for Valentine’s Day. 💕 I popped the link in my profile buttons. There are videos in the blog posts too. 

Also, I shared some personal stuff in my stories today!

#origamigarland #origamiproject #valentinesdecor #valentinesgarland #valentinescrafts #origamiheart #origamihearts #papercrafts #heartcraft #happyhearts #joyfulhome #mycolorfulhome
Follow on Instagram
  • Disclosures & Copyright
  • About
  • Contact me!
  • Digital Pattern FAQ’s

Copyright © 2021 · Sara Curtis // beloved theme