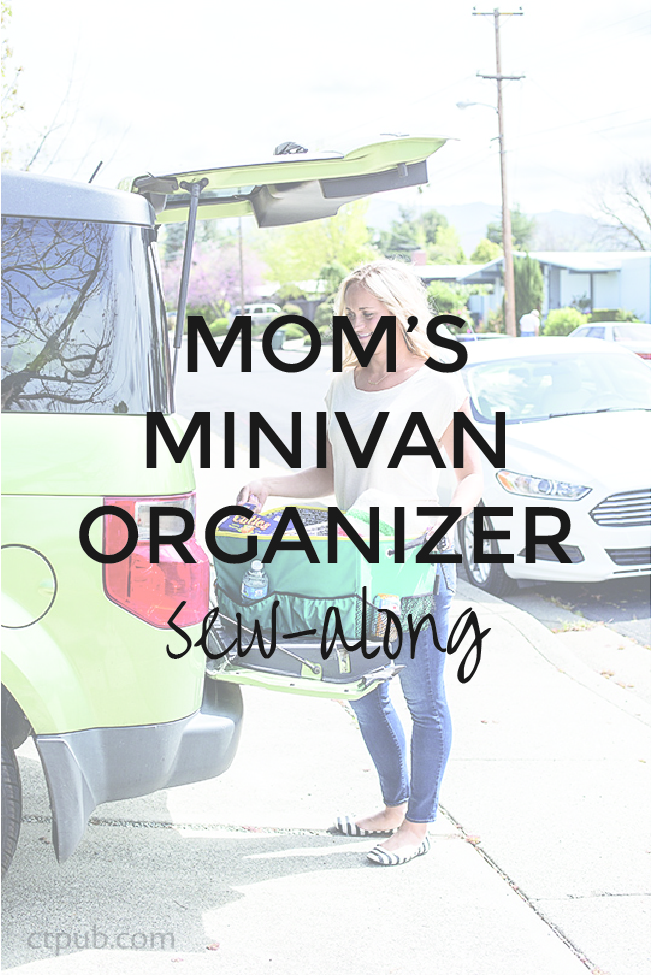
Today is the first day of the sew-along for the Mom’s Minivan Organizer pattern from On the Go Bags!
(This post contains affiliate links, which means I earn a small commission at no cost to you. Thanks!)
If you haven’t already, please join the On the Go Bags Facebook group to share your progress and keep up with the details of the sew-along. We would love to see what you are making!
Let me share a little bit about my inspiration for this pattern and why I think you should sew one for yourself. I enjoy designing bags and home accessories, but I especially love creating practical items to help you simplify your life. I spent some time thinking about what would be helpful to organize around my own house.
Anyone with kids knows the van can get crazy messy, so I designed this van organizer to contain some of the mess. It won’t magically clean your van for you, but at least it will keep it all the clutter from rolling around on the floor and out the sliding doors!
My kids aren’t involved in any sports, but I think it would be perfect for containing balls & equipment in the trunk. You can use it to transport casseroles to potluck events, which is the main reason I designed it with a removable divider. It can also be used, as we did on a recent road trip, between the front seats to hold snacks and trash—so much better than the usual pile that accumulates all over the floor!
In addition to keeping the car organized, I’m sure you can think of multiple places around the house to use this as well. I’ll be using this one in my sewing room on a utility shelf for fabric. It will add some color and allow me to use the space more efficiently.
Let’s get started!
In this post, I’ll go over a couple of the supplies, talk through the interfacing options, and talk about fabric choices. Then we’ll get all of the pieces cut out and apply the interfacing. I’ve got some extra tips to help you make a professional looking organizer!
Choosing fabric:
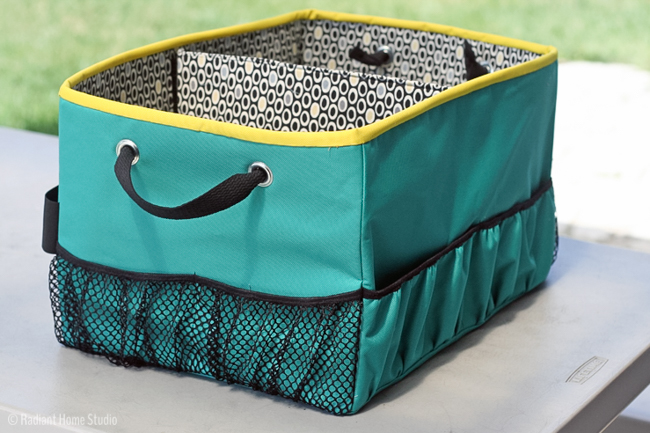
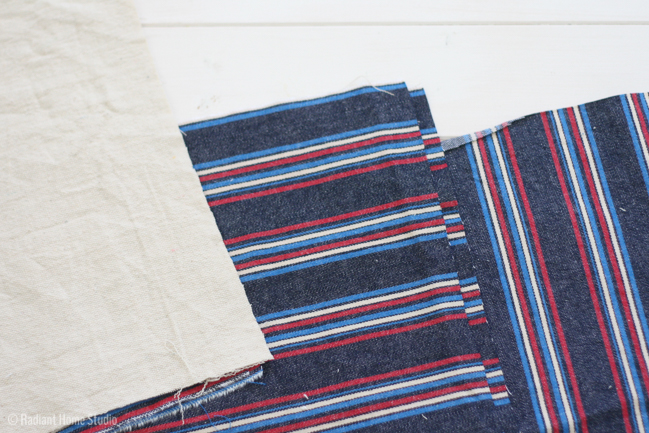
For the teal organizer in the book, I used an indoor/outdoor utility canvas. If you can find something like this, the water-resistant fabric is a great choice for something that will be in and out of the car. It’s easy to wipe clean and will hold up to heavy use.
Another great choice is indoor/outdoor home decor fabric, which will also be sturdy and water resistant.
You can also use any home decor fabric or medium weight canvas. This is a great choice if you plan to use the organizer inside. Lindsay made a beautiful version for quilt market with Art Gallery Canvas. Since I’ll be using this organizer in my sewing room for fabric storage, I’ve chosen be a home decor fabric for this version.
Supplies:
You can find the complete supply list on page 103 of the book. You should be able to find all of the supplies at your local fabric chain store, but I wanted to mention a couple of them in more detail.
1. One of the pockets is made from sports mesh (not the stretchy kind). If you can’t find anything like this at your fabric store, you can also make the pocket from the exterior fabric. (I’ll be substituting fabric pockets for mesh on my version, since I wasn’t able to locate the color I was looking for this time.)
2. Fold-over elastic (FOE) might be a new supply for many of you. One of the main uses for FOE is cloth diaper making. I made dozens of cloth diapers when my kids were babies, and I learned to love this stuff. Many of the chain fabric stores now have a small diaper making section with pretty FOE colors and designs. I’ve also seen FOE that is meant for making hair ties. My experience with the “hair tie” FOE is that it is not as strong as the “diaper making” FOE. Try to stick with FOE that has visible ribbing (navy blue) and avoid the satin finish FOE (chevron).
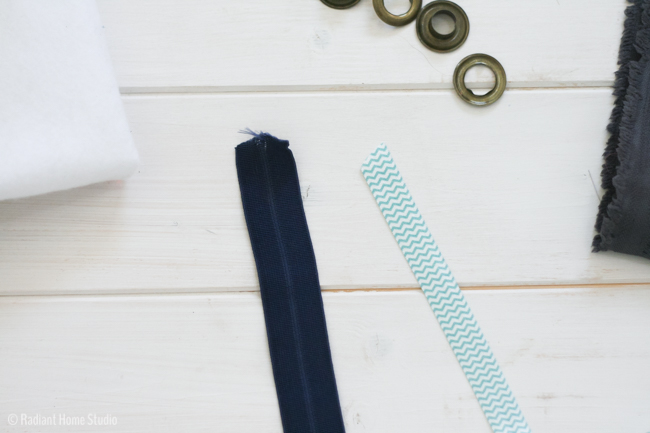
3. You will need to use FOE if you want to mesh pockets. If you decide to substitute solid fabric for mesh, you can also make the pockets with traditional elastic. I’ll show you how to do this as well.
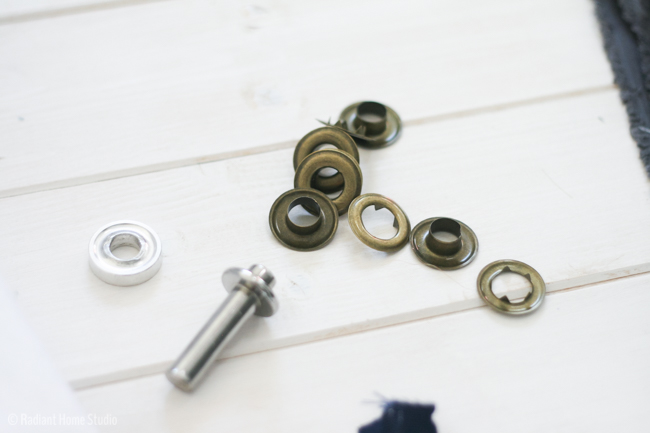
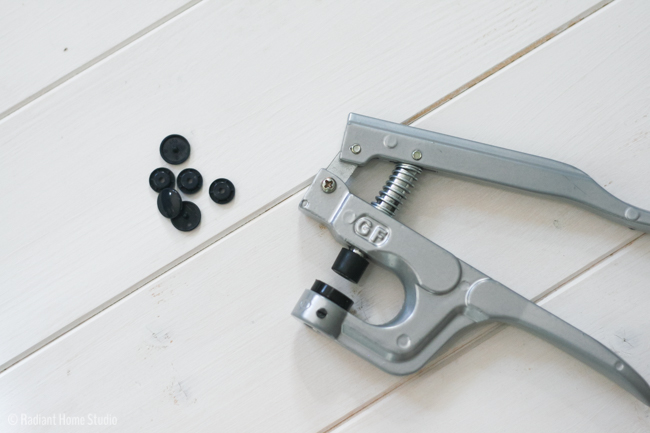
4. Suitable grommets are usually available in the hardware section and near the drapery making supplies in the store. You can also order them here. (Some come with the tools in the kit, but if you don’t have any make sure you get the tools too.)
5. You can use hook-and-loop tape to attach the divider as suggested, or you can substitute snaps if you prefer. I’ll be making this version with plastic snaps (also left over from my diaper making supplies!) so you can see how that option looks.
Interfacing:
If you aren’t familiar with interfacing, the layering process in this pattern might seem scary! The two types of interfacing are necessary to add stability to something like this. You don’t want the sides flopping over!
You’ll need Pellon Peltex, which is a very thick fusible product used to add stability. You’ll also need a layer of fusible fleece, which feels like felt or thin batting with glue on one side, to add some cushion and an extra layer of stability.
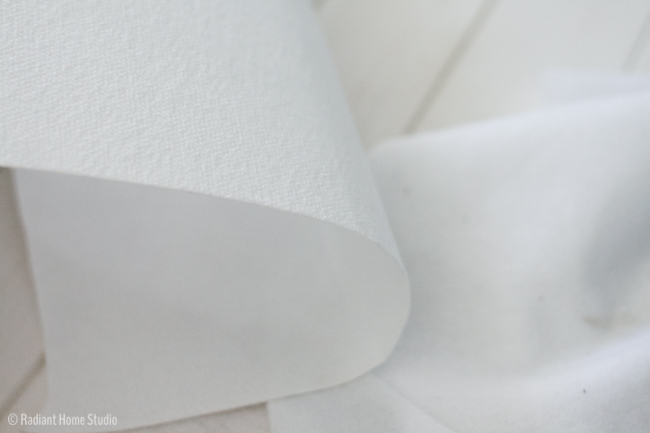
One product that I haven’t tried is Annie’s Soft and Stable (or similar products like Flex Foam). But based on what I have seen, it looks like it would work for this project. If you have used it before, you’ll probably be able to determine if it would make a good substitute for the interfacing I’ve suggested.
Cutting:
You’ll find the cutting list on page 104 of the book. All of the pieces are rectangles, so you won’t need any paper pattern pieces!
The best way to cut large rectangle is with a rotary cutter and mat. If you use scissors, I recommend using chalk or a fabric pen to trace the shapes and make sure they are square before cutting. We haven’t provided a cutting layout, so start by cutting the largest pieces first. Pay attention to the direction of the fabric if you aren’t using a solid color. We have listed the height measurements first. These should be parallel to the selvedge.
If you decide to substitute solid fabric for mesh pockets, you’ll need to cut two of each piece so that the pocket is lined. If you plan to use traditional elastic instead of FOE, add 1/4″ seam allowance to the height of those pieces.
The interfacing and stabilizer measurements are listed together. You will need make the cuts on this list 2x; once for the Peltex and once for the fusible fleece.
There is a mistake on the size of the webbing on page 105! Please cut your webbing to 18″ long, not 9″.
Interfacing:
Match up the stabilizer and interfacing pieces with the corresponding lining pieces. (I realize that it is more common to interface the exterior pieces, but for this project it worked best to add the interfacing to the lining. You don’t want a saggy lining and divider!)
The interfacing pieces are cut 1″ smaller than the corresponding lining pieces. This will eliminate bulk from the seams.
Finish fusing your layers of stabilizer and interfacing. You need to fully fuse the Peltex layer to the wrong sides of the fabric and then place the fusible fleece on top of the Peltex. Pay attention to which side the glue dots are on. Make sure you are pressing firmly and not sliding the iron around on the interfacing. You don’t want to distort the shape. When you finish, you’ll have all of the prep work done so you’ll be ready to start sewing!
Please let me know if you have any more questions! I’ll try to keep up answering comments and questions here and in the FB group.
P.S. If you still need a book, you can get one from Amazon or through C&T!


Even cars without children need organizers! This is great.
I have my fabric, yay! Now I just need time to sew it! Also, we need to get you trying some foam, you don’t know what you’re missing.
So glad you are joining in! I think I haven’t tried the foam products because I really prefer unstructured bags. I love slouchy canvas and leather bags, so the foam always seems like overkill…