• SHOP
  • About
    • About Sara
    • Contact me!
    • Design Collaborations
    • Sewing Collaborations
  • Sewing
    • Sewing Tutorials
    • Things I Made
  • Design Portfolio
  • Blog
  • Nav Social Menu

    • Facebook
    • Instagram
    • Pinterest
Radiant Home Studio | Sewing Patterns & Surface Design

Radiant Home Studio

August 18, 2016 ·

Mom’s Minivan Organizer Sew-along #2

Sew-along

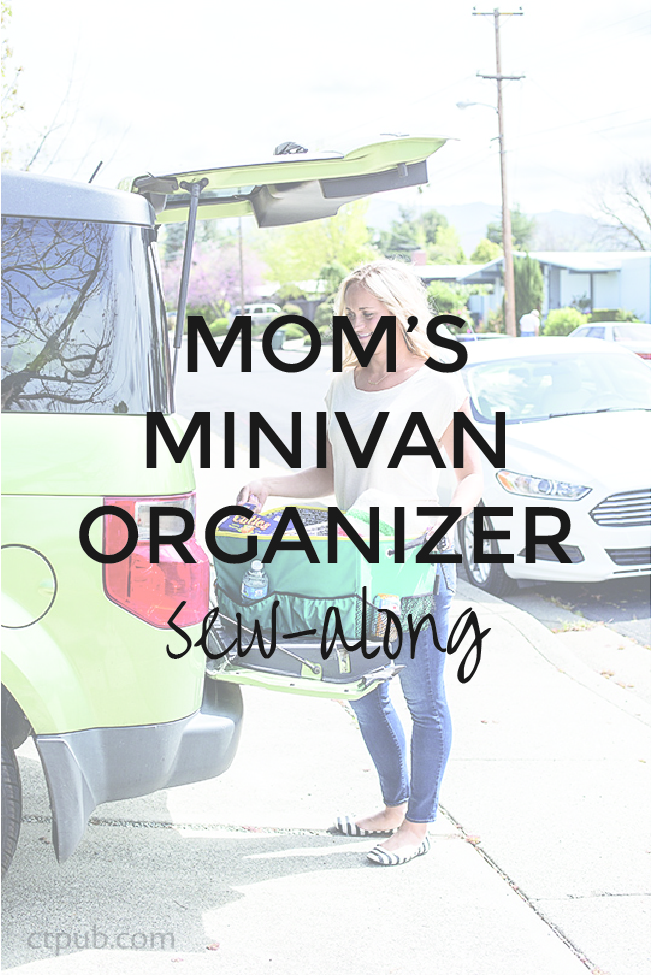
This is the second post for the Mom’s Minivan Organizer from On the Go Bags. If you are just joining, check out the intro post and the first sew-along post.

In this post, we’ll be putting together the pockets and constructing the exterior of the organizer. I have included a helpful video showing how to apply the fold-over elastic (FOE) to the pocket edges.

You can find the full instructions on page 105 of On the Go Bags.

Mom's MInivan Organizer Sew-along | On the Go Bags | Radiant Home Studio

Make the pockets:

The first step is to assemble the pockets. The pocket edges are bound with fold-over elastic (FOE). If you haven’t worked with FOE before, you might want to practice on an extra piece of fabric. FOE is basically elastic binding. It has a fold line down the center, so that it can cleanly wrap around the edges of fabric. (Please ignore my messy stitching…trying to record over my shoulder while sewing made it impossible to see what I was doing!)

Mom's MInivan Organizer Sew-along | Pockets & Elastic | On the Go Bags | Radiant Home Studio

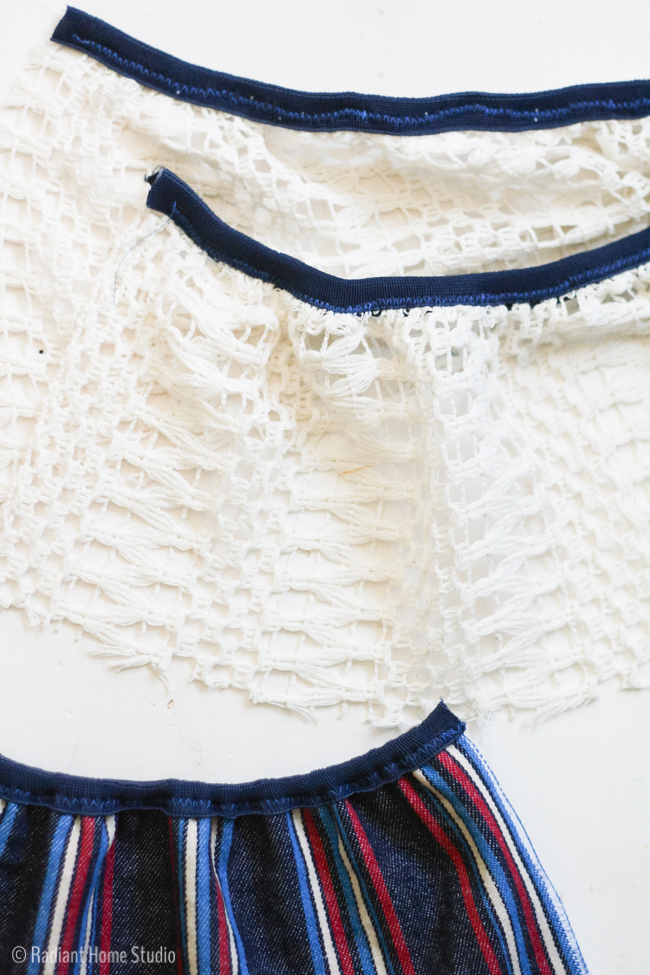
Begin by folding the elastic binding around the top edge of the pocket. (I’m using this crochet fabric instead of mesh…) You need to leave about an inch hanging off the end so that your machine doesn’t “eat” it. Don’t worry about trying to pin it on. Just pinch it together where you plan to start and place it under your presser foot to hold it in place. You need to line up the needle so that your zigzag stitch just reaches over the open edge of the elastic. Whenever you stop sewing to make adjustments, keep the needle down in the elastic.

Begin by sewing a few stitches. Hold your FOE about 2″ from the needle and stretch it tightly (I mean, really, really tight…more than you would for regular elastic. You want the fabric to gather tightly. Just don’t break your needle!). Stretch only the FOE and not the fabric. Pinch it around the fabric at the point you have stretched it and sew that section. Make sure the fabric is tucked in all the way to the fold of the FOE. Sew 3-4″, leave the needle down, and readjust as you go. Keep working to the end of the pocket. Once you get a good rhythm, it goes on very easily!

Mom's MInivan Organizer Sew-along | Pockets & Elastic | On the Go Bags | Radiant Home Studio

Mom's MInivan Organizer Sew-along | Pockets & Elastic | On the Go Bags | Radiant Home Studio

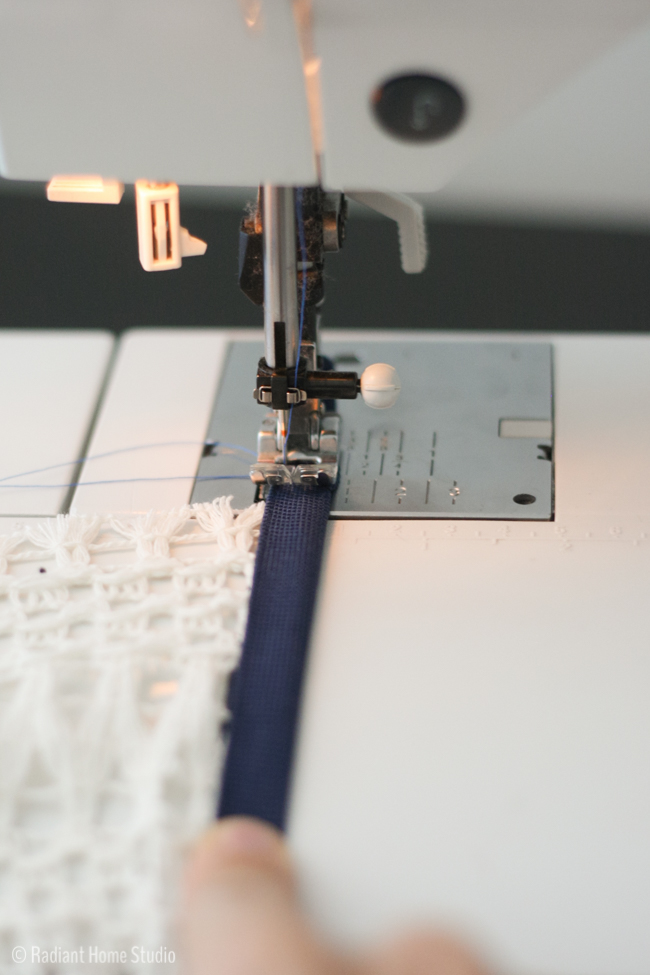
I’ve put together quick video so you can see my method here. It isn’t as precise as the method Mrs. H uses, but I think you can stretch the elastic more and gather the fabric more tightly this way. It might look like I’m pulling the elastic through my machine, but I am just keep ing tension on the elastic. Make sure you don’t pull. Let your machine feed the fabric through at it’s own pace!

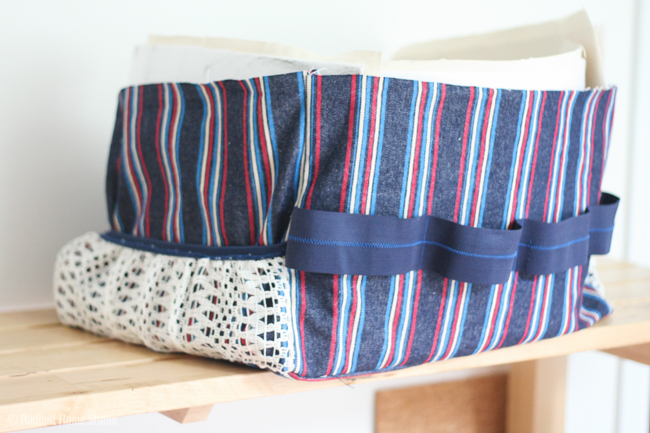
The rest of the pockets are pretty straightforward. You should have 2 mesh pockets and one long, lined pocket. Continue adding pockets as directed on page 106 of the book.

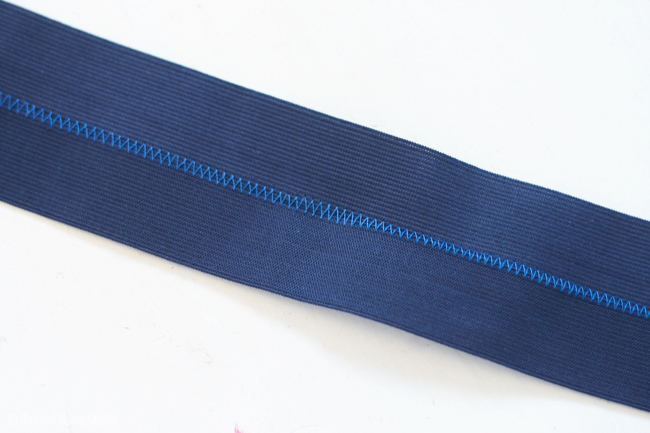
On the 4th side, there are elastic loops for water bottles and similar items. If you don’t need the loops, you can definitely make another pocket instead. I could not locate 2″ elastic in colors, so I have used 2 lengths of 1″ elastic and zigzag stitched them together. (Check the end of the video to see how this looks!) Once you have your elastic prepped, sew it to the 4th side using the diagram in the book for measurements.

Mom's MInivan Organizer Sew-along | Pockets & Elastic | On the Go Bags | Radiant Home Studio

Make the Exterior:

The exterior construction is also very straightforward. The seam allowances are 1/2″. Make sure these are very accurate at the top edge of the bag so that the exterior and lining fit together perfectly when you add the binding. It’s really hard to photograph these steps because the organizer is so big. The illustrations in the book are much more complete than I can capture in a photo.

Mom's MInivan Organizer Sew-along | Pockets & Elastic | On the Go Bags | Radiant Home Studio

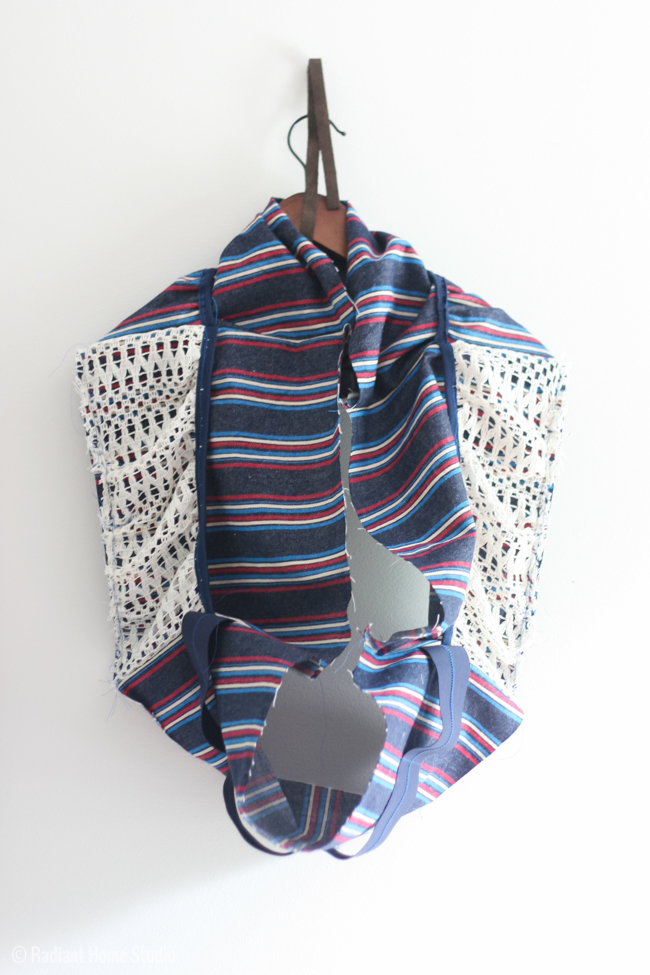
If you have made a few bags before, attaching the bottom piece shouldn’t be too difficult. Pin all of the corners first. If the sides don’t match up in length, you can adjust by making the seam allowances a little bigger or smaller at the corners before you sew. To sew around each corner, leave your needle down in the corner seam, raise the presser foot, and pivot the fabric 90°.

Mom's MInivan Organizer Sew-along | Pockets & Elastic | On the Go Bags | Radiant Home Studio

It’s starting to come together! It’s always encouraging to get to the point where you can see the size and shape of the bag. Next up, we’ll construct the lining and divider!

As always, please let me know if you have any questions!

Previous Post: « Mom’s Minivan Organizer Sew-along #1
Next Post: Mom’s Minivan Organizer Sew-along #3 »

Primary Sidebar

Hello

Welcome! I’m Sara. I share modern home & accessory sewing patterns, and I create surface designs for licensing. I hope you are encouraged to see beauty in small things and are inspired to try new creative projects!

Shop Sewing Patterns


icon icon

icon icon

Newsletter

Sign up to get access to free sewing patterns & resource library!

Find My Work at:


© Copyright Notice

All images and text copyright ©2013-2020 Radiant Home Studio, unless otherwise noted. Please be kind enough to link back to my site and contact me if you would like to use my images.

Disclosure

I am a participant in the Amazon Services LLC Associates Program, an affiliate advertising program designed to provide a means for me to earn fees by linking to Amazon.com and affiliated sites.

  • Disclosures & Copyright
  • About
  • Contact me!
  • Digital Pattern FAQ’s

Resources I Love:


Featured Posts:

  • Declutter Your Sewing Room to Spark Creativity | Radiant Home Studio

    Declutter Your Sewing Space & Supplies to Spark Creativity

Sewing Tutorials

Denim Pocket with Grommets and Denim Shoulder Strap| Tote Bag Upgrade | Radiant Home Studio

Sewing Patterns

Surface Design

home page 1 - radiant home studio design

overflowandco

surface pattern design • modern sewing patterns • welcoming gifts & creative home goods • mom of 7 • beauty in the everyday // also @prettynerdypress

Sara Curtis | Stationery & Pattern Design
Favorite place to add stickers? My kids have them Favorite place to add stickers? My kids have them on their water bottles and laptops. My husband adds them to his bullet journal cover to document his travels each year.

A few months ago, I added some inspirational stickers to the shop, but I don’t think I’ve shared them here! 

#stickershop #wholesalestickers #fairewholesale #fairewintermarket #fairewintermarket2023 #stationerylove #loveyourneighbor #practicekindness
Here’s another new pattern! This periwinkle colo Here’s another new pattern! This periwinkle color has been inspiring some new color palettes and combinations recently. 

Faire Winter Market is open for wholesale orders! I’m looking forward to connecting with more community-focused boutiques. 🙋‍♀️

#fairewholesale #fairewintermarket #fairewintermarket2023 #wholesalegreetingcards #papercampalum #surfacepatterndesigner #artlicensing #fabricdesigner #stationerydesigner
Washi tape is stocked and ready to ship! I started Washi tape is stocked and ready to ship! I started a fresh bullet journal a couple of weeks ago and I love using washi to mark sections. What do you use it for?

Today is insider access to Faire Winter Market! If you are a retailer, my Faire store is linked. And if you know a shop owner that sells stationery or accessories, please share! ☺️

#washitapelove #bulletjournalinspiration #fairewintermarket #fairewintermarket2023 #wholesalestationery #prooftoproduct #papercampalum #prettywashitape #encouragingcards #encouraginggifts
Hello Retailers! I’m participating in Faire Wint Hello Retailers! I’m participating in Faire Winter Market with 10% new orders over $150 from Jan. 24th-26th. (Insiders get access on the 23rd.)

If you are just finding me here…welcome! ☺️

My cozy, fresh cards and gifts are designed to promote connection and provide support. I value building community and finding beauty in the everyday! I love to partner with local shops that share these values. 🛍️

I have greeting cards, washi tape, stickers, and bandanas ready to ship! 📦 

@faire_wholesale #fairewintermarket #fairewintermarket2023 #wholesalegreetingcards #giftboutique #stationeryboutique #greetingcarddesigner #overflowandco #prooftoproduct #papercampalum
It has been months since I had the creative drive It has been months since I had the creative drive to make a new pattern! I had other things to do today, but when you feel the energy return you have to go with it. 

I have several unfinished collections that just needed a pattern or two to complete the set. I’ve finished one today! I’m not sure where this will land in the world, but it feels good to be designing again. 🙌

#artlicensing #fabricdesigner #patternfieldapp #teapattern #cozypattern #stationerydesign #fabricdesigner
I’ve got a few new cards in stock for Spring! Th I’ve got a few new cards in stock for Spring! This card is a favorite - happy flowers and an encouraging message about embracing challenges. 

Retailers - new Spring cards will be available for wholesale at the Faire Winter Market next week! 

@faire_wholesale #fairewintermarket2023 #fairewintermarket #wholesalegreetingcards #greetingcards #stationeryshop #proudofyou #embracingchallenges #lifeissobeautiful #shopsmalldurhamnc #shopsmallraleigh
Load More Follow on Instagram
  • Disclosures & Copyright
  • About
  • Contact me!
  • Digital Pattern FAQ’s

Copyright © 2023 · Sara Curtis // beloved theme