• SHOP
  • About
    • About Sara
    • Contact me!
    • Design Collaborations
    • Sewing Collaborations
  • Sewing
    • Sewing Tutorials
    • Things I Made
  • Design Portfolio
  • Blog
  • Nav Social Menu

    • Facebook
    • Instagram
    • Pinterest
Radiant Home Studio | Sewing Patterns & Surface Design

Radiant Home Studio

February 9, 2015 ·

Patchwork Heart Zipper Pouch Tutorial

Sewing· Tutorials

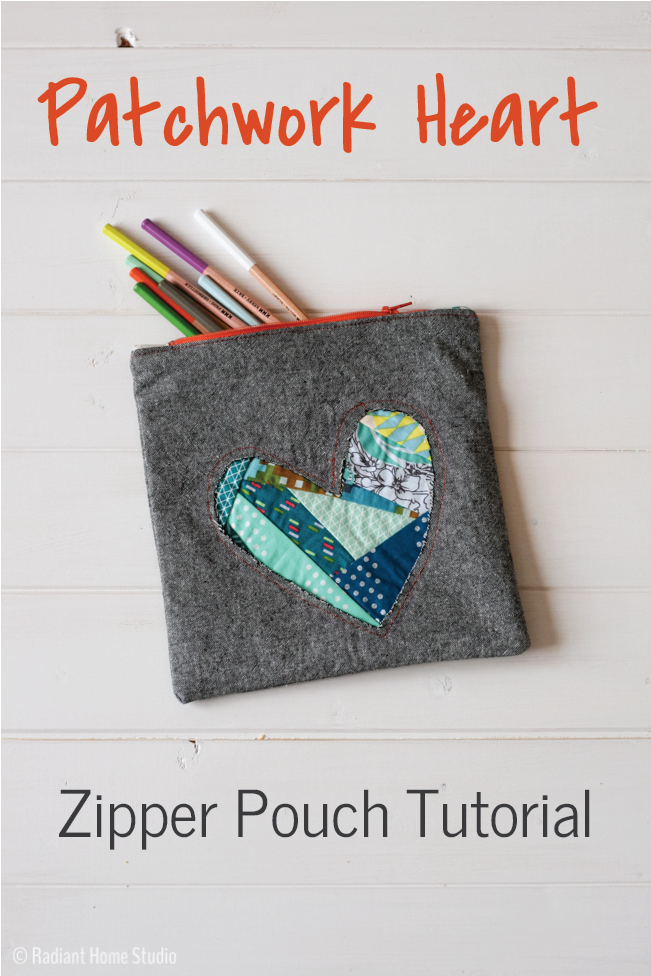
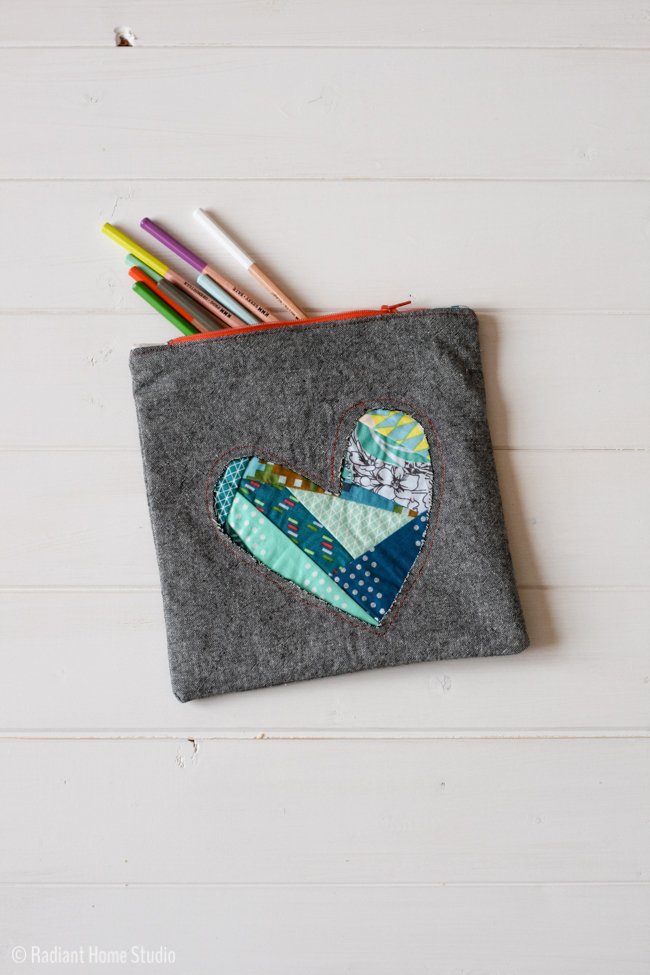
Use up your scraps, learn to make perfect zipper corners, and make a pretty patchwork heart zipper pouch for a friend! Today I wanted to share this fun zipper pouch project. It’s perfect for Valentine’s Day, but you can make it work year round by choosing fabric colors that aren’t so pink and red. I’ve used scraps from the quilt I made a few months ago.

Patchwork Heart Zipper Pouch Tutorial | Radiant Home Studio

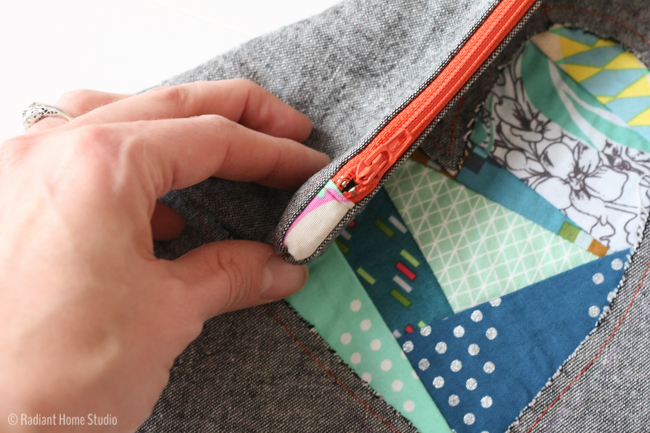
I experimented with the zipper tabs and corners a lot while I was testing the Fairport Purse & Pouch. I’ve worked out my favorite method for installing zippers so that you end up with nice square corners and not a lot of bulk. You can use the patchwork heart zipper pouch tutorial to practice your zipper skills or apply the same method to similar bags.

Patchwork Heart Zipper Pouch Tutorial | Radiant Home Studio

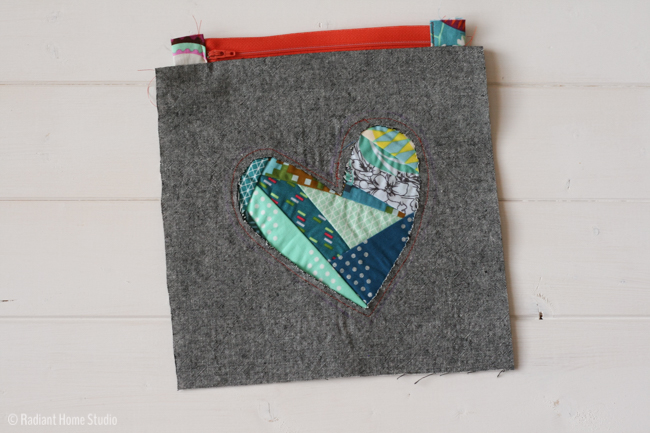
The heart shape is attached using reverse appliqué. The patchwork is attached under the front layer, then the front layer is cut away to reveal the patchwork underneath. If you prefer, you can also use the template to cut a heart from the patchwork and apply it using traditional appliqué methods.

How to Make a Patchwork Heart Zipper Pouch:

Materials: 

• 1/4 yd. of exterior fabric
• 1/4 yd. of lining fabric
• 1/4 yd. of interfacing (I used Pellon 931)
• small scraps of quilting cotton (to make a 7″ square)
• 8″ zipper
• heart template (PDF download)

Seam allowances are 1/2″.

Instructions:

1. Sew your scraps together. My scraps were mostly triangular pieces between 1-3″ wide. There is no wrong way to do this. Just start matching edges and stitching them together. You can trim the seams as you go. You’ll need a patchwork piece that measures roughly 7″ square.

Patchwork Heart Zipper Pouch Tutorial | Radiant Home Studio

2. Cut two 9″ squares from your exterior fabric, and two 9″ squares from your lining fabric. Cut two zipper tabs, 1 1/4″ x 4″.

Patchwork Heart Zipper Pouch Tutorial | Radiant Home Studio

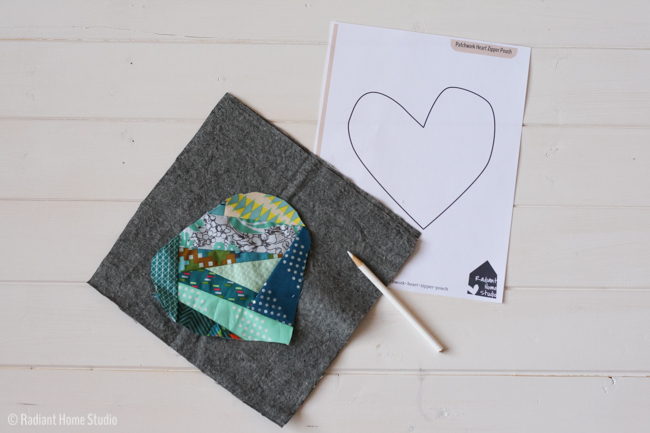
3. Trace the heart template onto the right side of the exterior fabric, and cut a small slit in the middle.

Patchwork Heart Zipper Pouch Tutorial | Radiant Home Studio

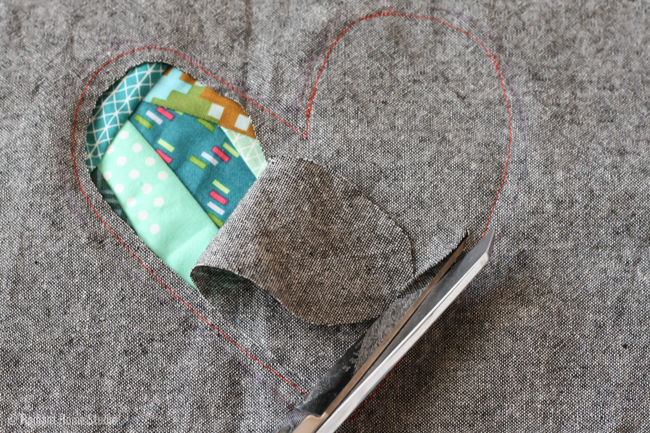
4. Place the wrong side of the exterior fabric on the right side of the patchwork piece, making sure that the patchwork is under the entire heart area. Stitch on the exterior around the heart line through both layers. You can use decorative stitching here if you like.

Patchwork Heart Zipper Pouch Tutorial | Radiant Home Studio

5. Using the slit you cut in the exterior as a starting point, cut out the inside of the heart to reveal the layer of patchwork below. Leave about 1/4″ inside the seam line. Trim the excess patchwork from the back.

Patchwork Heart Zipper Pouch Tutorial | Radiant Home Studio

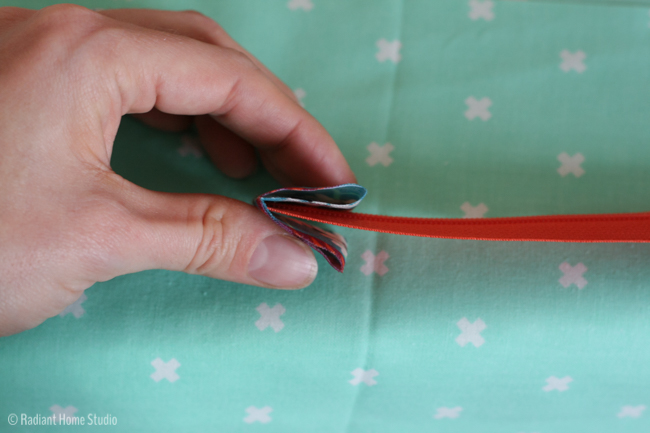
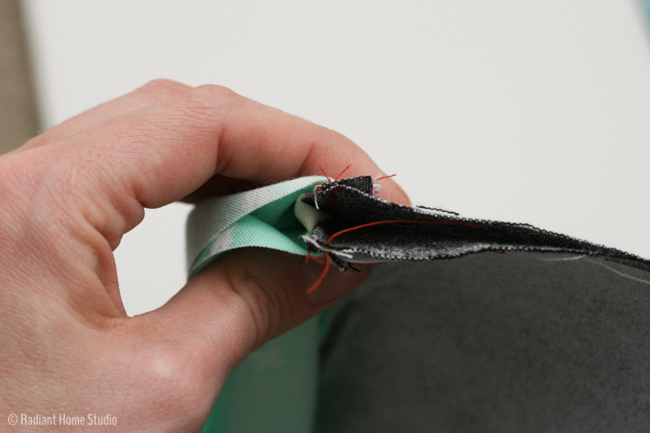
6. First, you need to make 2 zipper tabs. Trim your zipper tape to 8″. Make sure you trim excess from the bottom of the zipper if you need to shorten it. For each tab, fold the short ends of the zipper tab to the center, wrong sides together, and press. Fold in half again and press. Sandwich each end of the zipper into the center crease. Topstitch across the zipper tab on the open end to keep it in place.

Patchwork Heart Zipper Pouch Tutorial | Radiant Home Studio

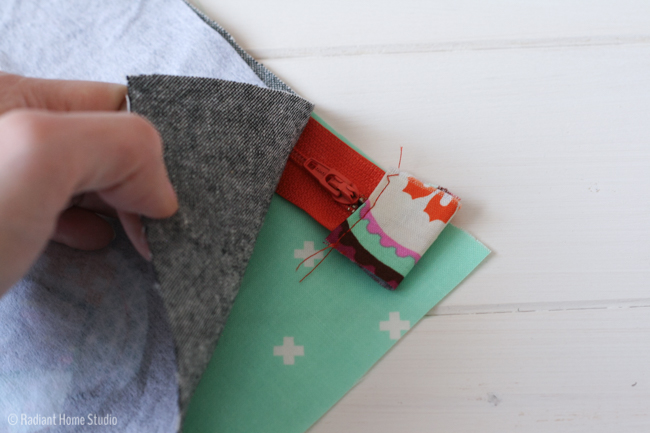
7. Align the top edges of one lining piece and one exterior piece, right sides together. Place the zipper between the layers of fabric, with the zipper teeth facing the exterior and one side of the tape aligned with the top edges. When the zipper is centered there will be an extra 1/2” of fabric on each end of the zipper. Baste, if desired. Using a zipper foot, stitch along the top edge through all three layers and across the tabs. Fold the sides away from the zipper and press to one side.


Patchwork Heart Zipper Pouch Tutorial | Radiant Home Studio

Patchwork Heart Zipper Pouch Tutorial | Radiant Home Studio

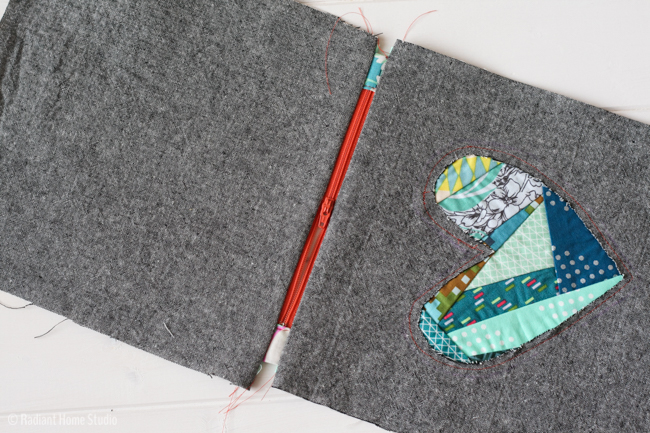
8. Align the top edges of the remaining lining piece and exterior, right sides together. Place the zipper (with the attached pieces folded out of the way) between the layers of fabric, with the zipper teeth facing the exterior and the remaining side of the zipper tape aligned with the top edges. Stitch along the top edge through all three layers. Fold the fabric layers away from the zipper and press to the side. Topstitch along both sides of the zipper

Patchwork Heart Zipper Pouch Tutorial | Radiant Home Studio

Patchwork Heart Zipper Pouch Tutorial | Radiant Home Studio

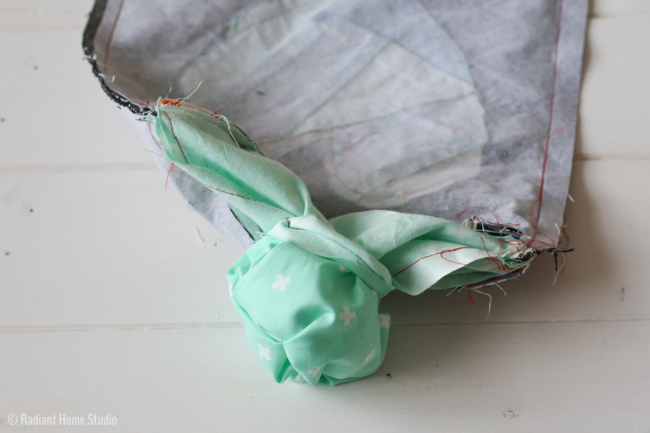
9. Open up the assembled sides and place so that the exterior pieces are right sides together and the lining pieces are right sides together. Make sure the zipper is open at least halfway. Stitch along the long sides, matching the zipper seams. The zipper seam allowances should be folded and pinned toward the exterior. Sew right next to the zipper tabs, but do not sew through them.

Patchwork Heart Zipper Pouch Tutorial | Radiant Home Studio

10. Stitch along the exterior end. Stitch the lining end in 2 sections, leaving a 3-4″ opening in the center. Turn the bag right side out through the opening in the lining. Stitch the lining closed by hand using a ladder stitch. Tuck the lining into the bag and you’re done!

Patchwork Heart Zipper Pouch Tutorial | Radiant Home Studio

Patchwork Heart Zipper Pouch Tutorial | Radiant Home Studio


Previous Post: « Fairport Purse & Pouch Tester Versions
Next Post: Reversible Tote Bag with Strong Straps {Tote Bag Upgrade} »

Reader Interactions

Comments

  1. lysa says

    February 9, 2015 at 11:09 am

    Oh, awesome! I’ve always been fussy about my zipper ends and laboured over them. This is perfect, I’d never seen it done this way before. I look forward to trying it like this!

    • Sara Curtis says

      February 9, 2015 at 11:14 am

      Thank you Lysa! Zipper ends can be tricky. Some people like tabs and some don’t, but this gives a nice clean look.

  2. Krista says

    February 9, 2015 at 2:24 pm

    The fourth photo from the bottom–YES!! It says it all! This is the one I’ve been needing to visualize how these zipper tabs can work. Thank you- 🙂

    • Sara Curtis says

      February 10, 2015 at 9:38 am

      Good to know!

  3. Clémence says

    February 10, 2015 at 4:23 pm

    Absolutely lovely !

    • Sara Curtis says

      February 11, 2015 at 8:16 am

      Thank you!

  4. Ursula @ Home Made by Carmona says

    February 10, 2015 at 8:52 pm

    This is beautiful and such a cute way to store things! Wow, I have a zillion fabric scraps, this is perfect!!
    Thanks so much for linking up with us at The Makers today!

    • Sara Curtis says

      February 11, 2015 at 8:18 am

      Thanks Ursula! I love projects that use up scraps!

  5. Kristina Mattson says

    February 15, 2015 at 10:49 pm

    Zippers scare me! thanks for this super straight forward tutorial. I may actually attempt one again. 🙂

    • Sara Curtis says

      February 16, 2015 at 10:07 am

      Great! Zippers are my favorite! It just takes a little practice and you’ll be putting them in everything 🙂

  6. Cathy says

    November 29, 2015 at 6:11 am

    I love zippers, I would rather put a zipper in then put button holes. Great way to use your scraps thank you. I found a circle I made ages ago it is crochet so I am going to make it into a small purse with a zip.

    • Sara Curtis says

      November 30, 2015 at 6:56 am

      Sounds like a great idea! Thanks for sharing.

      Sara

Primary Sidebar

Hello

Welcome! I’m Sara. I share modern home & accessory sewing patterns, and I create surface designs for licensing. I hope you are encouraged to see beauty in small things and are inspired to try new creative projects!

Shop Sewing Patterns


icon icon

icon icon

Newsletter

Sign up to get access to free sewing patterns & resource library!

Find My Work at:


© Copyright Notice

All images and text copyright ©2013-2020 Radiant Home Studio, unless otherwise noted. Please be kind enough to link back to my site and contact me if you would like to use my images.

Disclosure

I am a participant in the Amazon Services LLC Associates Program, an affiliate advertising program designed to provide a means for me to earn fees by linking to Amazon.com and affiliated sites.

  • Disclosures & Copyright
  • About
  • Contact me!
  • Digital Pattern FAQ’s

Resources I Love:


Featured Posts:

  • How to Make A Waxed Canvas Gift Pouch | Radiant Home Studio

    How to Make a Waxed Canvas Gift Pouch

Sewing Tutorials

Denim Pocket with Grommets and Denim Shoulder Strap| Tote Bag Upgrade | Radiant Home Studio

Sewing Patterns

Surface Design

home page 1 - radiant home studio design
Sara Curtis | Stationery & Pattern Design

overflowandco

🪴Shop welcoming greeting cards, stationery, home goods, & gifts in NC
☕️ Cozy, fresh, encouraging design
💌 Email for wholesale, licensing & collabs👇🏻

I’ve been spending my creative energy gardening I’ve been spending my creative energy gardening this year. The previous owner planted gorgeous peonies that we get to enjoy every year. This year, the rain came at just the right time and they are thriving. #peonies #peoniesofinstagram #flowergarden #flowergardensofinstagram
I still have sewing patterns in my Etsy shop! The I still have sewing patterns in my Etsy shop! The potholder pattern always gets popular before the holidays because people love to make beautiful custom gifts for their friends and family. 

#sewersgonnasew #sewingproject #sewinggifts #diygifts #christmassewing #giftsforfriends #handmadegifts #handmadegiftsarethebest #etsyshop #sewingpattern
I’ve finished my Masters in Autism Studies! I’ I’ve finished my Masters in Autism Studies! I’m providing parent coaching, education and consultation services to families. If you know anyone that might benefit from my services, please send them my way! @autistickind
It’s been a while, but I’m taking my products It’s been a while, but I’m taking my products to a market in April! If you’re in the Triangle area, stop by 🌸Petals & Play: a Celebration of Neurodiversity on April 20th. #petalsandplaydurham @hopecreekacademy for more details…

#durhamevents #raleighnc #durhamnc #chapelhillnc #artisanmarket #stationeryshop
Stock up on encouraging greeting cards! 50% off ev Stock up on encouraging greeting cards! 50% off everything this week when you support my favorite nonprofit @hopecreekacademy 🙌

DM me for the code if you donate!

#givingtuesday2023 #giveback #shoplocal #shopsmall #shoplocaldurhamnc #shopsmallraleigh #stationeryshop #handmadegiftshop #coffeecard #friendshipgift #greetingcardshop
Grab a bunch of stocking stuffers for up to 50% of Grab a bunch of stocking stuffers for up to 50% off! This year I’m supporting @hopecreekacademy - a nonprofit school for neurodivergent students. This school has been a lifeline for our family this year and Eve been volunteering all we can to help them meet the needs of the students. When you donate to their fundraiser, l’ll send you a coupon code for 50% off your purchase of everything in my shop! 

#shopsmalldurham #shopsmallnc #shoplocalnc #stationeryshop #sewingpatternshop #washitapelove #washitapeshop #stockingstuffers #supportnonprofits #giveback #givingtuesday2023
Load More Follow on Instagram
  • Disclosures & Copyright
  • About
  • Contact me!
  • Digital Pattern FAQ’s

Copyright © 2025 · Sara Curtis // beloved theme