• SHOP
  • About
    • About Sara
    • Contact me!
    • Design Collaborations
    • Sewing Collaborations
  • Sewing
    • Sewing Tutorials
    • Things I Made
  • Design Portfolio
  • Blog
  • Nav Social Menu

    • Facebook
    • Instagram
    • Pinterest
Radiant Home Studio | Sewing Patterns & Surface Design

Radiant Home Studio

December 23, 2013 ·

Scoop Neck Hopscotch Shirt

Sewing

Last year, I bought my first Oliver + S pattern, the Hopscotch Skirt, Top, + Dress pattern. The price seemed a bit high compared to the $1 patterns I was getting on sale at the craft store, but it has been worth every penny!

I’ve made at least 6 garments from the pattern so far, and the top is so versatile that I see myself using it many more times. I certainly can’t think of any mass marketed patterns that I have used this much!

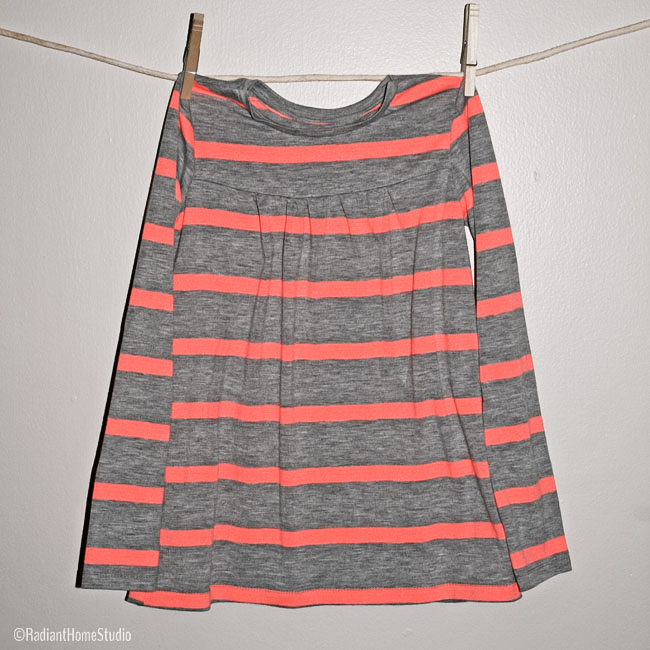
Though the top is very cute, I don’t want every shirt in the girls’ drawers to be identical, so I like to make little modifications to personalize them. The Hopscotch top has a crossover v-neck. Here I have modified it to have a basic scoop neck.

Scoop Neck Hopscotch Top Tutorial | Radiant Home Studio

Make a Scoop Neck Hopscotch Shirt:

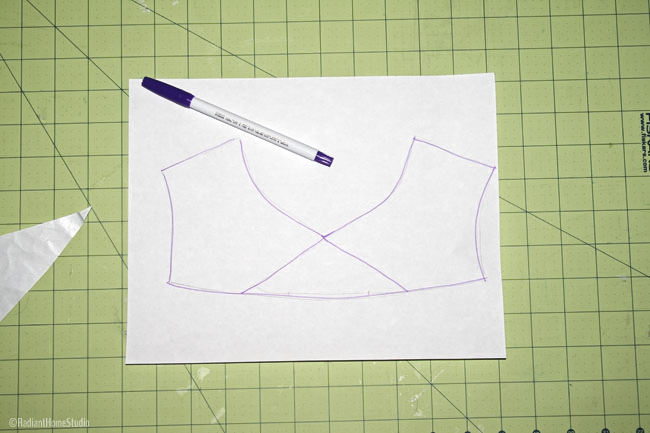
I traced the yoke piece one direction, then flipped it over, matched the pattern markings and traced it the other direction.

Scoop Neck Hopscotch Top Tutorial | Radiant Home Studio

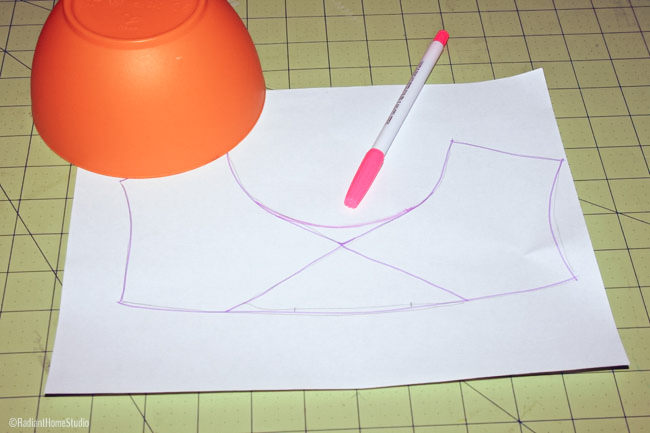
To add a curve in the neckline, I used a bowl (it was the closest thing in the room) to draw a clean, even neckline.

Scoop Neck Hopscotch Top Tutorial | Radiant Home Studio

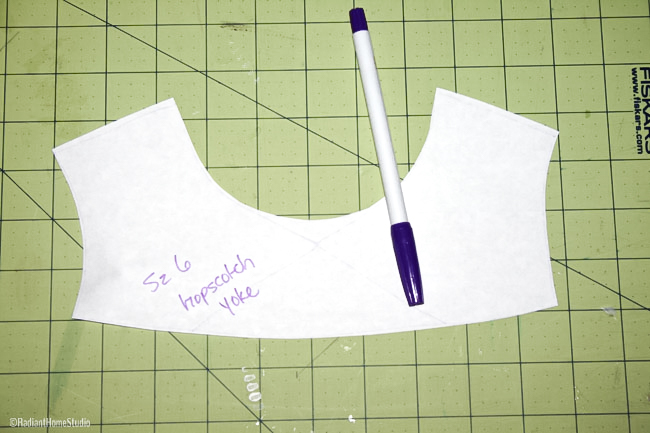
I cut out my pattern piece, and labeled it so that I can use it again later. It looks slightly uneven here. If you want to make sure the piece is symmetrical, just fold it in half and trim the excess bits off.

(And please don’t mind fabric ink all over my cutting board…)

I followed the pattern directions, adding the new piece to the gathered shirt front.

Scoop Neck Hopscotch Top Tutorial | Radiant Home Studio

The original neckband for the pattern is one piece. I used the neckband piece to cut my pieces the correct width. I measured each piece along the yoke neckline and then I cut them 2 inches shorter than that in length. Just as in the pattern, the neck band piece will need to be stretched slightly as you sew in order to fit properly.

I should also add that I was slightly concerned that the neckband might not fit over her head since it had been shortened a little. I also trimmed the back neckline down about 1/2″ (using the same “bowl method” so that the shoulder width remains the same) and I am happy to report that she had no problems getting it on!

Scoop Neck Hopscotch Top Tutorial | Radiant Home Studio

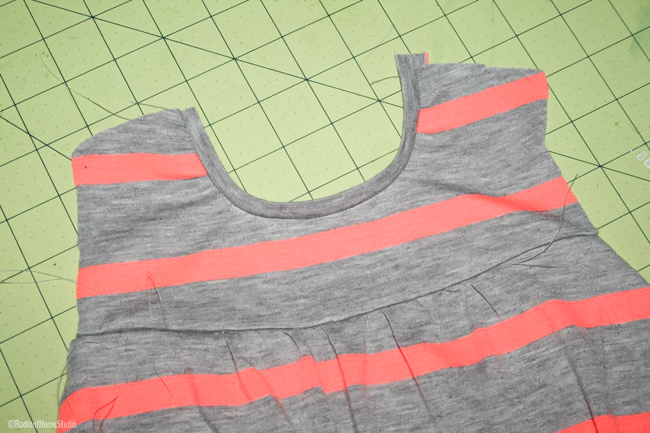
After both neckband pieces are attached, the shoulder seams can be matched and stitched. The rest can be finished according to the pattern directions.

Scoop Neck Hopscotch Top Tutorial | Radiant Home Studio

I highly recommend this pattern to try if you want to venture into sewing with stretch fabrics. It is very simple and can be finished nicely without a serger. (I have one and don’t even use it for this pattern.) You will need a double stretch needle, which can be easily found at any sewing shop, along with the helpful directions for pressing and stabilizing that are provided in the pattern instructions.

That’s it—an easy scoop neck Hopscotch shirt or dress modification!

Previous Post: « Sewing Simple Curtains
Next Post: Another Finished Water Bottle Tote »

Reader Interactions

Comments

  1. Annette says

    April 1, 2015 at 5:44 am

    Thanks for this idea. I will have to try it. I love finding ways to customise.

    • Sara Curtis says

      April 1, 2015 at 7:22 am

      Thanks for stopping by! I’m always adding to patterns or changing little things. That’s the great thing about sewing, right? You can make exactly what you want 🙂

  2. Murry says

    April 21, 2016 at 4:38 pm

    One of my favorite patterns too–Really like your scoop neck version and well done tute! Thanks so much

    • Sara Curtis says

      April 22, 2016 at 2:39 pm

      Thanks!

Primary Sidebar

Hello

Welcome! I’m Sara. I share modern home & accessory sewing patterns, and I create surface designs for licensing. I hope you are encouraged to see beauty in small things and are inspired to try new creative projects!

Shop Sewing Patterns


icon icon

icon icon

Newsletter

Sign up to get access to free sewing patterns & resource library!

Find My Work at:


© Copyright Notice

All images and text copyright ©2013-2020 Radiant Home Studio, unless otherwise noted. Please be kind enough to link back to my site and contact me if you would like to use my images.

Disclosure

I am a participant in the Amazon Services LLC Associates Program, an affiliate advertising program designed to provide a means for me to earn fees by linking to Amazon.com and affiliated sites.

  • Disclosures & Copyright
  • About
  • Contact me!
  • Digital Pattern FAQ’s

Resources I Love:


Featured Posts:

  • How to Make A Waxed Canvas Gift Pouch | Radiant Home Studio

    How to Make a Waxed Canvas Gift Pouch

Sewing Tutorials

Denim Pocket with Grommets and Denim Shoulder Strap| Tote Bag Upgrade | Radiant Home Studio

Sewing Patterns

Surface Design

home page 1 - radiant home studio design

overflowandco

🪴Shop welcoming greeting cards, stationery, home goods, & gifts in NC
☕️ Cozy, fresh, encouraging design
💌 Email for wholesale, licensing & collabs👇🏻

Sara Curtis | Stationery & Pattern Design
Beautiful day in @burlingtondowntown at @frontstm Beautiful day in @burlingtondowntown  at @frontstmarket! 

We had a relaxing day visiting with customers, old friends, our neighbor @bijouxbycatherine and her friend Stephanie, and drinking coffee from @theblendandco ☀️

#smallbusinessnc #burlingtondowntown #burlingtonnc #frontstreetmarket #stationeryshop #greetingcards
It’s almost Mother’s Day! I’m shipping out r It’s almost Mother’s Day! I’m shipping out retail and wholesale orders immediately, so you still have time to order. ☺️

Enjoy this beautiful Spring day! 🌸 ☀️ 🌳 

#mothersday #mothersdaycards #stationeryaddict #greetingcarddesigner
It’s almost Mother’s Day! Makers - a new set o It’s almost Mother’s Day! Makers - a new set of potholders is a quick and easy handmade gift that you can personalize to match a kitchen. Fabric by @ash_cascade_design and @cottonandsteel

#mothersday #mothersdaygiftideas #diyprojects #patchwork #quiltedgifts #handmademothersdaygifts #sewing
I just sent out some bandanas today! These always I just sent out some bandanas today! These always sell really well at markets, but I don’t think I share them enough here. I expect to sell out at summer markets and won’t be restocking these exact designs! 

#bandanastyle #bandanascarf #mothersdaygift #hairscarf #screenprintedtextiles #shopdurhamnc #shopsmallraleigh #designerbandanas
Spring bouquet inspired by the Farmer’s Market! Spring bouquet inspired by the Farmer’s Market! 👩‍🌾💐

I’ve been fighting to find my creative spark in the midst of personal struggle. This is one of the few things I’ve managed to create from fresh doodles all the way to pattern. 

As always, I’m looking for beauty in the small things, but it has been much harder this past year. I miss the creative flow that comes from easy days and a clear head. 

I’m learning to process loss (of many communities, of my identity, of plans, and more) and I’m grateful for people like @kjramseywrites @sarahbsouthern @katecbowler and @hilaryrushford that make a place for loss and hope to coexist. 😘

#lifeissobeautifullifeissohard #creativespark #hopewhileyoucope
Snippets of my week! #marchmeetthemaker #marchmeet Snippets of my week! #marchmeetthemaker #marchmeetthemaker2023 #snippetsaturday 

Music @and.y.morris from TT
Load More Follow on Instagram
  • Disclosures & Copyright
  • About
  • Contact me!
  • Digital Pattern FAQ’s

Copyright © 2023 · Sara Curtis // beloved theme