• SHOP
  • About
    • About Sara
    • Contact me!
    • Design Collaborations
    • Sewing Collaborations
  • Sewing
    • Sewing Tutorials
    • Things I Made
  • Design Portfolio
  • Blog
  • Nav Social Menu

    • Facebook
    • Instagram
    • Pinterest
Radiant Home Studio

Radiant Home Studio

November 11, 2013 ·

Sewing Tote Bag Straps from Fabric

Sewing Tips· Tutorials

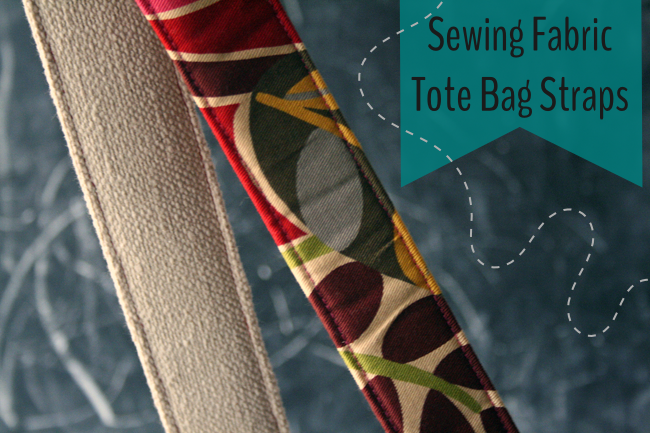
In my Water Bottle Tote pattern, I suggest using pre-made cotton or nylon webbing as bag straps. But what if you don’t have any on hand or you can’t find the right color to coordinate with your fabric?

Sewing tote bag straps from fabric is a simple change you can make to add more personality and color to your bag!  Usually the fabric store choices for trim and ribbon is limited, but I’ll show you how you can use any quilting cotton or home decorating fabric to make custom tote bag straps.

You can use these directions to replace nylon webbing on any bag pattern — just adjust the measurements to fit your pattern.

Sewing Fabric Tote Bag Strap Tutorial | Radiant Home Studio

First, decide how wide your straps will be. My tote bag straps are 1.5 inches wide, so I used that as a starting point.

Next, multiply that number by 4 — this is how wide you want to cut your fabric. I cut 6 inch wide strips of fabric.

Cutting Fabric Tote Bag Straps | Radiant Home Studio

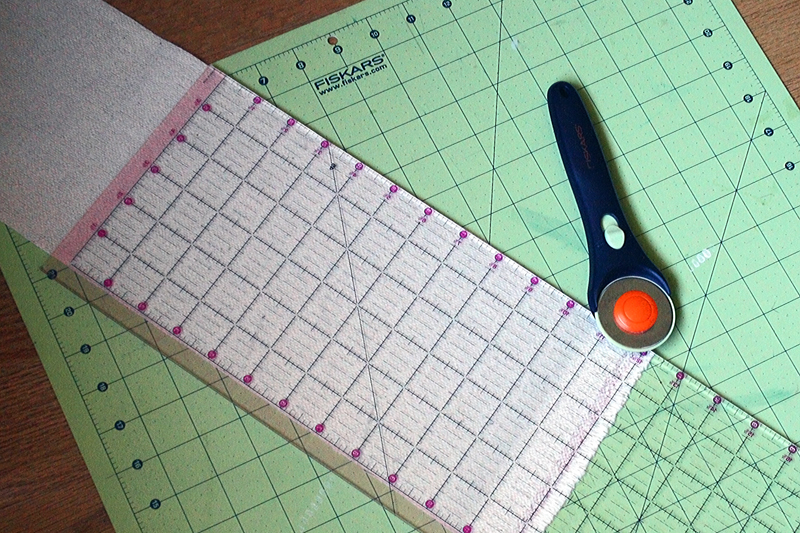
The Water Bottle Tote strap is 90 inches long. I didn’t want to use up yards of fabric by trying to cut a 90 inch strip, and another seam can be easily hidden on the bottom of the bag. In order to conserve fabric, I cut 6″ across the width of the fabric and joined the strips together. Most quilting fabric is 44-45 inches wide, so two 6 inch strips cut across the width were just the right length for tote bag straps.

You can join the two strips together by placing them right sides together and stitching across one short end of the fabrics (the seam allowance isn’t very important here). Press the seam open and trim the bulk away.

Do you want you straps to be more durable? Choose a fusible interfacing to add strength and stability to your fabric. (This article is a great resource to help you decide which interfacing you need.) Generally, lighter weight fabrics will need a heavier weight interfacing. Thicker home decor fabrics or specialty fabrics like faux leather may not need interfacing at all.

Interfacing Fabric Tote Bag Straps | Radiant Home Studio

Apply interfacing according to the manufacturer directions. (They are usually included on a sheet of paper with cut interfacing or on the packaging if you buy it pre-cut. So don’t throw them away!)

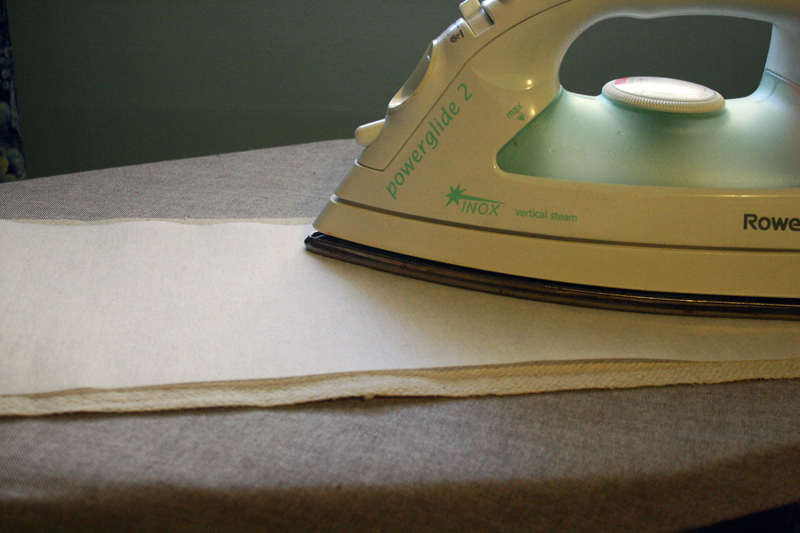
Next, fold your fabric strip in half, wrong sides together, and press along the fold.

Pressing Fabric Tote Bag Straps | Radiant Home Studio

Open the fabric back up, and fold the raw edges in until they meet at the fold. Press again.

Folding Fabric Tote Bag Straps | Radiant Home Studio

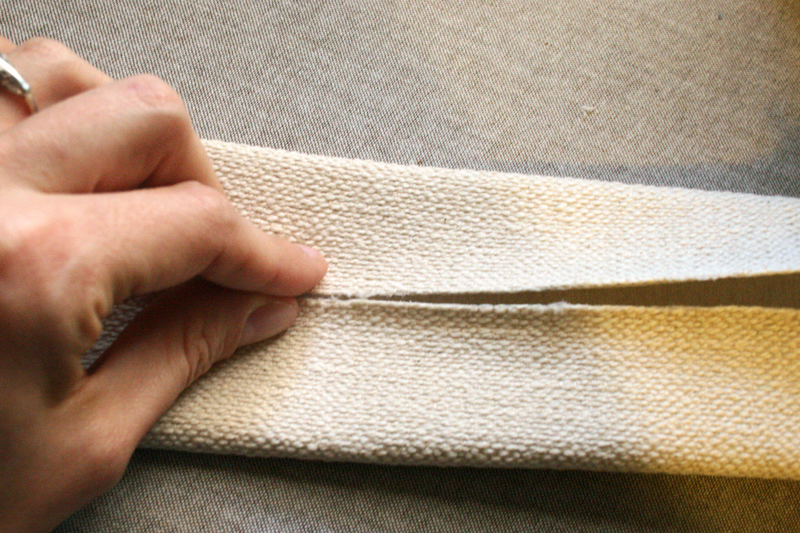
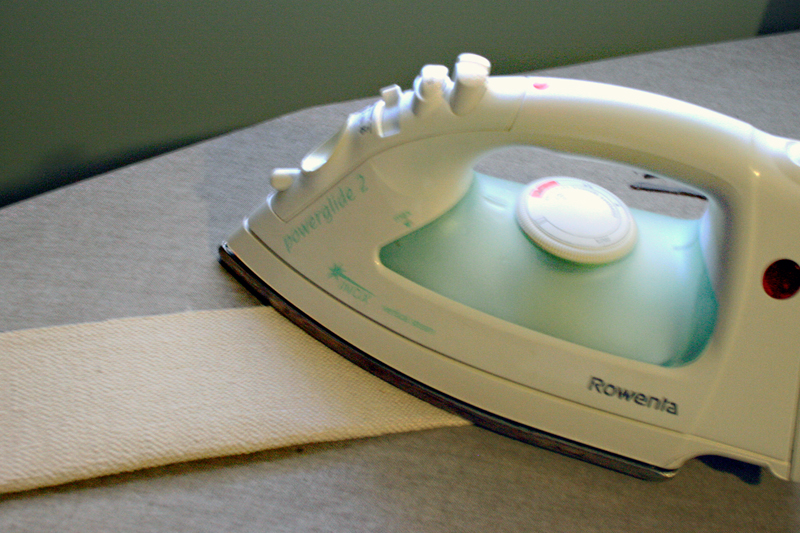
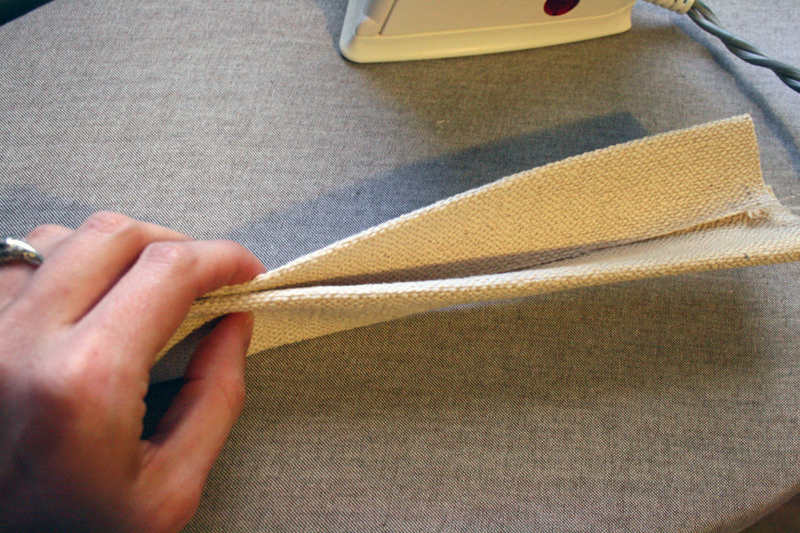
You should have 3 equally spaced folds and four equal sections. Fold the raw edges to the center, and then fold the center seam so that all of the raw edges are enclosed.

Folding Fabric Tote Bag Straps| Radiant Home Studio

To finish, stitch along the edges (about 1/8 inch from each edge). Several layers of  fabric plus interfacing will be pretty thick, so choose a needle for heavy-weight fabrics and make sure your stitch length is set to a slightly longer stitch.

Sewing Fabric Tote Bag Straps | Radiant Home Studio

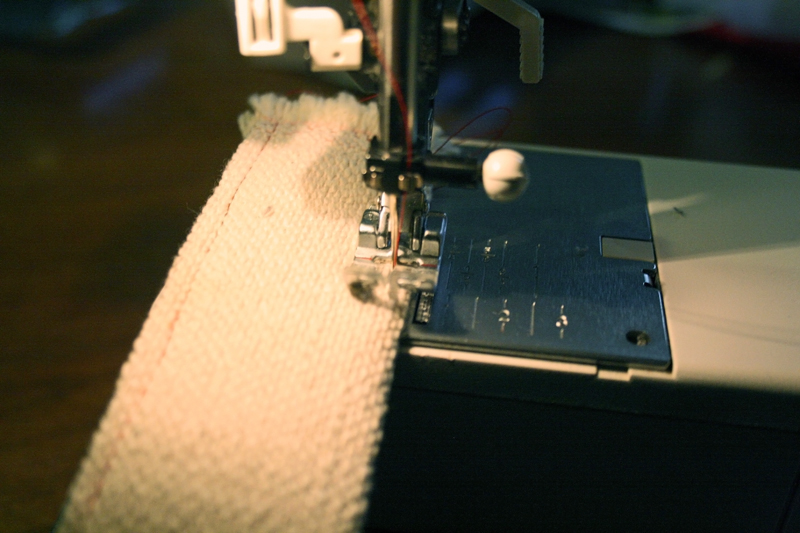
For the Water Bottle Tote, I recommend using using your longest machine stitch to baste the layers together first. You will be using another line of stitching to attach it to the bag, and too many lines of stitching will look messy and unprofessional.

Fabric Tote Bag Straps | Radiant Home Studio

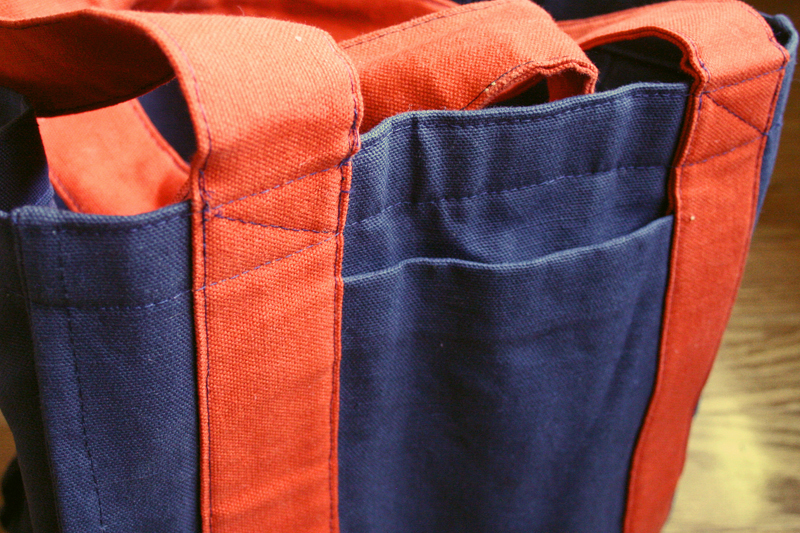
To add this orange strap, I basted the strap together, then attached it to the bag as directed in the pattern. I carefully removed the basting stitches so that only one line of stitching was visible on the straps.

Try making your straps with a patterned or textured fabric to add some style and interest to your bags. I’d love to see your finished tote bags with custom made straps! Add a link to your blog or photo to share what you have made!

Follow my blog with Bloglovin

Previous Post: « Introducing: The Water Bottle Tote Pattern
Next Post: Learn Sewing Terms: Download A Free Sewing Glossary! »

Reader Interactions

Comments

  1. Sasha says

    May 9, 2014 at 7:12 pm

    I usually use wide cotton tape for my handles as I found making fabric ones was a fiddle! Your intructions make it look more simpler now and so I might have to give them a try again. Thanks, Sasha 🙂

    • Sara Curtis says

      May 10, 2014 at 9:54 am

      I like using pre-made straps as well, but sometimes it’s too much trouble to gather all the kids and get to the store. That’s when I make my own!

Primary Sidebar

Hello

Welcome! I’m Sara. I share modern home & accessory sewing patterns, and I create surface designs for licensing. I hope you are encouraged to see beauty in small things and are inspired to try new creative projects!

Shop Sewing Patterns


icon icon

icon icon

Newsletter

Sign up to get access to free sewing patterns & resource library!

Find My Work at:


© Copyright Notice

All images and text copyright ©2013-2020 Radiant Home Studio, unless otherwise noted. Please be kind enough to link back to my site and contact me if you would like to use my images.

Disclosure

I am a participant in the Amazon Services LLC Associates Program, an affiliate advertising program designed to provide a means for me to earn fees by linking to Amazon.com and affiliated sites.

Footer

Sign up to get access to free sewing patterns & resource library!

Favorite Adobe Illustrator tool? I love recoloring Favorite Adobe Illustrator tool? I love recoloring patterns. I probably spend way too much time with the recolor tool and not enough time making new patterns. 🤷🏻‍♀️

Last day to join the Immersion Course! If you have ever dreamed of making beautiful designs, Bonnie can teach you how to get what’s in your head into the computer and then how to make money from licensing your designs to companies for use on products. 

As a member of Bonnie’s support team, I’ll be there to make sure you don’t feel lost. There’s room for you...as Bonnie often reminds us!

#surfacepatterndesign #surfacepatterndesigner #surfacepatterncommunity #printandpattern #radianthomestudiopatterns #floralpattern #alltheflowers #artlicensing #flowersfordays #mutedflorals
Look what just came in the mail! Notebooks! This w Look what just came in the mail! Notebooks! This was a test batch to check quality and I’m thoroughly impressed.

I’ll be listing extra in the shop soon, but first dibs go to anyone that signs up for the Immersion Course using my link. I’ll be sending a small gift package and scheduling a course success/ coaching call with you!

Just a reminder that the last day to enroll in Immersion is tomorrow! If you are like me and overthink things until the last day, you are not alone. 

I know it’s a huge decision. I have an Immersion stories highlight if you want to know more or go to my profile to find a link to the info page. Message me all your questions! 

#immersioncourse #immersioncourse2021 #designernotebooks #learntodesign #learnillustrator #surfacepatterndesigner
Just got an order of stickers in! I’m debating a Just got an order of stickers in! I’m debating about putting them in the shop as a separate product or adding them to orders. I think I need a few more to make a pretty coordinating set! 🌹

Reminder: there’s still a couple more days to enroll in the Surface Pattern Design Immersion Course or the free mini-course from Bonnie! Links in my profile...as always. Keep messaging with questions! ☺️
It’s been a minute since I showed my face here! It’s been a minute since I showed my face here! ☺️

I wanted to get a little personal today. If you’re here for sewing & crafty stuff...stay tuned. I’m not abandoning you. 🙂 If you saw my stories last week, you may have learned that I’m deep in design mode for a few weeks, working with @bonniechristine on the Surface Pattern Design Immersion Course.

When I discovered Spoonflower (about 8 years ago!) and realized I could create my own fabric, I had this far off “maybe someday” dream to create a collection of designs for a fabric company.

I spent many years learning bits and pieces of design and business skills. But a couple of years ago I got more serious about making my dream a reality. 

Last year, I made an investment in myself and I joined the Immersion Course with Bonnie Christine. It was truly the community support and confidence that I gained that propelled me forward this year. Just a few weeks after Immersion ended I signed a licensing deal for children’s wall art with Oopsy Daisy and a few months after that...I signed a contract with a fabric company!

You guys...Bonnie is SO genuine and generous in everything she does. ❤️ It spills over into this beautiful and inspiring community that cheers each other on every step of the way. 

This year, Bonnie invited me to join her support team to help encourage new students through the course and provide technical support for all those tricky Illustrator issues. 🙌🏻

This course is for anyone that wants to invest in their creative career. My “wildest dream” came true this year. I’m actually feeling a bit lost right now because I need a bigger dream!

Whether you have a few years of experience like I did when I joined or you have never used design software...Bonnie will walk you through the ENTIRE process. This is like a college-level course on design and creative business. We have many older students starting a second career, people that just graduated design school but don’t know how to practically start an art-based business, and people from dozens of countries around the world. It’s a beautiful, diverse community filled with people taking steps toward their creative business goals.

More below...
We had our first day of fake spring yesterday. It We had our first day of fake spring yesterday. It was warm for one day and it’s back to being cold. 🤷🏻‍♀️

I always draw flowers anyway. I’m hoping some of the local botanical gardens open back up this year. We have some really great inspiration nearby and flowers will start blooming soon!

It’s the little bits of beauty that inspire me the most. What are you looking forward to this Spring?
Just a reminder that I have this heart garland tut Just a reminder that I have this heart garland tutorial linked in my profile if you want to make some happy Valentine’s decor this week.

My girls are origami experts, so we worked together on these video tutorials last year. It’s a good family project for older kids! 💕

#heartcrafts #valentinesdecor #valentinecrafts #mycolorfulhome #cozymodernvibe #diyvalentinesdecor
This another favorite pattern of mine. As my style This another favorite pattern of mine. As my style has developed, I’ve embraced the imperfect lines and tend to work with graphic, but organic shapes. I like unexpected little pops of color or shapes that emerge from layering.

My iPad is at the fix-it shop, so of course, I’m feeling inspired today. ☺️ Maybe I should try some actual sketching and planning on paper with a pencil...😜

#radianthomestudiodesign #fabricdesign #surfacepatterndesign #surfacepatterncommunity #surfacepatternlife #licensingartist #artlicensing
Remember last year, the girls and I made this cute Remember last year, the girls and I made this cute origami heart garland tutorial? ❤️💙💛🧡

I don’t usually decorate with themed stuff, but these are fun to make and add some joyful, non-tacky hearts around the house for Valentine’s Day. 💕 I popped the link in my profile buttons. There are videos in the blog posts too. 

Also, I shared some personal stuff in my stories today!

#origamigarland #origamiproject #valentinesdecor #valentinesgarland #valentinescrafts #origamiheart #origamihearts #papercrafts #heartcraft #happyhearts #joyfulhome #mycolorfulhome
Follow on Instagram
  • Disclosures & Copyright
  • About
  • Contact me!
  • Digital Pattern FAQ’s

Copyright © 2021 · Sara Curtis // beloved theme