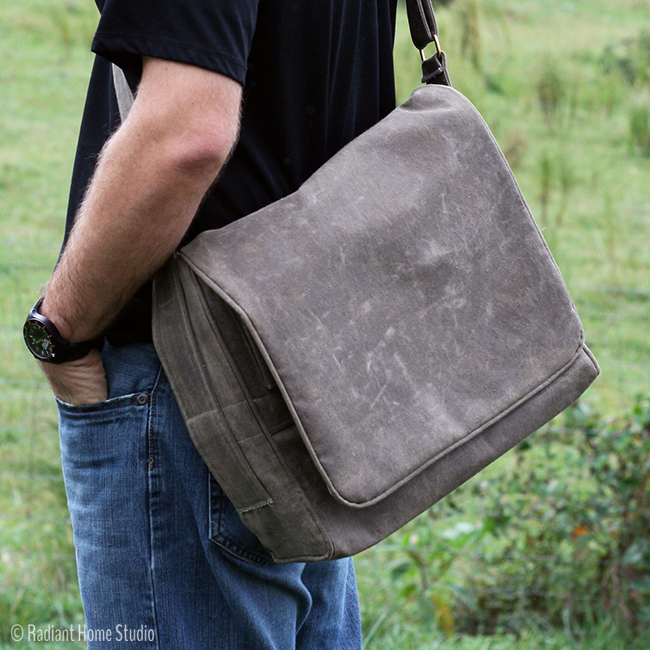
Last week I sewed a men’s messenger bag with waxed canvas fabric. Waxed canvas has the look of aged leather, but is much easier to sew. It’s also water repellent and stain-resistant, which is great for items that will be used outside often.
(Some links may be affiliate links, which means I earn a small commission at no cost to you. Thanks!)
Though there are a few sources of waxed canvas in the US (you can find a short list recommended by Colette Patterns), I couldn’t find exactly what I was looking for at a reasonable price. I remembered seeing a post over on the Thread Theory blog recommending Otter Wax to make your own waxed canvas fabric.
After weighing the options, I decided to try the Otter Wax. It worked exactly as I had hoped! (I feel like I need to say this, but this is not a sponsored post. I’m just a happy customer, sharing my experience!)
First, let me share a few tips about working with the wax:
Use the suggestions on the website to figure out how much you need. I most likely ignored the estimates, hoping to stretch the limits. I ordered the small size bar and ran out. Thankfully, their shipping is super fast and received the 2nd order in 3 days! I ordered the bigger bar the second time, and have plenty left for another bag or a couple of smaller projects.
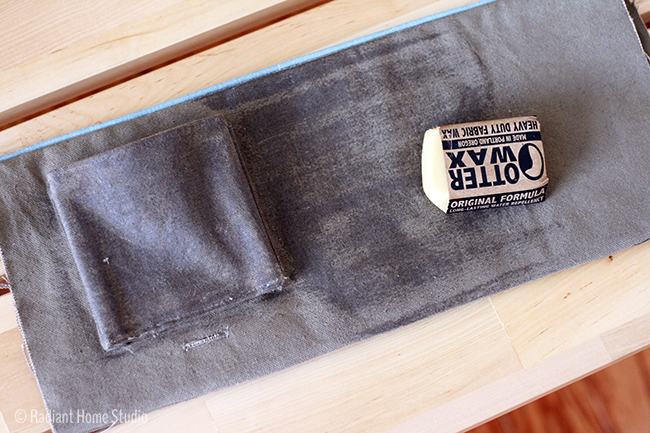
Applying the wax is easy, but a bit time consuming for larger projects. I worked in small sections (6″ squares) and took breaks. I decided to apply wax as I was putting the bag together. I wanted to avoid stitching on the waxed fabric as much as possible. The presser foot makes extra marks and if you need to pick out stitches there will be visible marks as well. But I also wanted to wax some of the parts that would have been difficult to reach after the bag was finished, like the insides of the outer pockets. I sewed the outer pocket pieces together, then waxed the entire pocket. I waxed the main outer section of the bag before attaching the pocket, but I did the sides of the bag at the end.
How to Wax Canvas Fabric:
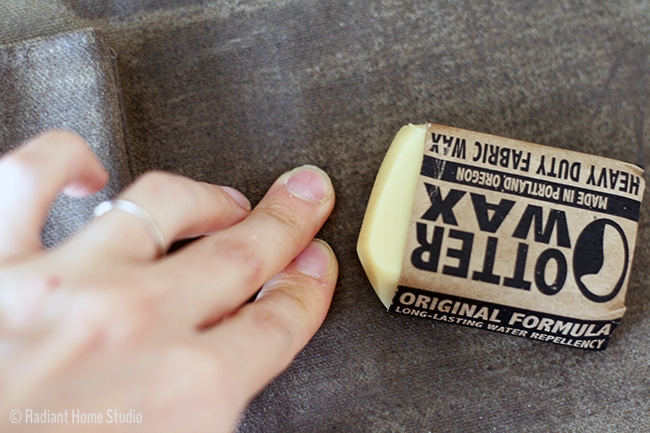
Rub the bar of wax vigorously on the canvas. You need to create a bit of heat from friction to warm up the wax. As you can see, it won’t cover every part of the fabric.
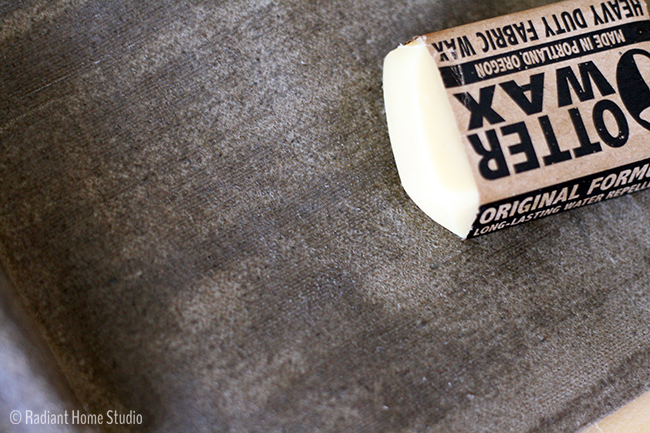
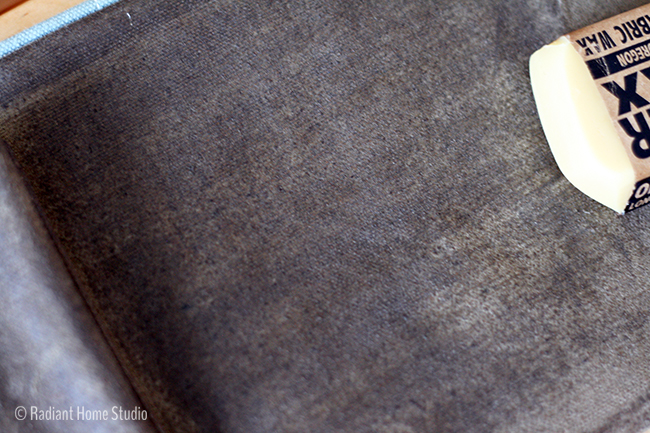
Next, use your fingers to rub the wax and spread it evenly across the fabric.
I tried rubbing in all directions, but I created a smooth finish by rubbing perpendicular to the direction of the wax bar strokes. If body heat and friction aren’t enough to smooth out the wax, you can use a hairdryer to warm it up. I didn’t find that a hairdryer was necessary though.
(Update: Wax tends to dry out when stored for months, even when wrapped in plastic. You can soften your wax by microwaving it for about 10 seconds. The surface also forms a sort of crust as it dries out. You can just scrape off that layer to expose the softer wax underneath.)
Just work in small sections, using the corner of the bar to get into the cracks and seams. The wax will stay sticky (and have a distinct smell) for a couple of days while it dries. I recommend letting the wax dry overnight before sewing with your fabric.
You can reapply wax as needed. Just like paint, a second coat will go on smoothly, quickly, and require less wax than the first coat. I expect that a bag would need a fresh coat of wax about a once a year.
Update: Since writing this tutorial, I have continued to use and love the wax! My husband has been carrying his bag for four years now, and it still looks great. The wax keeps the fabric looking new and resists staining. I haven’t applied any more coats of wax and it doesn’t seem to need any.
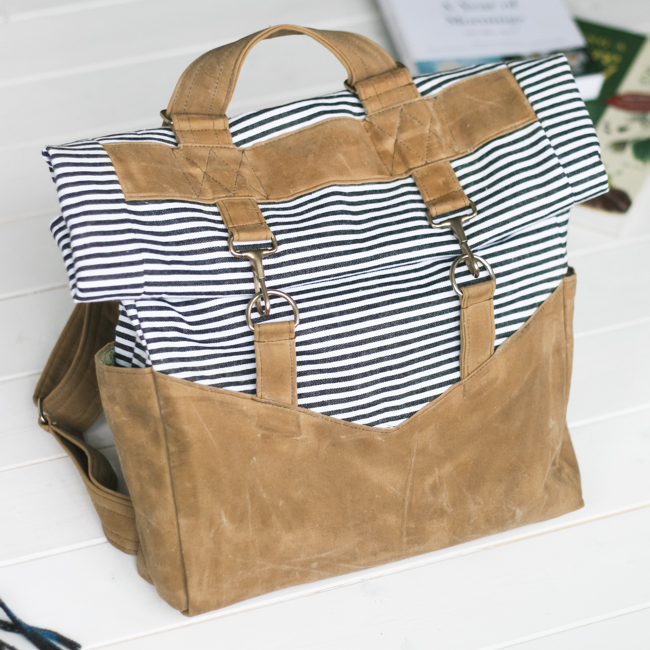
I recently updated my Retro Rucksack pattern sample with this waxed canvas version. Check out the post for a few more tips!
I also posted a free gift pouch tutorial with a waxed canvas flap.
What do you think? Will you try waxing your own canvas fabric?

You’ll have to let us know how this wears over time. I would have been tempted to melt the wax and soak the fabric or paint the wax onto the fabric, using paper and an iron to remove the excess wax and end up with it all being too stiff.
I will try to update in a few months with photos of the wear…
Thanks so much for the tips! This was so helpful! I just ordered a bar of otter wax. . . Looking forward to seeing how it works on some painted canvas. I’m hoping that the wax won’t smear the design, but I will learn as I go! Thanks again and great job on the bag! It looks amazing!
You are welcome! Come back and add comments if you have helpful tips to add!
This looks amazing! But I am wondering about how it sews. Does it mess up the sewing machine and/or needle?
You’ll want to wipe down your machine after using the waxed canvas. Once it dried, I didn’t find much residue was left on the machine. I also tried to apply the wax as I went along, so I was able to avoid sewing over it as much. Also, with the fabric right sides together most of the time, the waxed surface is not touching the machine directly.
Very cool! I was wondering what is on the ingredients list for the Otter Wax? Do they tell you?
The website says they are the “only water repellent wax that doesn’t utilize paraffin, silicone, or other synthetic ingredients derived from petroleum. Otter Wax is formulated to be both highly effective and environmentally friendly.” It seemed softer than any beeswax I’ve ever worked with.
Found the DIY wax if anybody is interested! http://www.livius.eu/making-greenland-wax/
Interesting! I’m sure this would work, but as you can see from the list I posted above…OtterWax seems to be more environmentally friendly if that is important to you 🙂
Well, not if you use parrafin recycled candles like I did. Waxing textile with them is better for the environment then burning them up! And the OtterWax has to be factory produced, packed and shipped. None of that with DIY.
Oh, forgot to say: great looking bag!
It looks like a lot of work but the result is fantastic I love the look of that messenger bag
Can Otter Wax be purchase in stores or is it only available online? I’m hoping to find some for a project before Christmas and I’m running out of time!
http://www.otterwax.com/pages/stockists – On their website you can search your area for retailers.
What a fantastic idea! I sew a bit with oilskin – I’m able to get a lighter weight version from an outdoor wholesaler that’s easier to work with on a domestic sewing machine. Fantastic stuff and I love the rustic look – but it is expensive. Not sure I’d find the otter wax here – am in Australia – but might have to experiment a bit now and see what I come up with.
You can check the Otter Wax website for retailers. http://www.otterwax.com/pages/stockists#abroad There are 2 in Australia! If those aren’t convenient though, I’ve seen some recipes for homemade fabric wax. I bet you can find something if you search a little bit! Thanks for stopping by 🙂
Hi I was wondering how the bag and the wax has held up. Does the wax ever come off on your clothing when you wear it? Awesome looking bag btw!
Hi Jessica, Great question! I should do a follow-up post. The wax has been excellent. Once it cures, it does not come off on clothes. My husband has carried it to work almost everyday for 9 months and I have not reapplied wax yet. I imagine it would benefit from another coat in a few months, but for now it is still looking great. Unrelated to the wax, I did take apart the bag once to reinforce the snap, which had come loose with time. Everything else has worn well.
Did you have any trouble sewing through the already-waxed parts? did your needle stick or anything? I’m hoping to make a waxed canvas bag too, and waxing prior to sewing seems a fair bit more efficient. Great Project – thanks for sharing!
I don’t recall the needle sticking, though I would recommend changing it when you are done with your project. You’ll also want to clean the area around the bobbin when you finish, just to make sure there’s no waxy gunk clogging up your machine.
Thanks for sharing this and the excellent bag! wondering if the otter wax can be used on other types of cotton successfully, what do you think Sara ?
I think it would work on a heavier weight cotton fabric. I have a cotton-linen blend fabric, slightly lighter than canvas, that I’m planning to use it on. I’m not sure how it would work with quilting cotton. If you think you might use the Otter Wax for another project (if the lighter cotton doesn’t work out), then it’s worth trying!
Oh, good. You’re still taking comments on this post! 🙂 I really love the look of waxed fabric, too; I’ve tried it on a few things in the last year and gained some insight that I wouldn’t have had before. One fabric that it seems to work very well on is the Home Essentials line of cotton home dec fabric at JoAnn’s. The weave is similar to canvas, but it’s lighter weight.
One thing I learned the hard way is that waxing white fabric is not the best idea. I made a bag of purple and white canvas stripes and decided to wax the whole thing. It was going to be gifted–however, I procrastinated on packing up the bag and it sat for a while. It turned out for the best because over a period of time, the wax yellowed the white fabric, and I couldn’t remove it. Perhaps that’s the case for other lighter colors as well; I couldn’t find any conclusive information on that, though.
It also does NOT wash off; once it’s on, it’s on-which is a very good thing because in one sense that’s what you want, but if you don’t like it, it’s difficult to remove (I haven’t figured it out yet). But for darker colors, it’s really nice. I plan on de-constructing the bag and re-doing it!
Thanks for your insight! It sounds like it’s a good idea to test your fabric before using the wax. That way you can get a good idea of the color and the texture before you commit. Traditionally, most waxed canvas is shades of brown that mimic the look of leather. I think sticking to browns and darker colors is a good idea.
Hi Sara! Very cool project! My son has come to me wanting a waxed canvas jacket (pretty much just an unlined, boxy hoodie windbreaker) like one he saw for sale on some website. It was VERY expensive, thus the request to perhaps make one. We all know how sometimes the $/time costs just don’t compute – but ANYWAY, I was wondering what kind of success one might have making one, then waxing AFTER construction; with the concern being waterproofing the seams, not to mention the residue on the machine you described above. Thoughts?
I think waxing after construction will work just fine. You can get into the seams with the corner of the bar. You could also melt it a little to get it into the cracks better. Keep in mind that it won’t be fully waterproof though. It’s water resistant, but if you wear it in a rainstorm it won’t keep you completely dry. If you want apply it to some parts before construction, just let it cure for a few days. The tackiness goes away and I don’t think you’ll need to worry about residue at that point.
So cool! Makes me want to try!!
What weight on the canvas do you suggest?
I believe this was 12oz, but I normally use 9oz with great success too. You can wax any weight of canvas, so choose whatever is best for your project.
Thank you! I just ordered my first Otter wax. It’s 2 for sale this weekend!
Curious how it would work on linen. I found some medium weight linen at Ikea that I want to make totes from, and waxing might be interesting surface treatment. Thanks for your thoughts.
I haven’t tried it yet, but I suspect it would work well on linen. I would not use it on synthetic fabrics, but any natural fabrics should work 🙂
Thanks for your thoughts. I’ll give it a wing.
I bought a bar of Otter Wax locally in Vancouver about 18 months ago, hoping to give it a go. I just didn’t have any suitable fabrics (it doesn’t work that well on quilting cotton according to a friend who tried it on a swatch) … I’ve recently gotten some distressed canvas and making a bag for myself for travel so am going to give it a try in the next week or so … I’m so glad they came out with this stuff as when I was searching before all I could find was wax you had to melt and apply with a brush .. too time consuming for me … your bag is fab and appreciate the review!
Awesome! Good luck with your bag! I’ve seen some DIY wax tutorials, but I’d be skeptical about the finished product too. Otter Wax was designed for making bags and clothes, so I think it’s worth a few dollars to have the right thing. 18 months later and my husband’s bag still looks great with everyday use 🙂
Just curious, what size needle did you use?
I believe it was just a denim needle.
I have a question…I’ve been going to make new slipcovers for some Ikea Karlstad chairs, and am planning on using canvas dropcloths for the fabric, but either printing or dying it first…cheap and easy! I’ve planned on using Scotchguard or the like to further kid/pet-proof them afterwards, but I like the idea of something less chemical-y. Do you think a light application of the wax would work? Or is it something that, if you were sitting on it and your body heat warmed it up, would you stick to it? SO curious! I love the look of waxed fabrics, though!
It’s definitely not sticky after it dries, but I haven’t tried reheating it. I’m with you on using fewer chemicals, but I’m not sure wax is right for slipcovers. For one, it would take A LOT of wax and time to cover it. If you are wanting cheap, that would not be the way to go. Wax would also make it impossible to wash in your washing machine. Also, I would consider that someone has already thought of this and tried it (since wax has been used for waterproofing for centuries), but since I’ve never seen waxed canvas furniture for sale anywhere…it has most likely been tested and discarded for a reason.
This article linked to a couple of less toxic options. Maybe one of them will work for you! http://www.apartmenttherapy.com/is-there-a-nontoxic-stainresis-93546
What are your thoughts on using the otter wax on a brushed twill? I’m guessing it would change the texture of the material and shouldn’t be used? Thank you, Renee
I’ve seen it used on denim, which is like twill. If brushed twill has a texture though, I’m not sure it would be right for waxing.