This is part 2 of a two part tutorial. Check out part 1, where I show you how to make the Kantha stitched pocket. In this post, I’ll show you how to add Kantha stitched tote bag handles and how to apply grommets.
Here’s part 2 of the Indian inspired tote bag with a Kantha stitched pocket and matching straps. I’ll show you how to make the straps and teach you how easy it is to apply grommets to your bag projects!
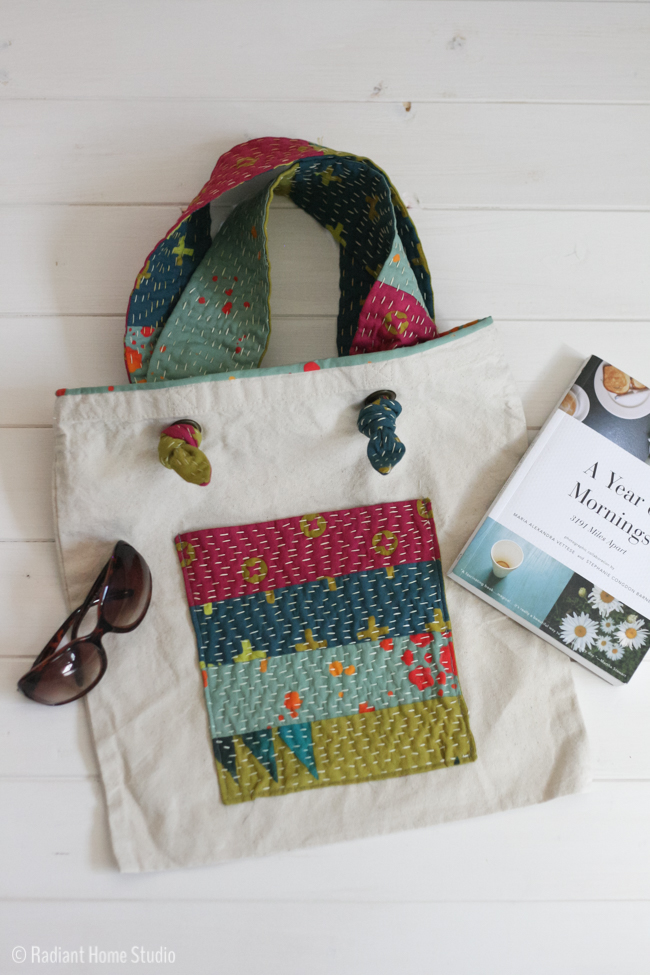
I gave this background info in part 1 of the tutorial, but for those that are finding this project through outside links, it’s worth repeating. I’ve been on a Kantha stitching kick recently. It started small with the Kantha needle book project. I decided to try a larger Kantha inspired project by applying the technique to a tote bag upgrade. This fabric is batik cotton from the Alison Glass Handcrafted line.
If you aren’t familiar with Kantha stitching, it’s basically a running stitch. In Japan it’s called sashiko, in India, it is called Kantha, and in English, we call it a running stitch. There are small nuances, meanings, and histories that make each stitching technique unique, but for our purposes, you’ll just need to make a simple running stitch. Kantha quilts are historically made with scraps, so patchwork style pockets and straps with bright colors really add to the exotic feel of the project.

Materials (includes materials needed for pocket and straps):
• canvas tote bag
• 4 fat quarters of quilting cotton or batiks in bright colors
• 3 skeins of embroidery floss & embroidery needle
• 8″ x 8″ square of mid-weight fusible interfacing (I used Pellon 931F.)
• 4 grommets size 3/8″
• 1/4 yd. of fusible fleece (I used Pellon 987F.)
• 1 yd. fusible hem tape
• a hammer to apply the grommets
Preparation (for strap pieces only):
• cut 4 strap rectangles 4″ x 36″ from various colors of quilting cotton (to make patchwork straps like mine, cut shorter 4″ rectangles and sew them together to make a total length of 36″ – this works well if you are working with scraps or fat quarters)
• cut 2 rectangles (3″ x 35″) from fusible fleece
• cut 2 rectangles (3″ x [width of bag + 1″]) from quilting cotton for bag facing (my bag is 15″, so my pieces are 3″ x 16″)
• cut 4 squares (1 1/2″) of medium weight interfacing
Kantha Stitch Straps Tutorial:
1. Remove the tote bag straps by cutting them off or picking out the stitching.

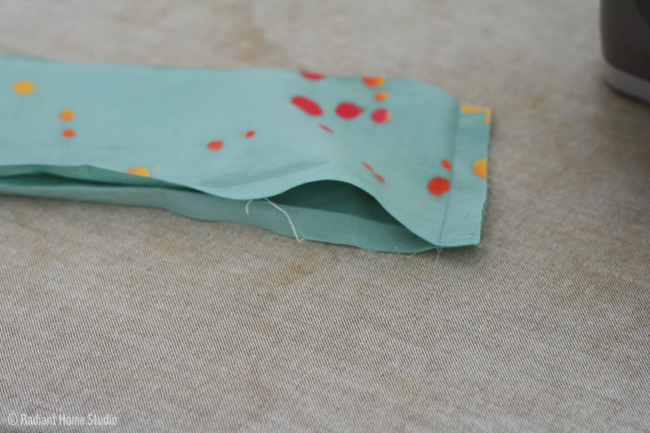
2. Place the bag facing rectangles right sides together and stitch together at the short ends to form a continuous loop. Press under 1/2″ along one raw edge.
3. Place the bag facing loop right sides together with the bag, matching the top edge of the bag with the unfolded raw edge and matching side seams. Stitch around the top edge of the bag close to the edge. Try to keep the seam allowance under 1/4″.
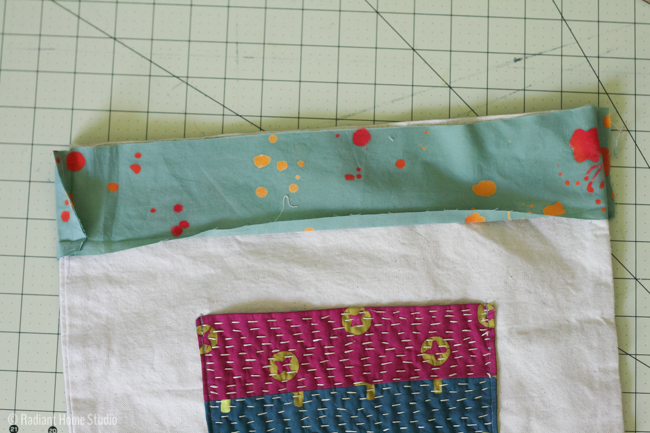
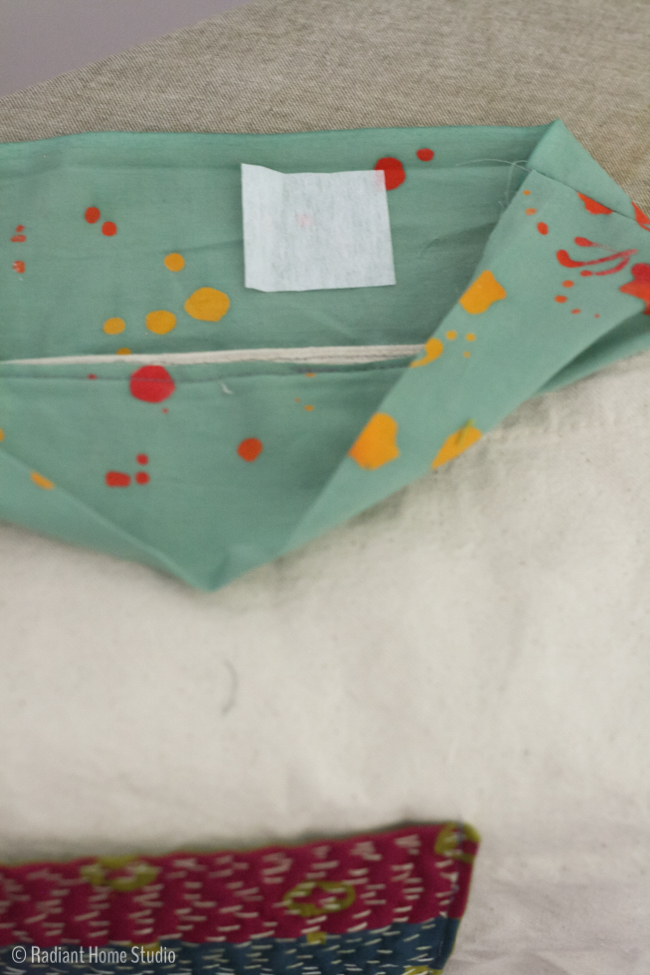
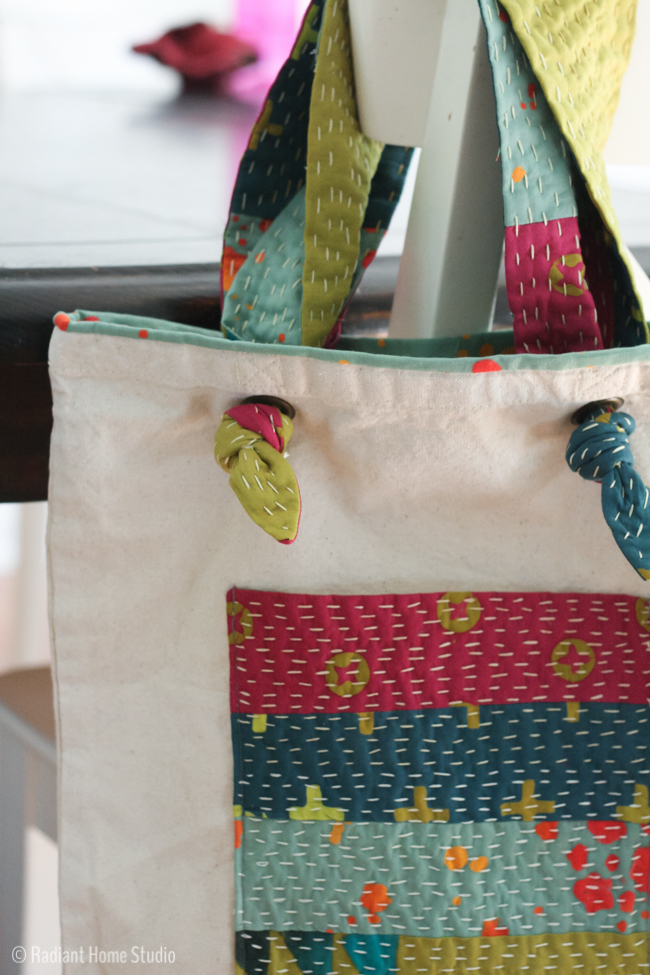
4. Open and press the facing toward the inside of the bag. You will have about 1/4″ of facing fabric around the top of the bag that creates a nice border around the top edge of the bag. Apply interfacing squares to the wrong side of the bag facing. Place them next to the crease and across from the original strap placement.
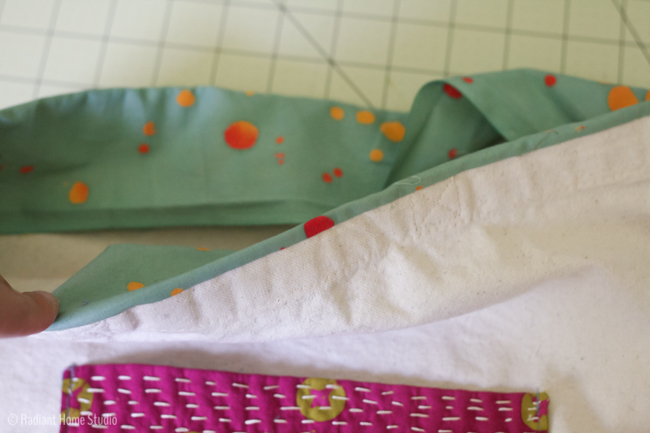
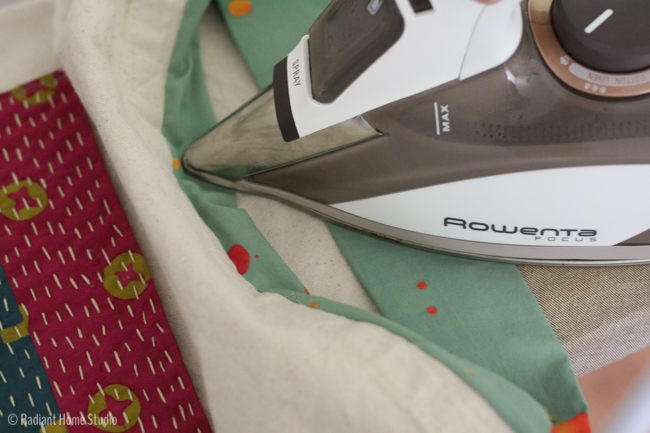
5. With the 1/2″ pressed edge folded under, use the fusible hem tape to hold the bag facing in place. I like to work with 6″ strips of hem tape. Longer pieces can shift out of place or get accidentally melted to the iron. Work slowly and in small sections to get a good strong bond.
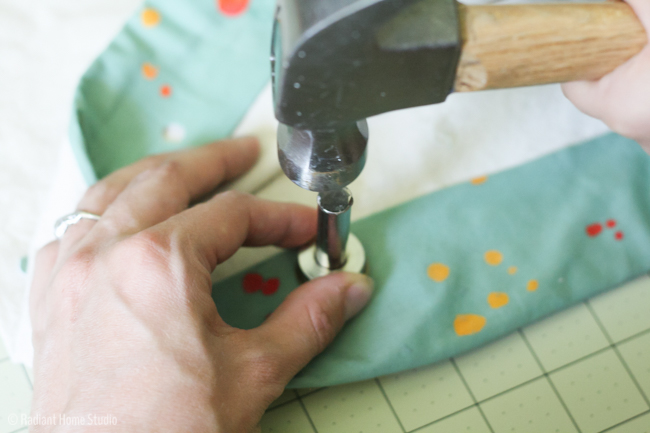
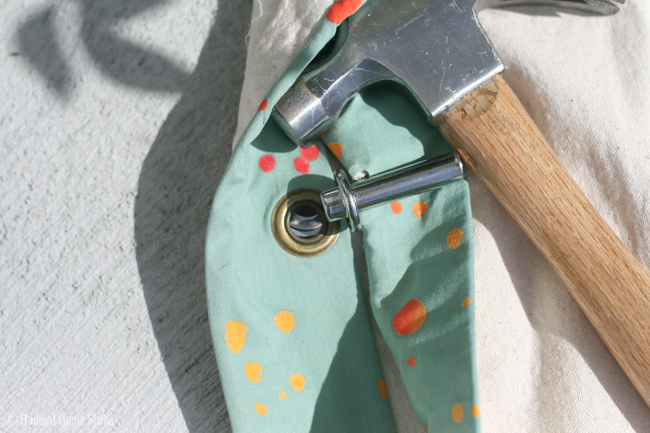
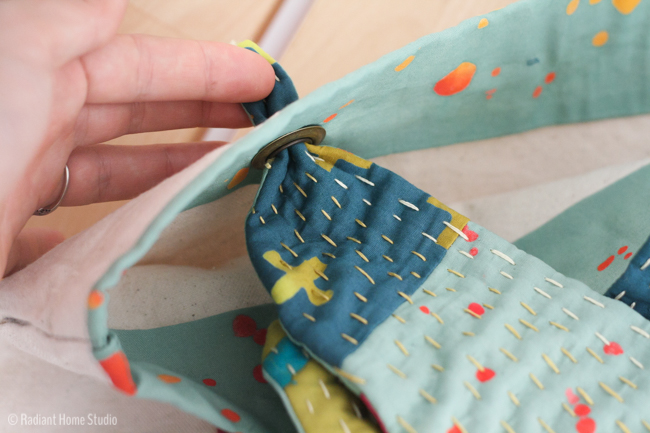
6. Now for the grommets! Grommet kits come with tools. All you need is a hammer. The tools are called the anvil (the short round piece) and the setter (the long piece). Each grommet has two parts, a stud (the taller piece) and the washer (the one with little teeth).

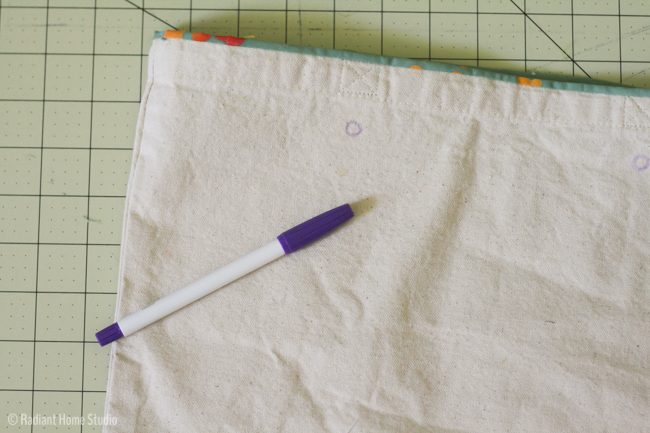
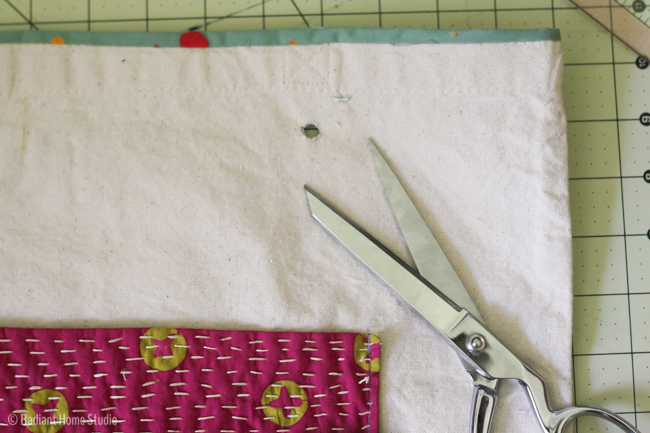
7. Mark the grommet holes with a water soluble pen. I placed mine directly below the original straps, about 1 1/2″ from the top of the bag. Cut out the holes using sharp scissors or a utility knife. I like to cut an “x” shape and then trim the excess out of the center. Start small and then try sliding the stud into the hole. You can always cut away a little bit more material as needed.
8. You’ll need to move to a hard surface, like concrete for the next part. Slide the stud through one hole in the front of the bag. Place the washer on the back. Place the front side of the back with the stud down on the anvil. Place the setter through the hole on the washer side. Use a hammer to hit the setter firmly several times. Usually, 8-10 taps work well for me. The setter will gently curl the end of the stud down and hold the washer in place. Apply all 4 grommets this way.


9. If you have chosen to piece together your straps, stitch them together to form four 36″ strips. Apply fusible fleece to the wrong side of 2 of the strap pieces. Place one interfaced strap piece rights sides together with one non-interfaced strap piece. You’ll need to leave a 4″ opening at the center of one of the long sides. Stitch around the rectangle. When you get to the first corner, pivot and stitch a curve skipping the second corner. The curved section should be about 6″. When you get to the 3rd corner, pivot and curve again skipping the 4th corner. Repeat for the 2nd strap.

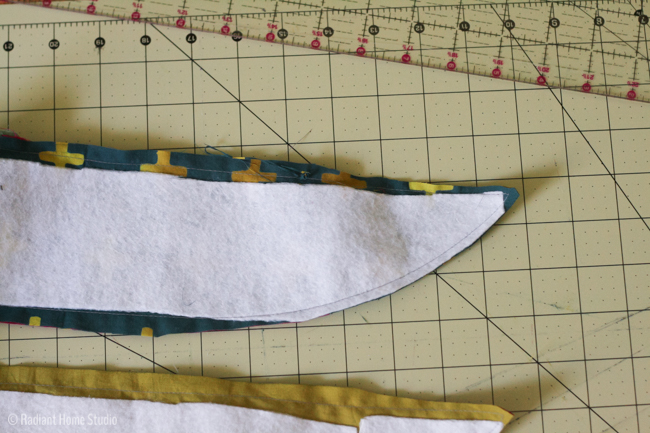
10. Trim the excess fabric from the curves and corners. Turn the straps right side out and push out the corners with a pointed object. (I like to use a knitting needle.) Press, tucking under the edges at the opening.
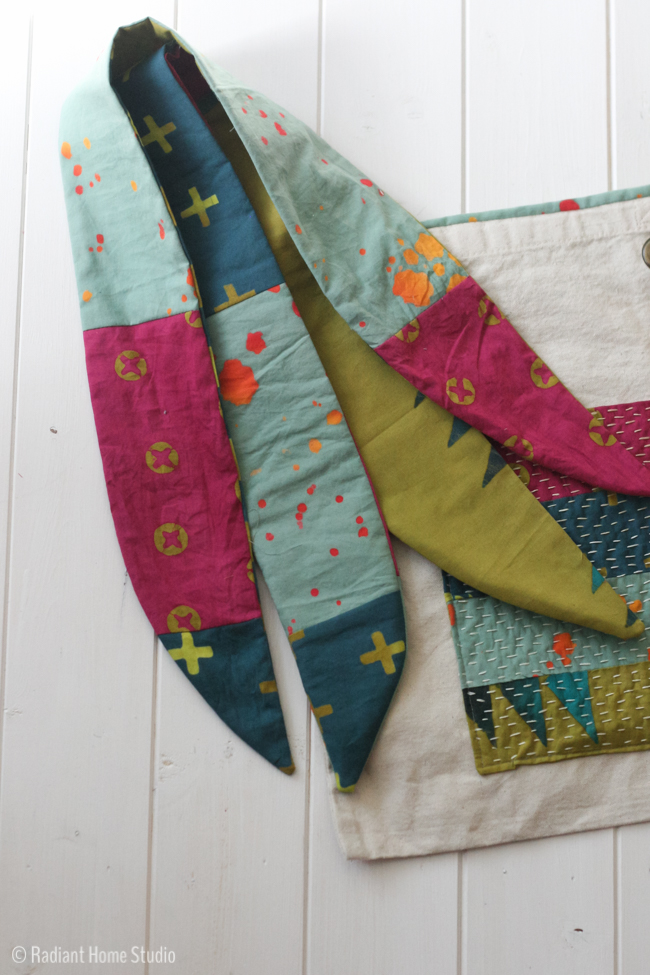
11. Using 3 strands of floss, begin stitching along the length of the straps using a running stitch. I like to bury my knots in the seams. Switch rows between the layers. You can also stitch quickly by using a long needle and loading it with several stitches before pulling it through. Continue embroidering with a running stitch until you have covered the entire strap. Repeat for the other strap. ( I forgot to take a picture while stitching, but it’s the same process as this pocket…)
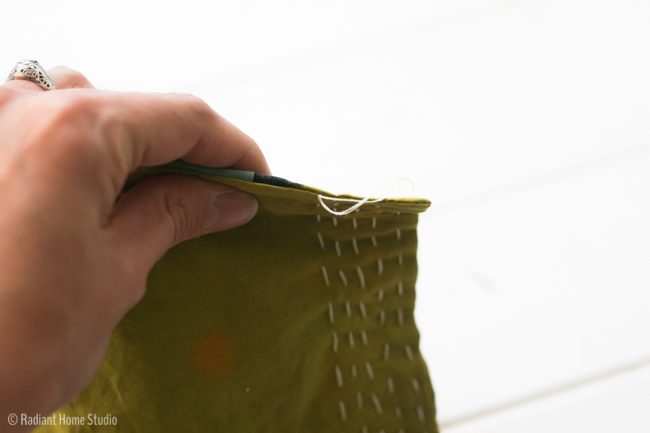
A note about the stitching…don’t worry about getting the spacing perfect. The beauty of tKanthatha stitching is in the imperfections. The finished stitching looks beautiful even when the lines are crooked and uneven because it is obvious that someone (you!) put your time into hand making every stitch!
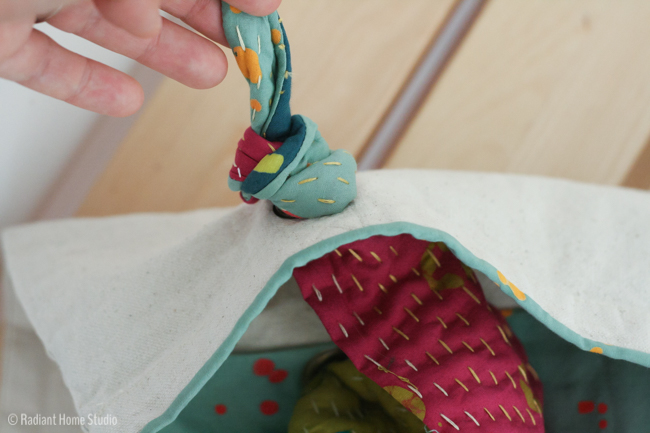
12. Place the ends of the straps through the grommets from the inside of the bag. Tie a small knot to hold the strap in place. That’s it!
If you enjoyed this tutorial, you can find the other Tote Bag Upgrade posts here.


Thank you for this wonderful tutorial! I’m so glad I found you through a post on Anna Graham’s Instagram! I used to live in India (ages ago), and I love Kantha!
Thank you again Elnora! It was lovely to wake to so many lovely comments and new followers this morning! If you make anything inspired by the tutorial, I’d love to see it 🙂
This bag is just beautiful. I have many Boho friends who will appreciate them as gifts. Thanks so much for sharing your talents!
Thanks Margo! I love sharing my ideas and it makes me happy to know people use them to make handmade gifts for their friends! I’d love to see your finished bags if you get a chance.
Thanks Margo! I love sharing my ideas and it makes me happy to know people use them to make handmade gifts for their friends! I’d love to see your finished bags if you get a chance.
Fell in love with this as soon as I saw it. I’ve made two!
Can’t figure out how to post a pic, though…
Thanks for letting me know! I’d love to see them! You can share it on Instagram and tag me @radianthomestudio. Or you can add it to my flickr group at https://www.flickr.com/groups/radianthomestudiopatterns/ . Or you can e-mail it to me at sara at radianthomestudio dot com.
Posted in Instagram. Hoping to make one of the denim upgrades soon. 🙂
Your tutorial is brilliant!!
Thank you!