• SHOP
  • About
    • About Sara
    • Contact me!
    • Design Collaborations
    • Sewing Collaborations
  • Sewing
    • Sewing Tutorials
    • Things I Made
  • Design Portfolio
  • Blog
  • Nav Social Menu

    • Facebook
    • Instagram
    • Pinterest
Radiant Home Studio

Radiant Home Studio

September 7, 2015 ·

Make Bias Binding from a Fat Quarter

Sewing· Tutorials

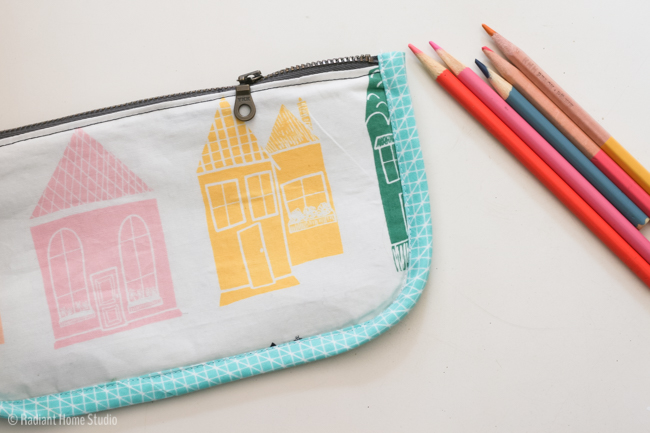
Here’s a tutorial showing you how to make bias binding from a fat quarter. (After making these pencil pouches with the girls last week, I realized I needed a tutorial they could reference!) Why make your own? Well, store-bought bias binding is typically a poly/cotton blend of fabric. It’s a little bit stiff and can melt at high temperatures more quickly than cotton and linen. If you are making something like a pot holder, you’ll definitely want to use cotton binding so you don’t melt your hard work. (Yes. I learned this from experience…)

Store-bought binding typically comes only in solid colors, but when you make bias binding the design possibilities are endless. You can make your projects uniquely yours by adding extra pops of pattern with floral or striped bias binding. I used this method to make bias binding for the pencil pouches I made with the girls. I also shared this technique when I made the Hot Mitt House Potholder for Betz White’s blog.

Make Bias Binding from a Fat Quarter | Radiant Home Studio

Starting with a fat quarter, you can make about 5 yds. of bias tape. There are many methods for doing this, but I find this method to be less confusing than some of the others I have tried.

Make Bias Binding from a Fat Quarter:

Materials:

1 fat quarter of quilting cotton
rotary cutter, quilting ruler, and cutting mat
iron and ironing board
bias tape maker (optional, but recommended)

Instructions:

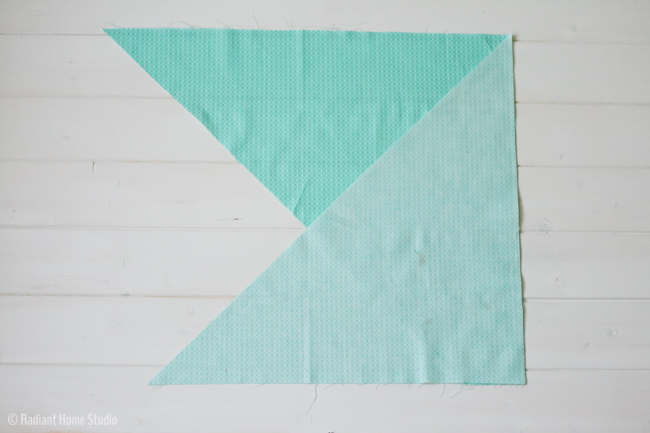
1. Start by folding one corner of the fat quarter of fabric up diagonally and press.

Make Bias Binding from a Fat Quarter | Radiant Home Studio

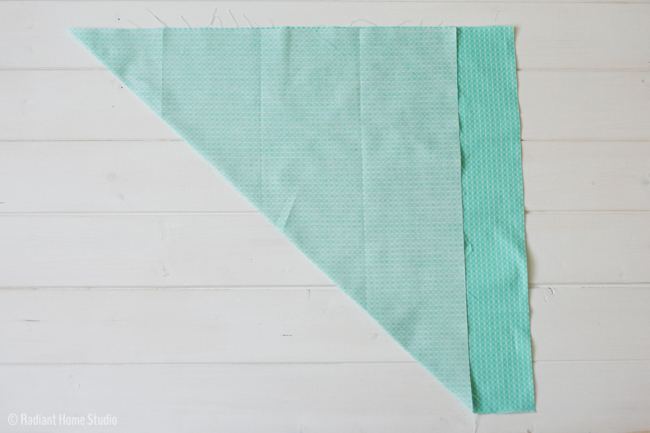
2. Cut along the diagonal crease using a rotary cutter and mat.

Make Bias Binding from a Fat Quarter | Radiant Home Studio

3. Move the left piece over to the other side and match the straight edges. You should have a parallelogram.

Make Bias Binding from a Fat Quarter | Radiant Home Studio

4. Align the straight edges right sides together, stitch and press.

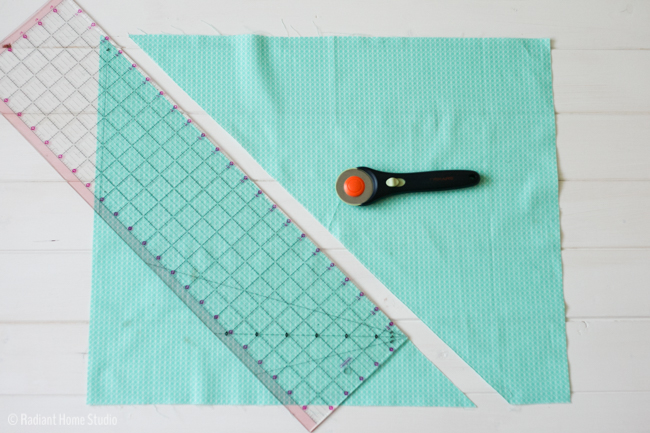
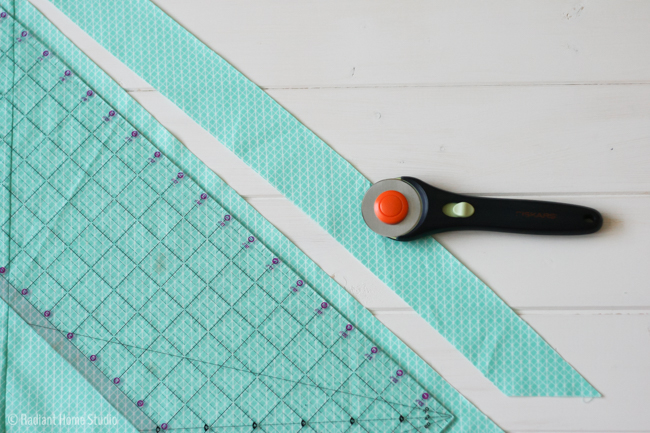
5. Using a rotary cutter and mat, cut 2” strips of fabric across the diagonals. The last piece will probably be too small and can be discarded.

Make Bias Binding from a Fat Quarter | Radiant Home Studio

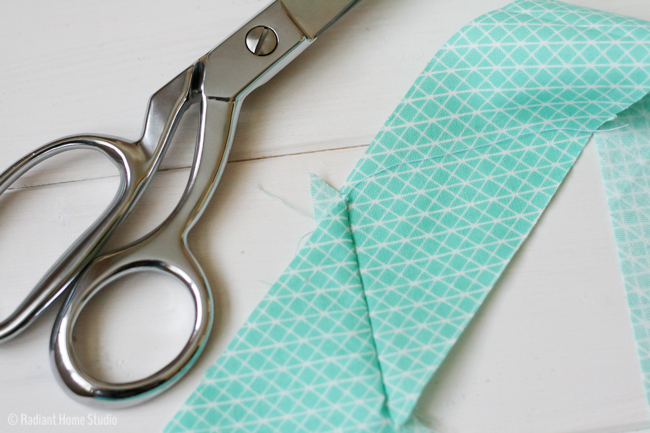
6. Connect the strips using a ¼” seam, matching the ends as shown. See how the corners are offset by ¼”? It’s important to align the edges this way to account for the seam allowance and to ensure that you have a nice straight edge when you open it up.

Make Bias Binding from a Fat Quarter | Radiant Home Studio

7. After stitching and pressing the strips together, trim the excess corner pieces.

Make Bias Binding from a Fat Quarter | Radiant Home Studio

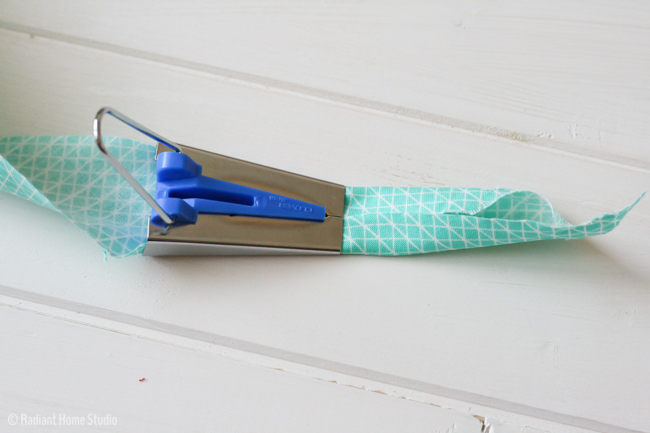
8. Push one end of the fabric through the wide end of the bias tape maker and pull it through to the narrow end. See the small, straight opening in the top of the bias tape maker? You can use a pin or seam ripper in that space to guide the fabric through to the opening. Adjust it until the fabric comes out folded equally on each side.

Make Bias Binding from a Fat Quarter | Radiant Home Studio

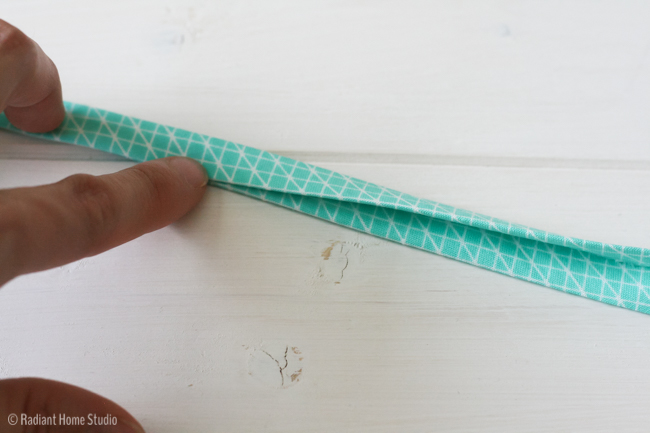
9. Begin pressing the folds in place with a hot iron as you gently pull back the bias tape maker. Continue pulling and pressing in small sections until you reach the end of the fabric strip.

Make Bias Binding from a Fat Quarter | Radiant Home Studio

10. At this point, you have single fold bias tape. To make double fold bias tape, fold the binding in half one more time and press as you go.

Make Bias Binding from a Fat Quarter | Radiant Home Studio

When you finish, you’ll have about 5 yards of ½” double fold bias binding to use on your projects!

Make Bias Binding from a Fat Quarter | Radiant Home Studio

Though it’s a few minutes of extra work, making your own bias binding for your sewing projects is worth trying. You’ll have new design options and you’ll be able to make higher-quality binding than you can find at the craft store.

If you use the “pin it” button on your browser, you’ll find a hidden full-length step-by-step image to pin! Try it!

Make Bias Binding from a Fat Quarter | Radiant Home Studio
Previous Post: « Zipper Pouch Girls Sewing Day
Next Post: Autumn Running Stitch {Tote Bag Upgrade} »

Reader Interactions

Comments

  1. Jess says

    September 7, 2015 at 10:39 am

    Oh my gosh, this looks so simple! I tried to make bias binding for a Christmas gift last year and it was very frustrating (it was a plaid, and that didn’t help, but I kept getting confused on how I was meant to cut it).

    • Sara Curtis says

      September 7, 2015 at 11:46 am

      Thank you! I love it when people find my explanations to be easier than what they thought. I hope you get a chance to try it!

  2. Jaime Johnson says

    September 7, 2015 at 11:31 am

    Great tutorial and the pinterest image is great! Pinned to my free patterns & tutorials board!

    • Sara Curtis says

      September 7, 2015 at 11:45 am

      Thanks for sharing Jaime!

  3. Bobbie says

    September 7, 2015 at 4:39 pm

    Great way to make binding. I love my little binding maker too

    • Sara Curtis says

      September 7, 2015 at 8:21 pm

      Thank you! It’s a useful and inexpensive tool to have on hand. I have multiple sizes.

  4. Stacey..... From-a-Box says

    September 8, 2015 at 12:21 am

    I love making my own bias tape – it is much preferred over the store bought kind. Thank you for this tutorial. I will keep it handy… 5 years from a fat quarter?!!! more cost effective over store bought too 🙂

    • Sara Curtis says

      September 8, 2015 at 12:13 pm

      I don’t actually love making it, but I much prefer using it 🙂

  5. Jamie N says

    December 3, 2015 at 10:46 am

    This is great! I hadn’t seen a tip for cutting the FQ on the bias and then joinung it together before cutting the strips. This is awesome! It eliminates individually joining short strips.
    Thank you!

    • Sara Curtis says

      December 3, 2015 at 11:21 am

      Great! Glad it was helpful 🙂

Primary Sidebar

Hello

Welcome! I’m Sara. I share modern home & accessory sewing patterns, and I create surface designs for licensing. I hope you are encouraged to see beauty in small things and are inspired to try new creative projects!

Shop Sewing Patterns


icon icon

icon icon

Newsletter

Sign up to get access to free sewing patterns & resource library!

Find My Work at:


© Copyright Notice

All images and text copyright ©2013-2020 Radiant Home Studio, unless otherwise noted. Please be kind enough to link back to my site and contact me if you would like to use my images.

Disclosure

I am a participant in the Amazon Services LLC Associates Program, an affiliate advertising program designed to provide a means for me to earn fees by linking to Amazon.com and affiliated sites.

Footer

Sign up to get access to free sewing patterns & resource library!

Favorite Adobe Illustrator tool? I love recoloring Favorite Adobe Illustrator tool? I love recoloring patterns. I probably spend way too much time with the recolor tool and not enough time making new patterns. 🤷🏻‍♀️

Last day to join the Immersion Course! If you have ever dreamed of making beautiful designs, Bonnie can teach you how to get what’s in your head into the computer and then how to make money from licensing your designs to companies for use on products. 

As a member of Bonnie’s support team, I’ll be there to make sure you don’t feel lost. There’s room for you...as Bonnie often reminds us!

#surfacepatterndesign #surfacepatterndesigner #surfacepatterncommunity #printandpattern #radianthomestudiopatterns #floralpattern #alltheflowers #artlicensing #flowersfordays #mutedflorals
Look what just came in the mail! Notebooks! This w Look what just came in the mail! Notebooks! This was a test batch to check quality and I’m thoroughly impressed.

I’ll be listing extra in the shop soon, but first dibs go to anyone that signs up for the Immersion Course using my link. I’ll be sending a small gift package and scheduling a course success/ coaching call with you!

Just a reminder that the last day to enroll in Immersion is tomorrow! If you are like me and overthink things until the last day, you are not alone. 

I know it’s a huge decision. I have an Immersion stories highlight if you want to know more or go to my profile to find a link to the info page. Message me all your questions! 

#immersioncourse #immersioncourse2021 #designernotebooks #learntodesign #learnillustrator #surfacepatterndesigner
Just got an order of stickers in! I’m debating a Just got an order of stickers in! I’m debating about putting them in the shop as a separate product or adding them to orders. I think I need a few more to make a pretty coordinating set! 🌹

Reminder: there’s still a couple more days to enroll in the Surface Pattern Design Immersion Course or the free mini-course from Bonnie! Links in my profile...as always. Keep messaging with questions! ☺️
It’s been a minute since I showed my face here! It’s been a minute since I showed my face here! ☺️

I wanted to get a little personal today. If you’re here for sewing & crafty stuff...stay tuned. I’m not abandoning you. 🙂 If you saw my stories last week, you may have learned that I’m deep in design mode for a few weeks, working with @bonniechristine on the Surface Pattern Design Immersion Course.

When I discovered Spoonflower (about 8 years ago!) and realized I could create my own fabric, I had this far off “maybe someday” dream to create a collection of designs for a fabric company.

I spent many years learning bits and pieces of design and business skills. But a couple of years ago I got more serious about making my dream a reality. 

Last year, I made an investment in myself and I joined the Immersion Course with Bonnie Christine. It was truly the community support and confidence that I gained that propelled me forward this year. Just a few weeks after Immersion ended I signed a licensing deal for children’s wall art with Oopsy Daisy and a few months after that...I signed a contract with a fabric company!

You guys...Bonnie is SO genuine and generous in everything she does. ❤️ It spills over into this beautiful and inspiring community that cheers each other on every step of the way. 

This year, Bonnie invited me to join her support team to help encourage new students through the course and provide technical support for all those tricky Illustrator issues. 🙌🏻

This course is for anyone that wants to invest in their creative career. My “wildest dream” came true this year. I’m actually feeling a bit lost right now because I need a bigger dream!

Whether you have a few years of experience like I did when I joined or you have never used design software...Bonnie will walk you through the ENTIRE process. This is like a college-level course on design and creative business. We have many older students starting a second career, people that just graduated design school but don’t know how to practically start an art-based business, and people from dozens of countries around the world. It’s a beautiful, diverse community filled with people taking steps toward their creative business goals.

More below...
We had our first day of fake spring yesterday. It We had our first day of fake spring yesterday. It was warm for one day and it’s back to being cold. 🤷🏻‍♀️

I always draw flowers anyway. I’m hoping some of the local botanical gardens open back up this year. We have some really great inspiration nearby and flowers will start blooming soon!

It’s the little bits of beauty that inspire me the most. What are you looking forward to this Spring?
Just a reminder that I have this heart garland tut Just a reminder that I have this heart garland tutorial linked in my profile if you want to make some happy Valentine’s decor this week.

My girls are origami experts, so we worked together on these video tutorials last year. It’s a good family project for older kids! 💕

#heartcrafts #valentinesdecor #valentinecrafts #mycolorfulhome #cozymodernvibe #diyvalentinesdecor
This another favorite pattern of mine. As my style This another favorite pattern of mine. As my style has developed, I’ve embraced the imperfect lines and tend to work with graphic, but organic shapes. I like unexpected little pops of color or shapes that emerge from layering.

My iPad is at the fix-it shop, so of course, I’m feeling inspired today. ☺️ Maybe I should try some actual sketching and planning on paper with a pencil...😜

#radianthomestudiodesign #fabricdesign #surfacepatterndesign #surfacepatterncommunity #surfacepatternlife #licensingartist #artlicensing
Remember last year, the girls and I made this cute Remember last year, the girls and I made this cute origami heart garland tutorial? ❤️💙💛🧡

I don’t usually decorate with themed stuff, but these are fun to make and add some joyful, non-tacky hearts around the house for Valentine’s Day. 💕 I popped the link in my profile buttons. There are videos in the blog posts too. 

Also, I shared some personal stuff in my stories today!

#origamigarland #origamiproject #valentinesdecor #valentinesgarland #valentinescrafts #origamiheart #origamihearts #papercrafts #heartcraft #happyhearts #joyfulhome #mycolorfulhome
Follow on Instagram
  • Disclosures & Copyright
  • About
  • Contact me!
  • Digital Pattern FAQ’s

Copyright © 2021 · Sara Curtis // beloved theme