• SHOP
  • About
    • About Sara
    • Contact me!
    • Design Collaborations
    • Sewing Collaborations
  • Sewing
    • Sewing Tutorials
    • Things I Made
  • Design Portfolio
  • Blog
  • Nav Social Menu

    • Facebook
    • Instagram
    • Pinterest
Radiant Home Studio | Sewing Patterns & Surface Design

Radiant Home Studio

July 7, 2017 ·

How to Sew a Sling for a Broken Arm

Tutorials

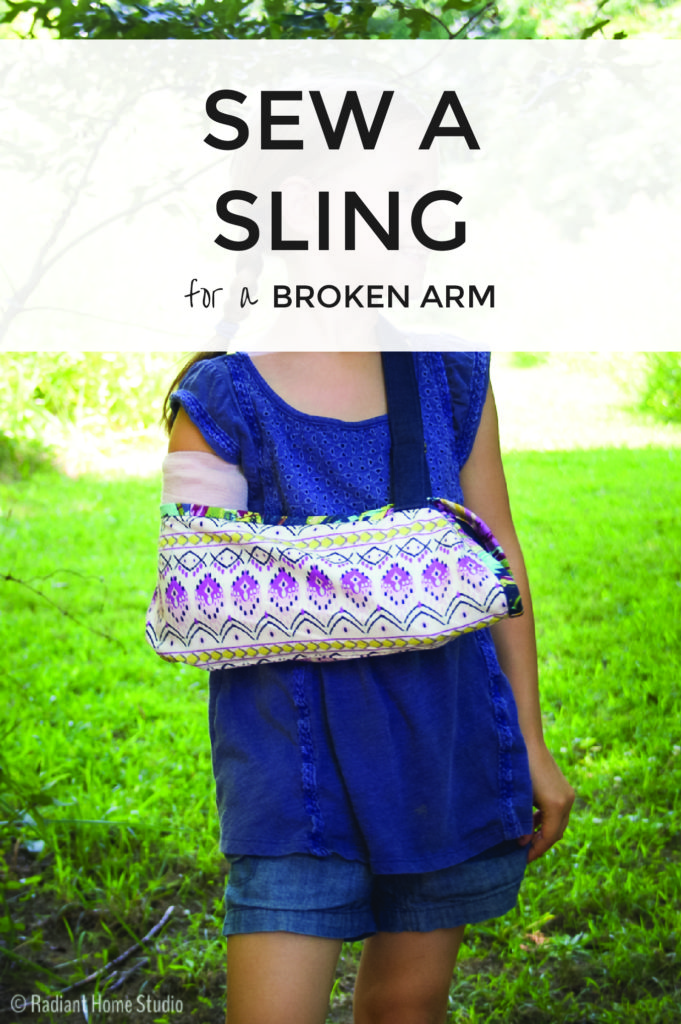
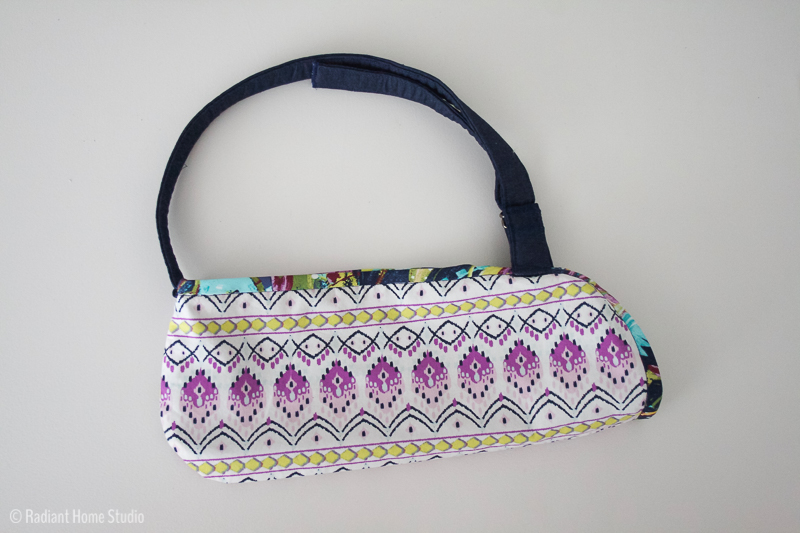
Earlier this week, my 7-year-old daughter fell on the driveway while playing and broke her wrist. A couple of years ago, my other daughter broke her wrist falling off a swing. Thankfully, broken arms heal…so why not have some fun with the sling while it’s healing?

How to Sew a Sling for Broken Arm | Radiant Home Studio

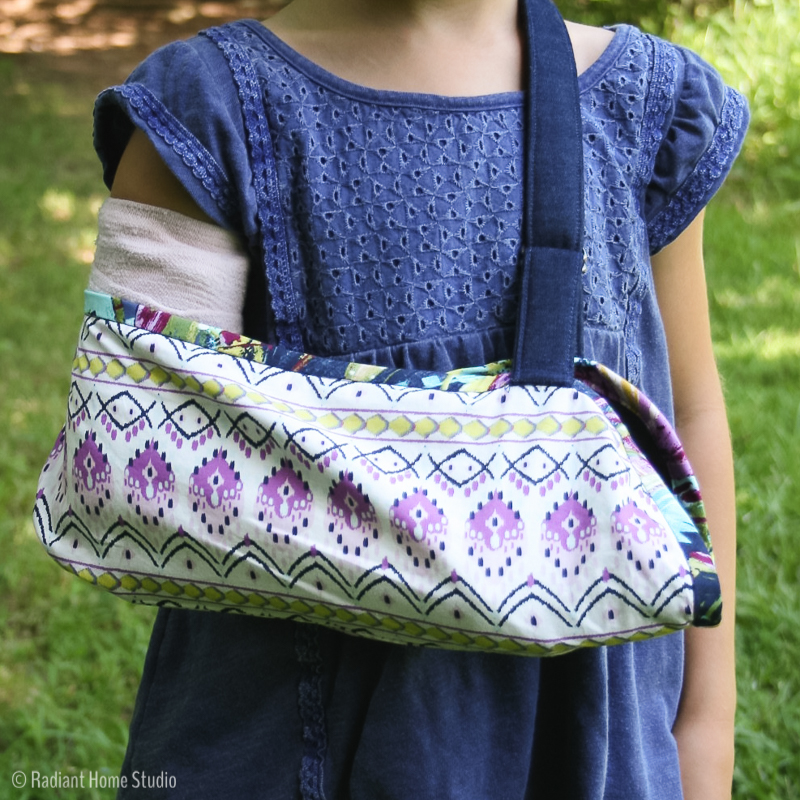
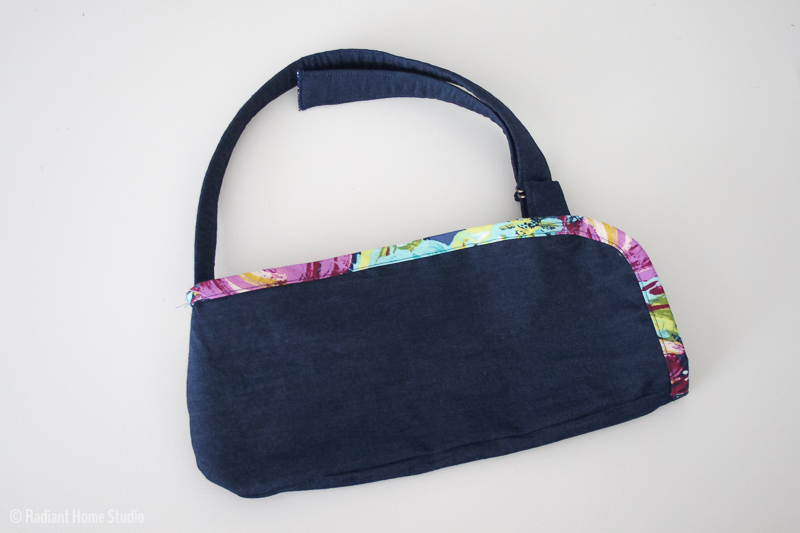
The hospital issued slings aren’t the best. After watching two little girls with broken arms using the slings, I have made a couple of improvements to the standard issue hospital sling. Both have complained about the scratchy strap cutting into their neck, so I padded the neck strap. On the current sling, the strap slide is too high and also cuts into the shoulder/neck area. I moved it down to fix that problem. Finally, the new sling is reversible—plain navy on one side and a fun pattern on the other!

I made a sling for an elementary-aged child, but you can easily adjust the size for a smaller or larger person. My kids asked if it would work for either arm, and the answer is yes!

How to Sew a Sling for Broken Arm | Radiant Home Studio

(Some links may be affiliate links, which means I earn a small commission at no cost to you. Thanks!)

How to Sew a Sling for a Broken Arm:

Materials:

2 fat quarters of quilting cotton
2 d-rings (1″)
1/4 yd. fabric for a strap (OR 1 yd. of 1″ webbing)
1/4 yd. fusible fleece (to pad the strap)
1 yd. of 1/2″ double fold bias binding (make your own with this tutorial!)

(If making a larger size, you will need more webbing and more bias binding. You might also consider making a wider strap and using stronger o-rings in place of d-rings.)

Cut the Following:

(4) 14″ x 6″ rectangles, 2 from each fat quarter
(1) 36″ x 4″ rectangle from 1/4 yd. fabric
(1) 36″ x 2″ rectangle from fusible fleece (you can piece this together from scraps)

(For a larger size, measure from the elbow to the fingertips, add 1″, and replace the 14″ measurement on the first cut. Change the depth of the sling by changing the 6″ measurement on the first cut. For example, a sling for myself would be 18″ x 8″. Remember that you might also need a longer strap and more bias binding.)

Sewing Instructions:

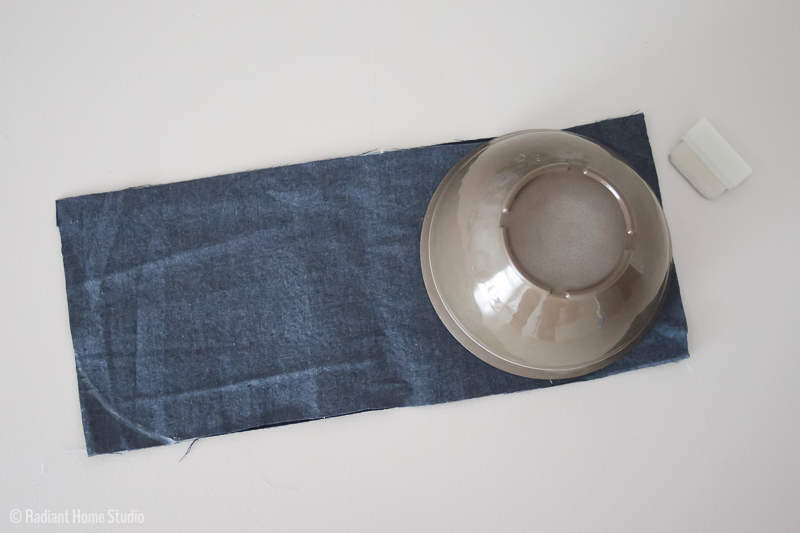
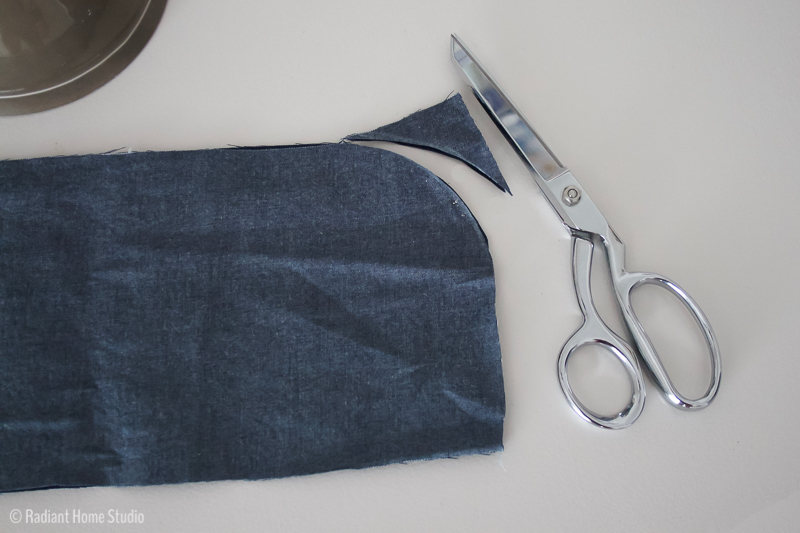
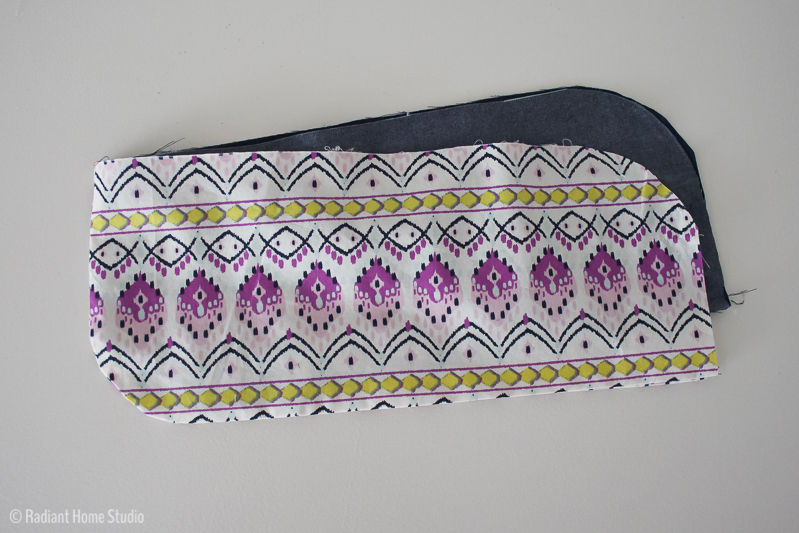
1. Place one matching set of the large rectangles right sides together. Use a bowl (or another rounded object) mark rounded edges on the top right & bottom left corners. Trim the corners. Repeat for the second set of large rectangles.

How to Sew a Sling for Broken Arm | Radiant Home Studio

How to Sew a Sling for Broken Arm | Radiant Home Studio

2. With the rounded rectangles still right sides together, stitch along the left and bottom edges with a 1/4″ seam allowance.

How to Sew a Sling for Broken Arm | Radiant Home Studio

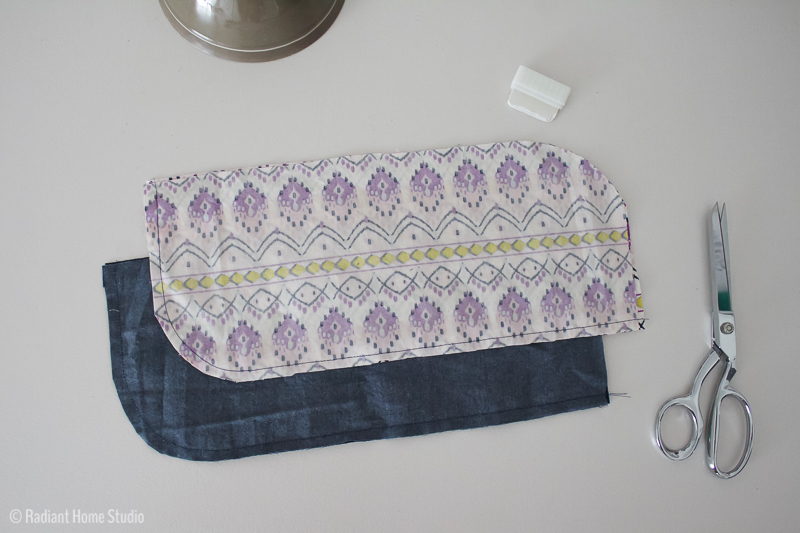
3. Turn one piece right side out. Place the two sling pieces wrong sides together and set aside.

How to Sew a Sling for Broken Arm | Radiant Home Studio

4. To make the strap, fold the 36″ long fabric in half lengthwise and press. Fold each long, raw edge into the center seam, wrong sides together, and press again.

How to Sew a Sling for Broken Arm | Radiant Home Studio

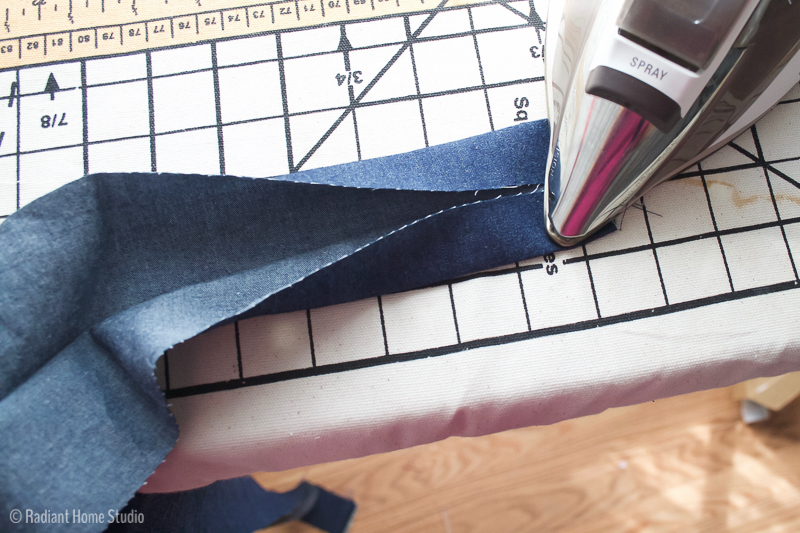
5. Place the fusible fleece on the wrong side of the strap, centered between the fold lines. Fuse, refold, and press.

How to Sew a Sling for Broken Arm | Radiant Home Studio

How to Sew a Sling for Broken Arm | Radiant Home Studio

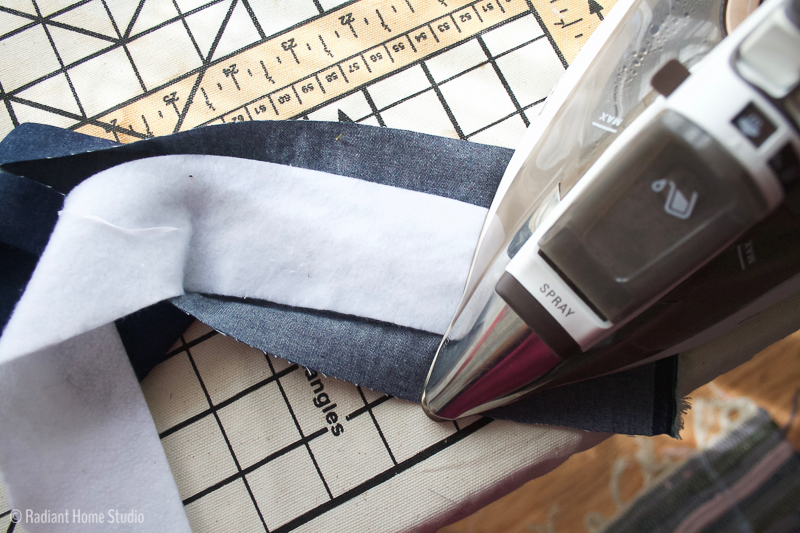
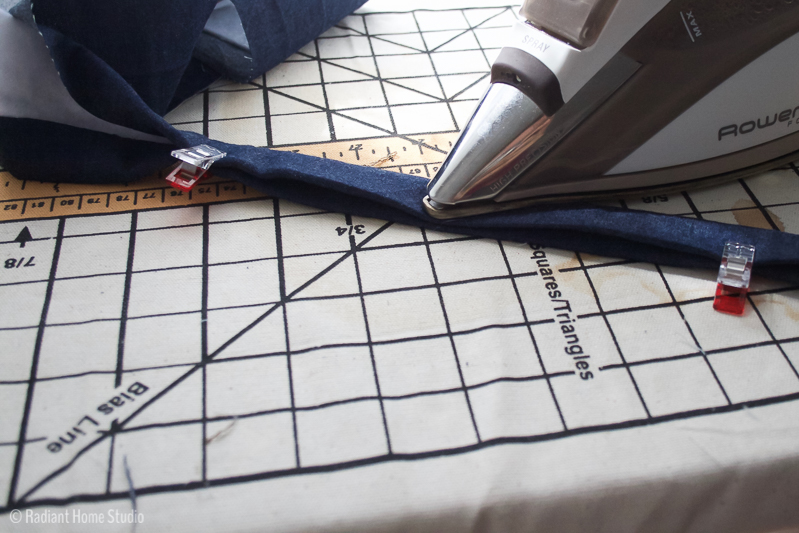
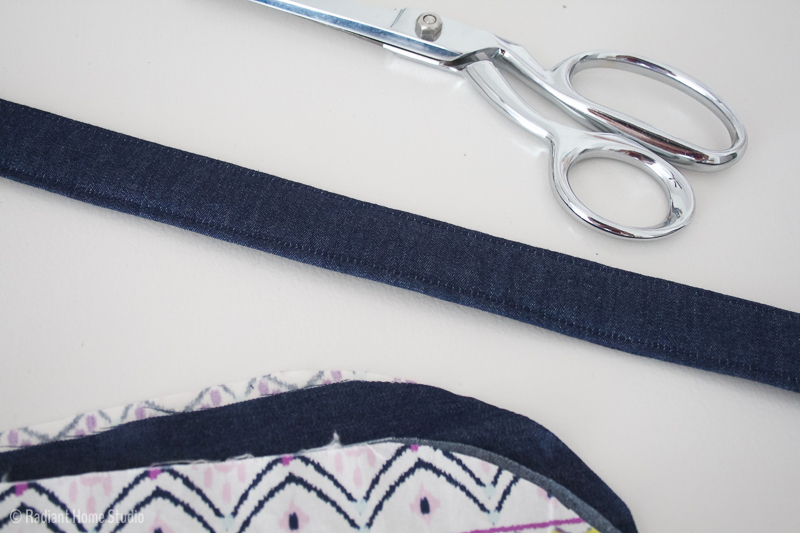
6. Stitch along the long, folded edges of the strap with a 1/8″ seam allowance.

How to Sew a Sling for Broken Arm | Radiant Home Studio

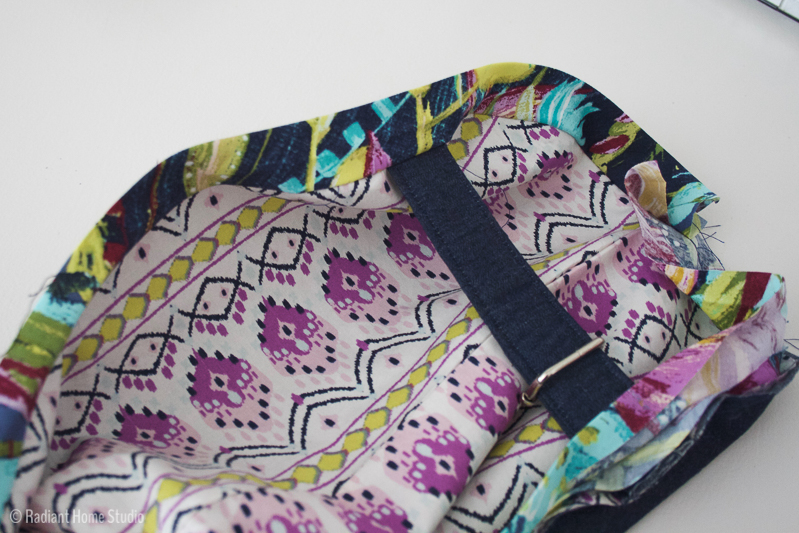
7. Cut a 6″ length from the strap. On the right (open) end of the sling, baste one end of the strap, just at the edge of the curve on the front of the sling, as shown. Place the d-rings on the 6′ length of the strap. Baste the other end of the strap on the back of the sling. (Ignore the strap slide…I ended up switching hardware after finding that the strap slide was too slippery.)

8. Baste the remaining strap piece to the left side of the sling, centered over the seam.

How to Sew a Sling for Broken Arm | Radiant Home Studio

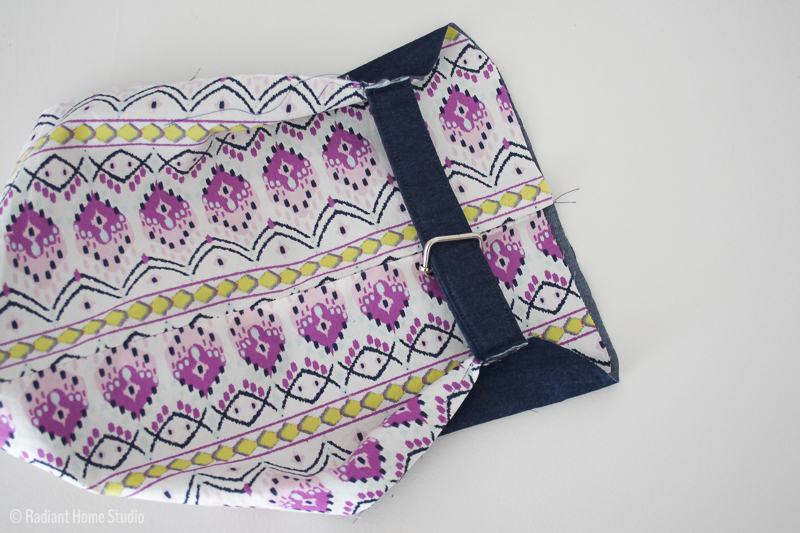
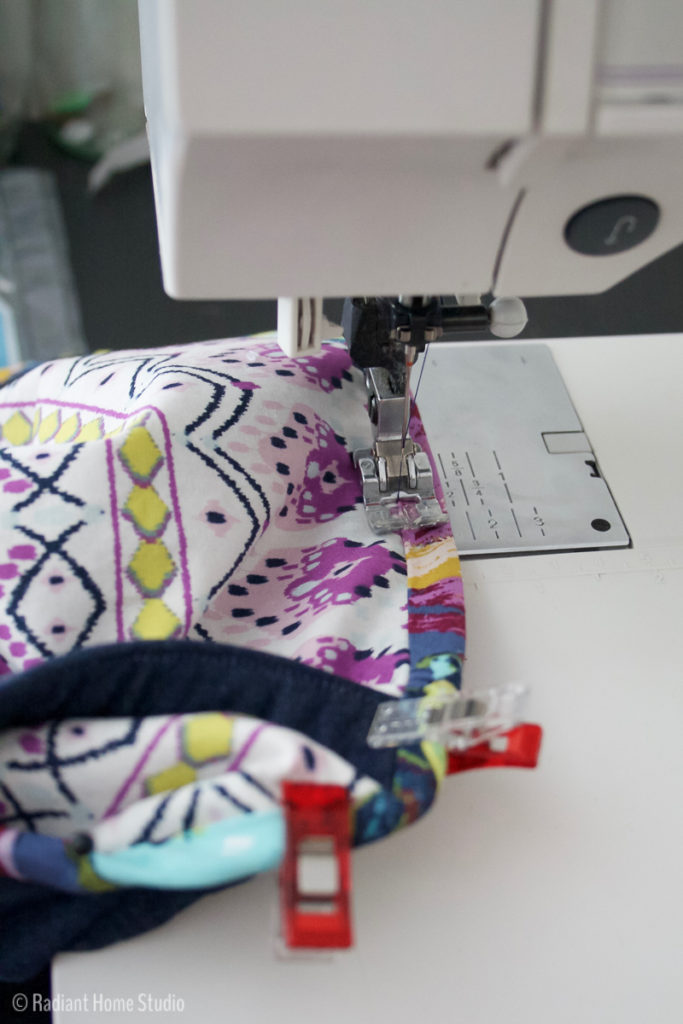
9. Next, open and place your bias binding right sides down on the raw edge of the sling. (It doesn’t really matter which side of the sling since it will be reversible.) Fold the end of the bias binding down about 1/2″ and begin sewing. Continue around the whole sling, stitching on the first fold line, and catching the strap ends in the stitching. Overlap the end by about 1/2″. Backstitch and trim excess binding.

How to Sew a Sling for Broken Arm | Radiant Home Studio

How to Sew a Sling for Broken Arm | Radiant Home Studio

10. Clip the curves and press the binding toward the other side. Pin in place and stitch around the binding again, 1/8″ from the folded edge.

How to Sew a Sling for Broken Arm | Radiant Home Studio

11. Flip the straps to the right side and tack them onto the binding by stitching a couple of lines across them.

How to Sew a Sling for Broken Arm | Radiant Home Studio

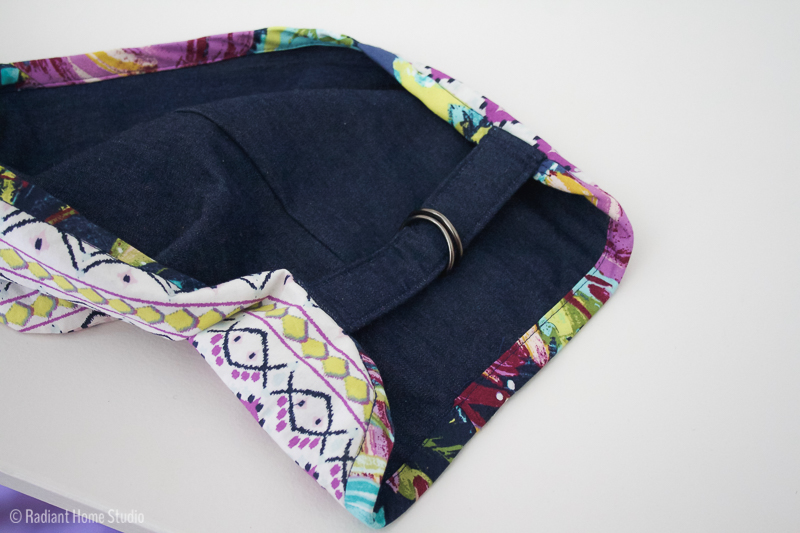
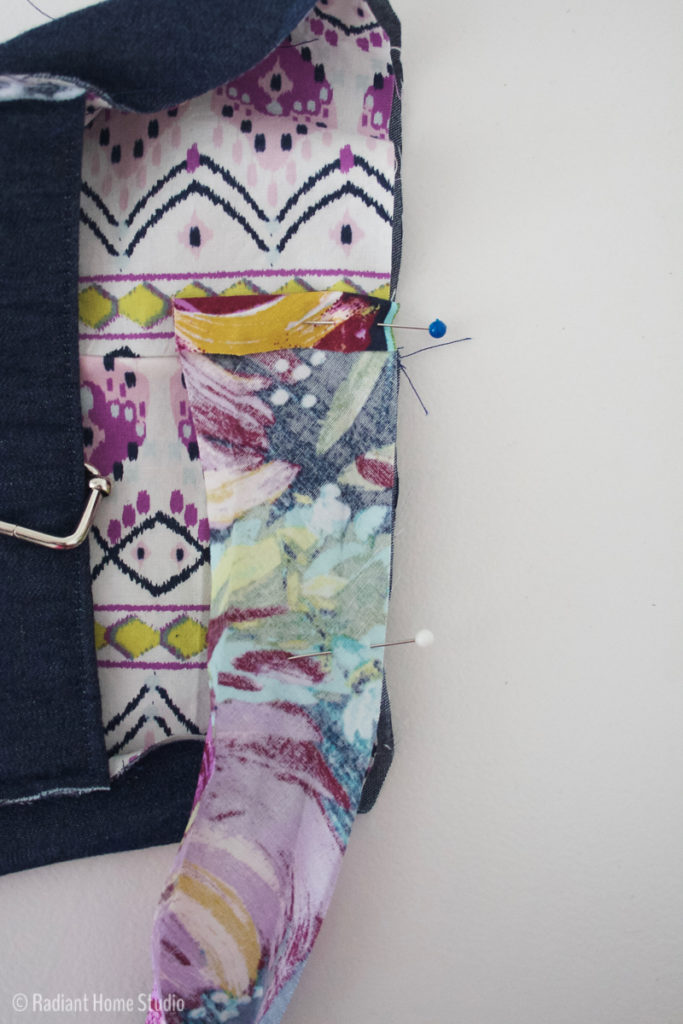
12. Shorten the shoulder strap if needed and finish the end with a wide zig-zag stitch.

How to Sew a Sling for Broken Arm | Radiant Home Studio

How to Sew a Sling for Broken Arm | Radiant Home Studio

How to Sew a Sling for Broken Arm | Radiant Home Studio

While this is not a sewing tutorial I had planned on writing, I hope a handmade sling makes healing from a broken arm a little bit more comfortable and fun!

Also sharing this tutorial at: Sew Can She, Craftastic Monday, Made By You Monday

SaveSaveSaveSave

SaveSave

SaveSave

SaveSave

SaveSave

SaveSave

SaveSave

SaveSave

SaveSave

SaveSaveSaveSave

SaveSaveSaveSave

SaveSave

SaveSave

Previous Post: « Sewing a Rumi Tank for Maternity
Next Post: Shibori Indigo Dyed Zipper Pouch »

Reader Interactions

Comments

  1. Anne says

    July 9, 2017 at 10:20 am

    Best wishes for a speedy recovery!! Broken wrists are no fun! My mother-in-law made some similar slings for me when I broke my wrist several years ago. They were such an improvement! And the pretty designs cheered me up! I still have them and I lend them out to friends/acquaintances whenever I hear of someone else breaking their wrist. An easy way to spread the love!

    I’ve got a Craft Gossip post scheduled for later today that features your tutorial: http://sewing.craftgossip.com/tutorial-sew-a-broken-arm-sling/2017/07/09/

    –Anne

    • Sara Curtis says

      July 10, 2017 at 10:30 am

      Thank you! I thought about lending it out when she’s done…that’s a great way to help cheer people up! 🙂

  2. Rachel says

    July 14, 2017 at 3:59 pm

    This is so adorable! I hope I never need to use this, but pinning it just in case!! 🙂

    • Sara Curtis says

      July 19, 2017 at 9:43 am

      Thanks!

  3. Kelly says

    May 6, 2018 at 4:53 pm

    This pattern is very confusing and im an experienced seamstress. It doesn’t mention which sides get sewn together- lining/outside. I know it’s reversible but it should mention which are sewn where. I’ve spent 2 hours on this and am nowhere.

    • Sara says

      May 7, 2018 at 7:47 am

      Hi Kelly. I’m sorry the tutorial is confusing to you! Step 3 says, “Turn one piece right side out. Place the two sling pieces wrong sides together and set aside.” So the lining and the outside go wrong sides together. It’s assembled like a drop in tote bag. Is that the part you were struggling with or something else? Hopefully, you’ve already figured it out. Sometimes putting the project aside and coming back to it makes everything clear again. I’m always happy to answer questions through email if you want to send pictures of what you have and where you got stuck!

Primary Sidebar

Hello

Welcome! I’m Sara. I share modern home & accessory sewing patterns, and I create surface designs for licensing. I hope you are encouraged to see beauty in small things and are inspired to try new creative projects!

Shop Sewing Patterns


icon icon

icon icon

Newsletter

Sign up to get access to free sewing patterns & resource library!

Find My Work at:


© Copyright Notice

All images and text copyright ©2013-2020 Radiant Home Studio, unless otherwise noted. Please be kind enough to link back to my site and contact me if you would like to use my images.

Disclosure

I am a participant in the Amazon Services LLC Associates Program, an affiliate advertising program designed to provide a means for me to earn fees by linking to Amazon.com and affiliated sites.

  • Disclosures & Copyright
  • About
  • Contact me!
  • Digital Pattern FAQ’s

Resources I Love:


Featured Posts:

  • How to Make A Waxed Canvas Gift Pouch | Radiant Home Studio

    How to Make a Waxed Canvas Gift Pouch

Sewing Tutorials

Denim Pocket with Grommets and Denim Shoulder Strap| Tote Bag Upgrade | Radiant Home Studio

Sewing Patterns

Surface Design

home page 1 - radiant home studio design
Sara Curtis | Stationery & Pattern Design

overflowandco

🪴Shop welcoming greeting cards, stationery, home goods, & gifts in NC
☕️ Cozy, fresh, encouraging design
💌 Email for wholesale, licensing & collabs👇🏻

I’ve been spending my creative energy gardening I’ve been spending my creative energy gardening this year. The previous owner planted gorgeous peonies that we get to enjoy every year. This year, the rain came at just the right time and they are thriving. #peonies #peoniesofinstagram #flowergarden #flowergardensofinstagram
I still have sewing patterns in my Etsy shop! The I still have sewing patterns in my Etsy shop! The potholder pattern always gets popular before the holidays because people love to make beautiful custom gifts for their friends and family. 

#sewersgonnasew #sewingproject #sewinggifts #diygifts #christmassewing #giftsforfriends #handmadegifts #handmadegiftsarethebest #etsyshop #sewingpattern
I’ve finished my Masters in Autism Studies! I’ I’ve finished my Masters in Autism Studies! I’m providing parent coaching, education and consultation services to families. If you know anyone that might benefit from my services, please send them my way! @autistickind
It’s been a while, but I’m taking my products It’s been a while, but I’m taking my products to a market in April! If you’re in the Triangle area, stop by 🌸Petals & Play: a Celebration of Neurodiversity on April 20th. #petalsandplaydurham @hopecreekacademy for more details…

#durhamevents #raleighnc #durhamnc #chapelhillnc #artisanmarket #stationeryshop
Stock up on encouraging greeting cards! 50% off ev Stock up on encouraging greeting cards! 50% off everything this week when you support my favorite nonprofit @hopecreekacademy 🙌

DM me for the code if you donate!

#givingtuesday2023 #giveback #shoplocal #shopsmall #shoplocaldurhamnc #shopsmallraleigh #stationeryshop #handmadegiftshop #coffeecard #friendshipgift #greetingcardshop
Grab a bunch of stocking stuffers for up to 50% of Grab a bunch of stocking stuffers for up to 50% off! This year I’m supporting @hopecreekacademy - a nonprofit school for neurodivergent students. This school has been a lifeline for our family this year and Eve been volunteering all we can to help them meet the needs of the students. When you donate to their fundraiser, l’ll send you a coupon code for 50% off your purchase of everything in my shop! 

#shopsmalldurham #shopsmallnc #shoplocalnc #stationeryshop #sewingpatternshop #washitapelove #washitapeshop #stockingstuffers #supportnonprofits #giveback #givingtuesday2023
Load More Follow on Instagram
  • Disclosures & Copyright
  • About
  • Contact me!
  • Digital Pattern FAQ’s

Copyright © 2025 · Sara Curtis // beloved theme