• SHOP
  • About
    • About Sara
    • Contact me!
    • Design Collaborations
    • Sewing Collaborations
  • Sewing
    • Sewing Tutorials
    • Things I Made
  • Design Portfolio
  • Blog
  • Nav Social Menu

    • Facebook
    • Instagram
    • Pinterest
Radiant Home Studio | Sewing Patterns & Surface Design

Radiant Home Studio

March 20, 2015 ·

Photo Transfer {Tote Bag Upgrade}

Sewing· Tutorials

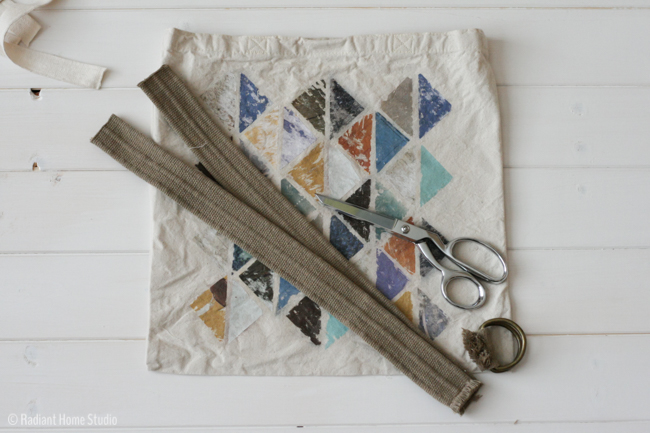
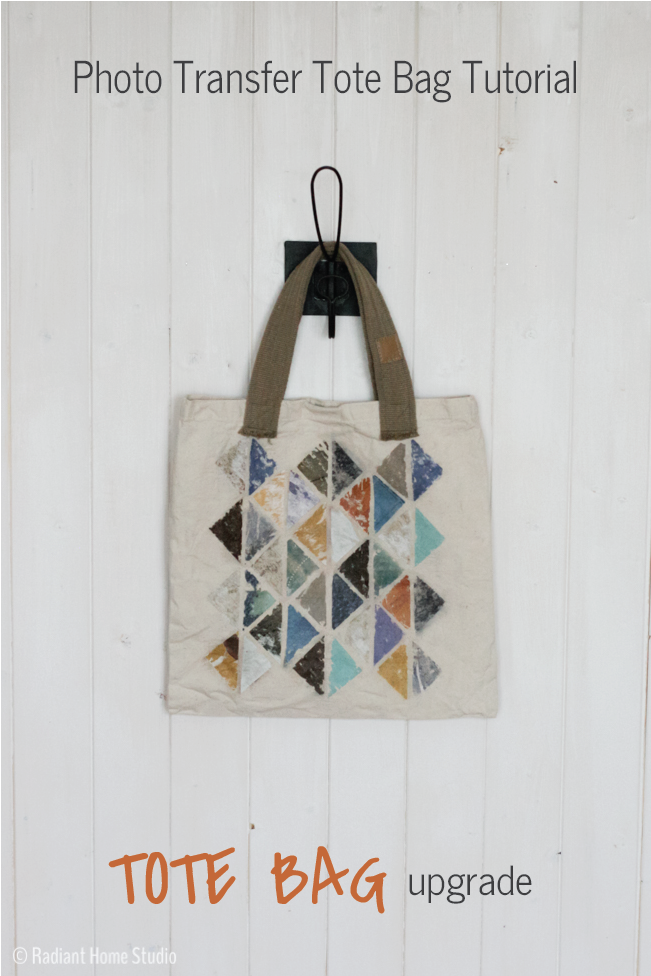
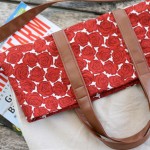
So far, the tote bag upgrades have been mostly sewing related. I thought it would be fun to add some other craft techniques into the mix for variety, so today I’m going to show you how to make a photo transfer tote bag. I had so much fun with my half square triangle sketchbook cover that I decided to use magazine images to mimic the quilted triangle pattern. You can make a modern quilt design even if you are not a quilter!

Photo Transfer Tote Bag Upgrade | Radiant Home Studio

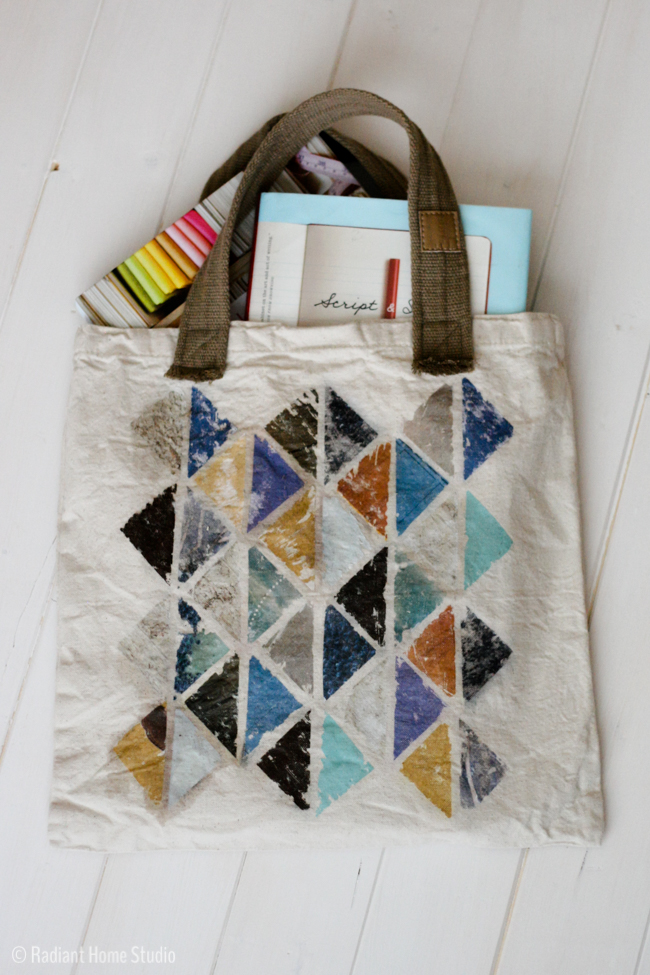
I’ll also show you how to do a quick upgrade to the straps with an old canvas belt, which will only require minimal sewing. The photo transfer tote bag looks great without a lining since there is no stitching to hide on the inside of the bag. But if you would like, you can add a lining using my tote bag lining tutorial.

This tutorial for transferring images will work with any photo, magazine image, or laser printed image. Just keep in mind that any image you choose will be backward after transfer, so it’s best not to use images with words. The finished image will also be a little bit rough around the edges, giving the photo a worn, vintage look. You can use any image shape or size. I highly recommend practicing on some scraps first though. It took me 3 tries to get the right mix of gel medium, patience, and water for removal. You’ll have to wait overnight for the gel to dry, but it’s worth practicing to get it right!


Photo Transfer Tote Bag Upgrade | Radiant Home Studio

Materials:

• canvas tote bag
• a couple of old magazines
• gel medium
• a canvas belt (or new belt webbing)
• rotary cutter and mat
• coordinating thread
• spray bottle (optional)

Preparation:

Practice. (I’m serious! Don’t skip this and ruin your bag!)

Photo Transfer Tote Bag Upgrade | Radiant Home Studio

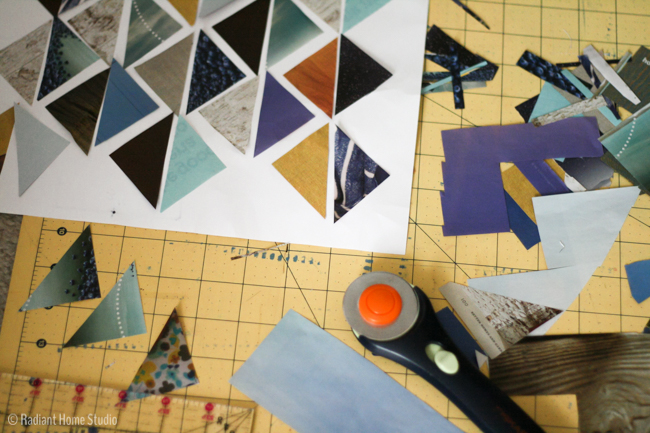
To make the triangle design, decide on a color scheme and cut several large pieces out from your magazines. My colors were aqua/blue and gold/brown. To form the triangles, cut 2″ squares. Then cut across the diagonals to form the triangles. You’ll need 18 squares, cut in half to make 36 triangles. Arrange the triangles into a pattern.

Photo Transfer Tote Bag Upgrade | Radiant Home Studio

Make a Photo Transfer Design on a Tote Bag:

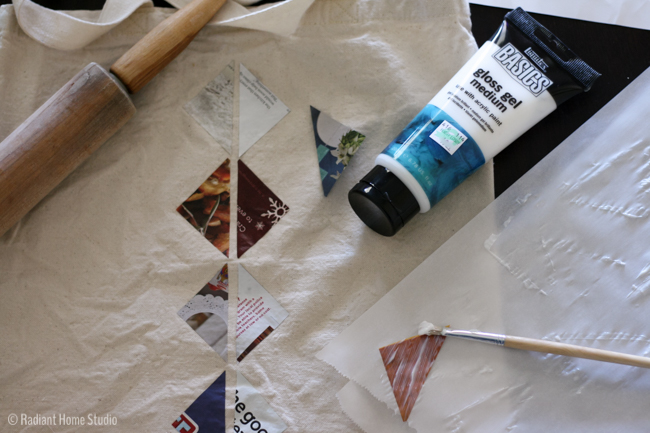
1. Use a paintbrush to cover the front of your image with a thick, even coat of gel medium. Press the images onto the front of your tote bag. You may want to use a rolling pin to make sure the gel medium at the edge of each image adheres to the fabric. (Do not paint gel medium over the back of the image. As I learned from experience, the paper will not come off.) Let everything dry overnight. You want to make sure it is completely dry or the image will not adhere to the fabric correctly.

Photo Transfer Tote Bag Upgrade | Radiant Home Studio

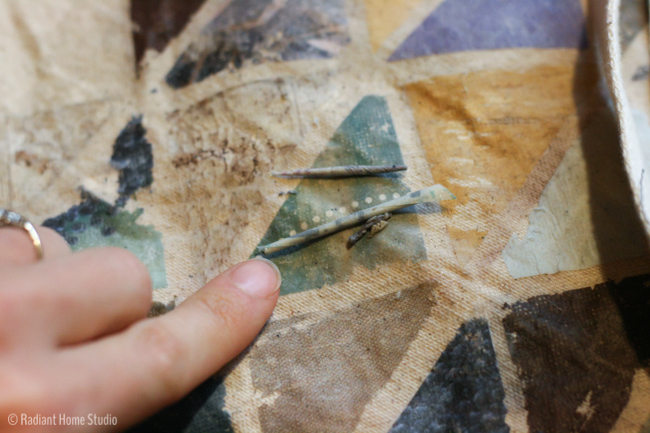
2. Lightly wet the paper (you can use a spray bottle or just use the faucet and your fingers to dampen it). Remove the excess paper. Most of the instructions I read suggested rubbing off the excess paper. I found that some of the paper just peeled right off, while other bits took more effort. This is why I suggest experimenting on scraps first.

Photo Transfer Tote Bag Upgrade | Radiant Home Studio

3. Let the bag dry for an hour or so, and then paint over the image with a light coat of gel medium to seal the image. This will protect the images but does not make the bag machine washable. If you need to wash your bag, I recommend washing it by hand.

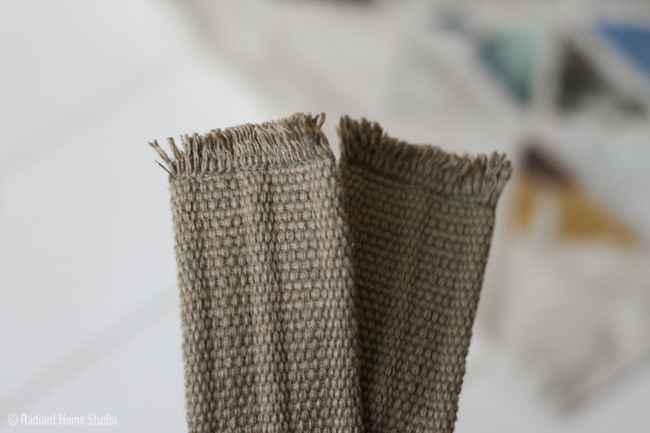
4. To add new straps, cut off the old straps as close to the stitching as possible. Cut your canvas belt into two 12″ lengths. Remember that canvas webbing will fray. I like the rough edges for a casual bag. But to keep it from fraying too far, stitch across the width 1/2″ from each end.

Photo Transfer Tote Bag Upgrade | Radiant Home Studio

Photo Transfer Tote Bag Upgrade | Radiant Home Studio

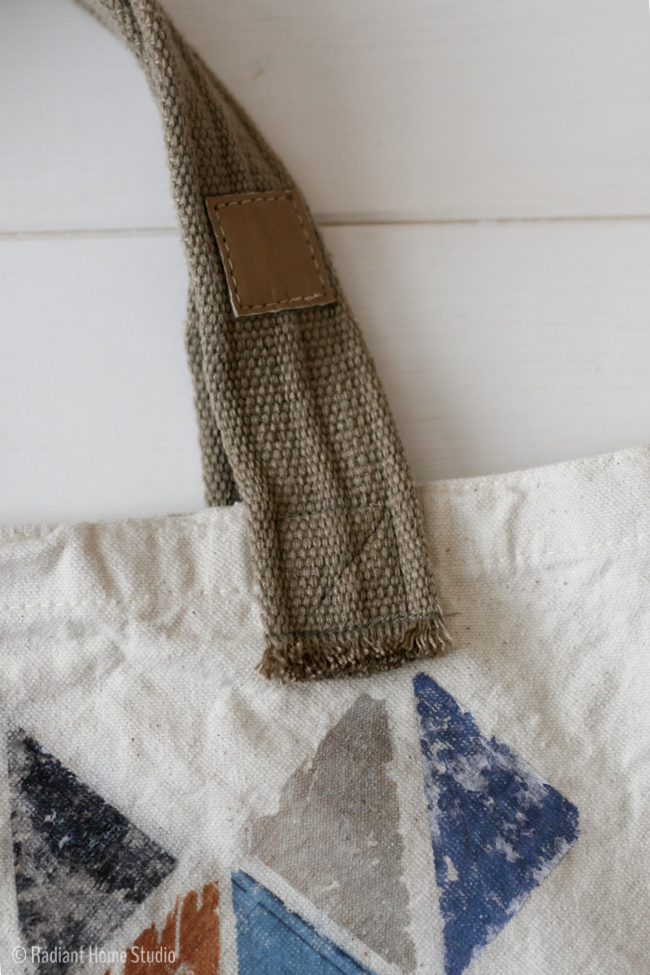
5. Align the belt ends on the bag where the old strap ends were attached. Sew each end by stitching a square with a diagonal line across it.

Photo Transfer Tote Bag Upgrade | Radiant Home Studio

This bag requires a little bit of patience and planning, but it is easy to make and requires very little sewing. You can use the same technique to transfer any image to the tote bag. Try personalizing it with photos of your kids, pictures from your travels, Instagram photos, vintage graphics, or funny magazine ads.

Photo Transfer Tote Bag Upgrade | Radiant Home Studio

(This post is linked with: The Makers)

Have you tried any of the other tote bag upgrades yet? I’d like to see what you’ve made. Should we plan a link-up for the summer?

Sew a Reversible Tote Bag with Strong Straps | Radiant Home Studio 

Reversible Tote Bag with Strong Straps

Sew a Cargo Pocket to a Tote Bag | Tote Bag Upgrade | Radiant Home Studio 

Sew a Cargo Pocket on a Tote Bag

2 Ways to Add a Lining to a Tote Bag | Tote Bag Upgrade | Radiant Home Studio

2 Ways to Line to a Tote Bag

Fold Over Tote Bag Tutorial | Radiant Home Studio

Fold Over Tote Bag 

Kantha Stitched Pocket {Tote Bag Upgrade} | Radiant Home Studio

Kantha Stitched Pocket Tote Bag

Previous Post: « Grammercy Out and About Dress
Next Post: Spring Ribbon Zipper Pouch »

Reader Interactions

Comments

  1. Krista says

    March 20, 2015 at 2:38 pm

    This is a brand new technique to me–I was looking up gel medium and found that it comes in gloss and matte types–is it okay to use either one?

    • Sara Curtis says

      March 20, 2015 at 3:02 pm

      That’s a good question Krista! As far as I know, both should work for this project. Mine was gloss, though it doesn’t look very glossy…

  2. Ama says

    March 22, 2015 at 7:36 pm

    Great idea! I like the color combination you choose. You end up with a beautiful and unique tote bag.

    • Sara Curtis says

      March 23, 2015 at 7:53 am

      Thank you Ama!

  3. Anne says

    March 23, 2015 at 11:27 am

    This is so cool! This would also be neat to do to the front of a pillow cover. I’ve got a Craft Gossip post scheduled for this evening that links to your tutorial:
    http://sewing.craftgossip.com/tutorial-upgrade-a-tote-bag-with-a-photo-transfer-technique/2015/03/23/

    –Anne

    • Sara Curtis says

      March 23, 2015 at 11:31 am

      Oh yes, a pillow cover would be great too. And thank you! I always appreciate the link from your site!

Primary Sidebar

Hello

Welcome! I’m Sara. I share modern home & accessory sewing patterns, and I create surface designs for licensing. I hope you are encouraged to see beauty in small things and are inspired to try new creative projects!

Shop Sewing Patterns


icon icon

icon icon

Newsletter

Sign up to get access to free sewing patterns & resource library!

Find My Work at:


© Copyright Notice

All images and text copyright ©2013-2020 Radiant Home Studio, unless otherwise noted. Please be kind enough to link back to my site and contact me if you would like to use my images.

Disclosure

I am a participant in the Amazon Services LLC Associates Program, an affiliate advertising program designed to provide a means for me to earn fees by linking to Amazon.com and affiliated sites.

  • Disclosures & Copyright
  • About
  • Contact me!
  • Digital Pattern FAQ’s

Resources I Love:


Featured Posts:

  • How to Make A Waxed Canvas Gift Pouch | Radiant Home Studio

    How to Make a Waxed Canvas Gift Pouch

Sewing Tutorials

Denim Pocket with Grommets and Denim Shoulder Strap| Tote Bag Upgrade | Radiant Home Studio

Sewing Patterns

Surface Design

home page 1 - radiant home studio design
Sara Curtis | Stationery & Pattern Design

overflowandco

🪴Shop welcoming greeting cards, stationery, home goods, & gifts in NC
☕️ Cozy, fresh, encouraging design
💌 Email for wholesale, licensing & collabs👇🏻

I’ve been spending my creative energy gardening I’ve been spending my creative energy gardening this year. The previous owner planted gorgeous peonies that we get to enjoy every year. This year, the rain came at just the right time and they are thriving. #peonies #peoniesofinstagram #flowergarden #flowergardensofinstagram
I still have sewing patterns in my Etsy shop! The I still have sewing patterns in my Etsy shop! The potholder pattern always gets popular before the holidays because people love to make beautiful custom gifts for their friends and family. 

#sewersgonnasew #sewingproject #sewinggifts #diygifts #christmassewing #giftsforfriends #handmadegifts #handmadegiftsarethebest #etsyshop #sewingpattern
I’ve finished my Masters in Autism Studies! I’ I’ve finished my Masters in Autism Studies! I’m providing parent coaching, education and consultation services to families. If you know anyone that might benefit from my services, please send them my way! @autistickind
It’s been a while, but I’m taking my products It’s been a while, but I’m taking my products to a market in April! If you’re in the Triangle area, stop by 🌸Petals & Play: a Celebration of Neurodiversity on April 20th. #petalsandplaydurham @hopecreekacademy for more details…

#durhamevents #raleighnc #durhamnc #chapelhillnc #artisanmarket #stationeryshop
Stock up on encouraging greeting cards! 50% off ev Stock up on encouraging greeting cards! 50% off everything this week when you support my favorite nonprofit @hopecreekacademy 🙌

DM me for the code if you donate!

#givingtuesday2023 #giveback #shoplocal #shopsmall #shoplocaldurhamnc #shopsmallraleigh #stationeryshop #handmadegiftshop #coffeecard #friendshipgift #greetingcardshop
Grab a bunch of stocking stuffers for up to 50% of Grab a bunch of stocking stuffers for up to 50% off! This year I’m supporting @hopecreekacademy - a nonprofit school for neurodivergent students. This school has been a lifeline for our family this year and Eve been volunteering all we can to help them meet the needs of the students. When you donate to their fundraiser, l’ll send you a coupon code for 50% off your purchase of everything in my shop! 

#shopsmalldurham #shopsmallnc #shoplocalnc #stationeryshop #sewingpatternshop #washitapelove #washitapeshop #stockingstuffers #supportnonprofits #giveback #givingtuesday2023
Load More Follow on Instagram
  • Disclosures & Copyright
  • About
  • Contact me!
  • Digital Pattern FAQ’s

Copyright © 2025 · Sara Curtis // beloved theme