• SHOP
  • About
    • About Sara
    • Contact me!
    • Design Collaborations
    • Sewing Collaborations
  • Sewing
    • Sewing Tutorials
    • Things I Made
  • Design Portfolio
  • Blog
  • Nav Social Menu

    • Facebook
    • Instagram
    • Pinterest
Radiant Home Studio

Radiant Home Studio

December 7, 2015 ·

How to Sew Perfect Scallops

Sewing Tips· Tutorials

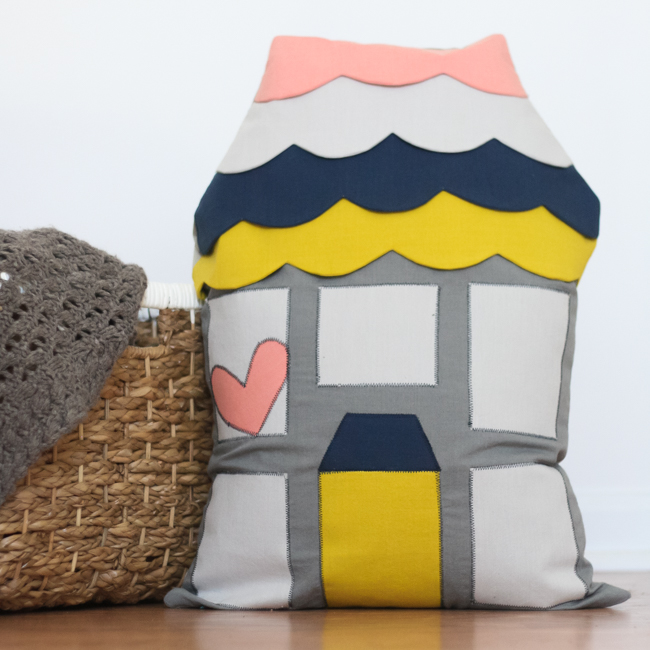
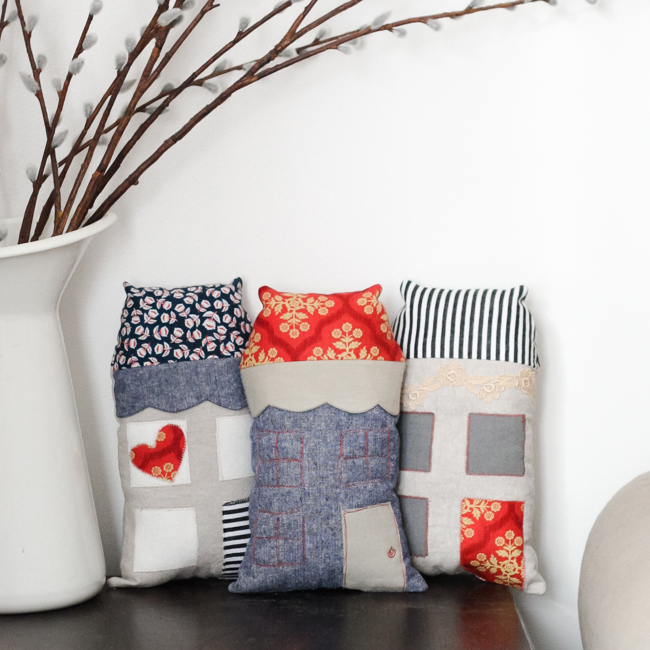
I’ve been sewing a lot of projects with scalloped edges recently, and my new Highland Avenue House pattern features a scalloped roof. The pattern contains sewing tips to help you create clean and professional scallops. But there’s no reason not to share my tips with everyone. Would you like to learn how to sew perfect scallops? (Okay. We all know our sewing won’t be perfect, but that’s what people are searching for, right?)

How to Sew Perfect Scallops | Sewing Scalloped Edges | Radiant Home Studio
(Some links may be affiliate links, which means I earn a small commission at no cost to you. Thanks!)

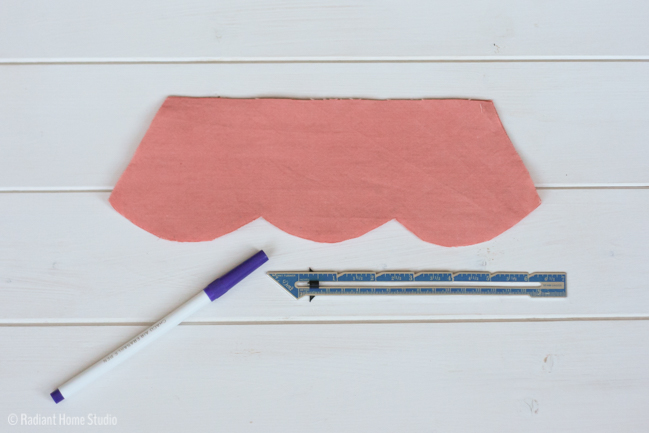
I’ll be using the top scallop from the Highland Avenue House to demonstrate, but the technique works for any scallops. You can even make your own scalloped edge using a cup or other round item. I won’t cover that in detail, but it’s pretty easy if you can measure precisely. (Or, check out this awesome quilting ruler that helps you to create perfect scalloped edges!)

Highland Avenue House Pillow Pattern | Radiant Home Studio

You’ll need your fabric, a hem gauge or ruler, a marking tool, and blunt pointed object to push out the edges.

How to Sew Perfect Scallops | Radiant Home Studio

At the peak of each scallop, make a mark directly above the point. My seam allowance is 1/4″ so my mark is 1/4″ from the point. This will be your pivot point. If you are comfortable sewing an even curved line, that should be all of the marking you need.

How to Sew Perfect Scallops | Radiant Home Studio

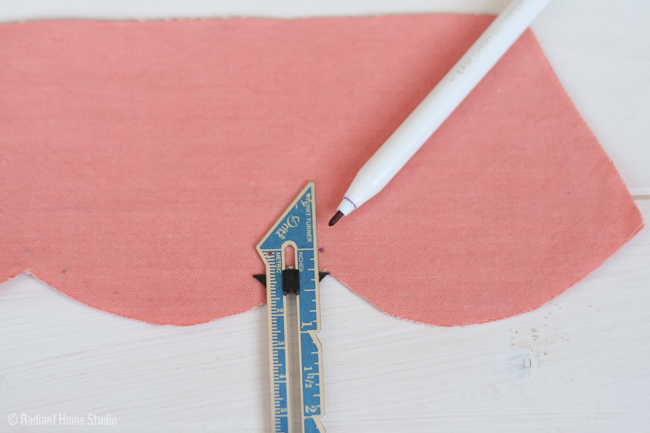
If you need a better guideline to get an even curve, go ahead and make a dotted line by measuring in 1/4″ and making dots along the edges.

How to Sew Perfect Scallops | Radiant Home Studio

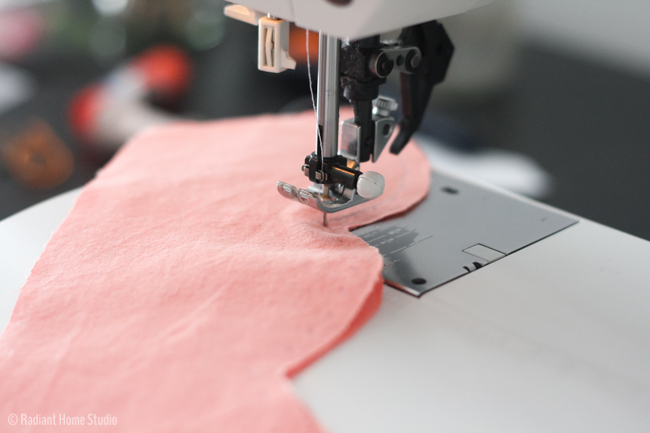
Using a short straight stitch, begin sewing along the first curve using the dotted line as a guide. At the peak, where you marked the pivot point, leave your needle down in the fabric, raise the presser foot and turn the fabric to sew the next curve. Continue to the end.

How to Sew Perfect Scallops | Radiant Home Studio

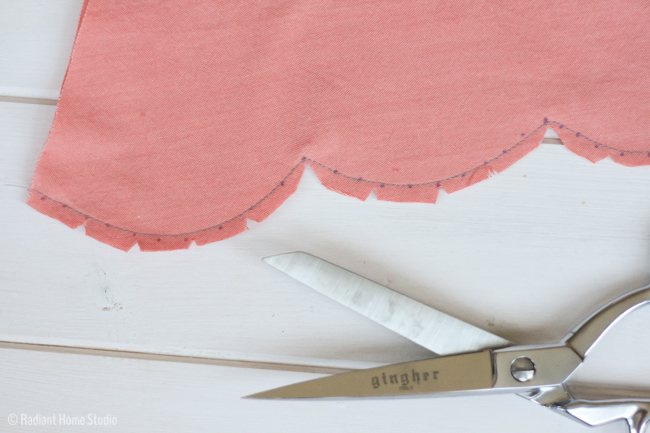
When you finish sewing, clip the curves. If the seam allowance is more than 1/4″, trim that as well. Clip into the peaks, as close to the stitches as you can, and cut the excess fabric out around each peak.

How to Sew Perfect Scallops | Radiant Home Studio

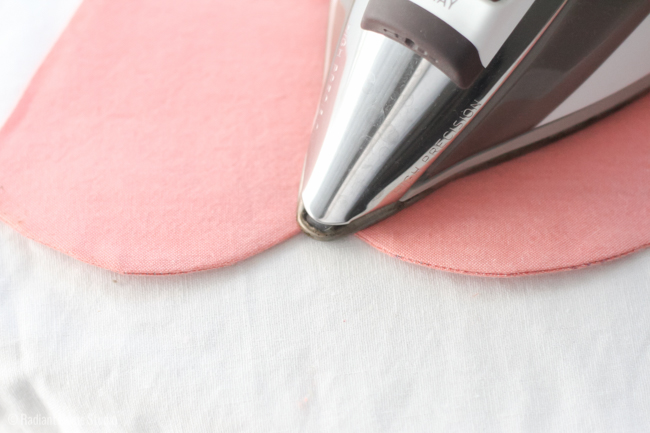
Turn the scallops right side out. The scallops will not look even yet. If you haphazardly press them at this point, you’ll have a very uneven scalloped edge. Don’t just plop the iron down on top of it!

How to Sew Perfect Scallops | Radiant Home Studio

To even out the curved seams, use a thin blunt object such as a paintbrush end or knitting needle.

How to Sew Perfect Scallops | Radiant Home Studio

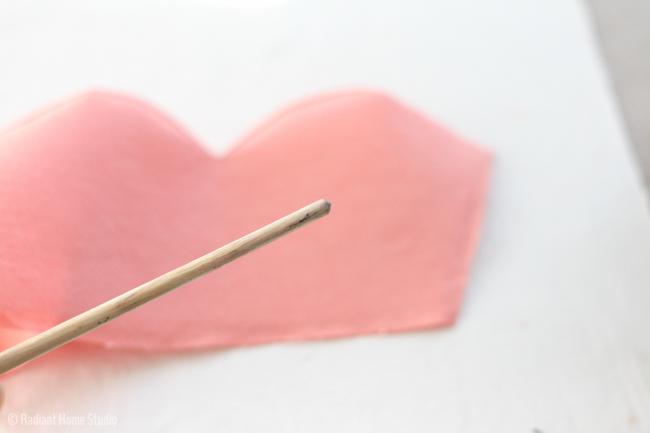
Push the curves out using your pointed tool. It’s best if you can stretch each curve a little bit to get the seams lined up properly. I work in small sections, pushing out the curve, holding it in place, and pressing as I go. Working slowly and methodically while pressing is the key to getting (nearly) perfect scalloped edges.

How to Sew Perfect Scallops | Radiant Home Studio

How to Sew Perfect Scallops | Radiant Home Studio

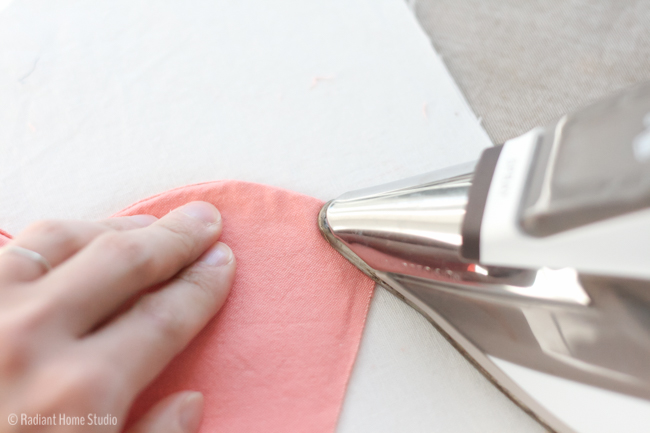
Continue along the curved edge until you reach the end, working to get the curves as smooth as possible.

How to Sew Perfect Scallops | Radiant Home Studio

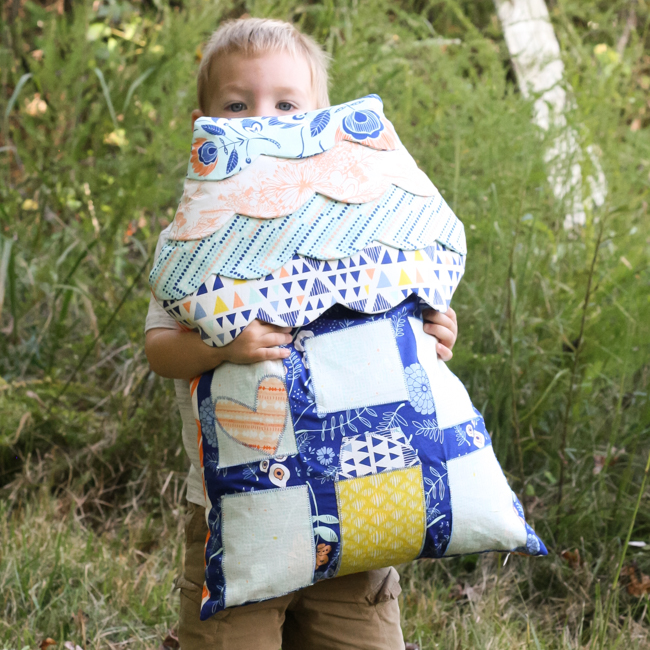
If you like, you can also topstitch along the scalloped edge. Then add your scalloped detail to your sewing project!

You can use my Mini Highland House pattern to practice sewing scalloped edges. It’s a free gift when you subscribe to my newsletter!

Mini Highland House Pattern | Radiant Home Studio

Or try the Highland Avenue House Pattern…

How to Sew Perfect Scalloped Edges | Radiant Home Studio

Highland Avenue House Pillow Pattern | Radiant Home Studio

P. S. If you can’t stop sewing scallops and want some more sewing ideas, you’ll love 18 Beautiful Scalloped Craft Projects!

SaveSave

Previous Post: « 2nd Birthday Celebration & Blog Tour {Day 6}
Next Post: Blue Out and About Dress »

Reader Interactions

Comments

  1. Reece says

    December 14, 2015 at 1:29 am

    Thanks for the tips! I think I’d like to make a little gingerbread house with a scalloped “snow” roof, so this will be perfect.

    • Sara Curtis says

      December 14, 2015 at 8:42 am

      That would be super cute!

  2. Linda says

    January 19, 2016 at 8:02 am

    Thanks for the tutorial,I think I’ll give scallops a try!

  3. phyllis panza says

    February 16, 2016 at 8:02 pm

    thanks for the tut. love the houses; houses are my thing. nev. made one yet.

    • Sara Curtis says

      February 17, 2016 at 7:54 am

      Thank you! The little house pattern is free for newsletter subscribers!

  4. Phyllis panza says

    February 18, 2016 at 2:53 pm

    I subscribed and cant find the free house pattern; can you direct me. thank you

    • Sara Curtis says

      February 18, 2016 at 2:56 pm

      http://radianthomestudio.com/shop/mini-highland-house-pattern/ – the new subscriber welcome e-mail contains a coupon code for you. Just enter it at checkout for a free pattern.

  5. Stacey Morales..... From-a-Box says

    February 20, 2016 at 10:36 pm

    I have a dress with a Scalloped Collar on my cutting table now – thank you for these sewing tips! I am going to share them in the Sew Along that I am participating in….

    • Sara Curtis says

      February 22, 2016 at 9:48 am

      Thanks for sharing it with your group! I hope it’s helpful 🙂

  6. Debbie McLeod says

    May 14, 2016 at 7:51 am

    Thank you for the wonderful pictures. I am making my granddaughter a dress today that has scallops, so this came at a perfect time.

    • Sara Curtis says

      May 14, 2016 at 9:44 am

      Perfect! Glad to be of help! 🙂

  7. vilma says

    August 8, 2016 at 3:36 pm

    Thank you a lot! love it! Hugs from Brazil!

  8. Theresa Ricord says

    October 5, 2016 at 6:25 am

    Great article. Thank you

  9. Cucicucicoo: Eco Sewing and Crafting says

    January 12, 2017 at 1:35 pm

    This is awesome! I’ve made some pretty bad looking scalloped edges in my life! 🙂 Lisa

Primary Sidebar

Hello

Welcome! I’m Sara. I share modern home & accessory sewing patterns, and I create surface designs for licensing. I hope you are encouraged to see beauty in small things and are inspired to try new creative projects!

Shop Sewing Patterns


icon icon

icon icon

Newsletter

Sign up to get access to free sewing patterns & resource library!

Find My Work at:


© Copyright Notice

All images and text copyright ©2013-2020 Radiant Home Studio, unless otherwise noted. Please be kind enough to link back to my site and contact me if you would like to use my images.

Disclosure

I am a participant in the Amazon Services LLC Associates Program, an affiliate advertising program designed to provide a means for me to earn fees by linking to Amazon.com and affiliated sites.

Footer

Sign up to get access to free sewing patterns & resource library!

Favorite Adobe Illustrator tool? I love recoloring Favorite Adobe Illustrator tool? I love recoloring patterns. I probably spend way too much time with the recolor tool and not enough time making new patterns. 🤷🏻‍♀️

Last day to join the Immersion Course! If you have ever dreamed of making beautiful designs, Bonnie can teach you how to get what’s in your head into the computer and then how to make money from licensing your designs to companies for use on products. 

As a member of Bonnie’s support team, I’ll be there to make sure you don’t feel lost. There’s room for you...as Bonnie often reminds us!

#surfacepatterndesign #surfacepatterndesigner #surfacepatterncommunity #printandpattern #radianthomestudiopatterns #floralpattern #alltheflowers #artlicensing #flowersfordays #mutedflorals
Look what just came in the mail! Notebooks! This w Look what just came in the mail! Notebooks! This was a test batch to check quality and I’m thoroughly impressed.

I’ll be listing extra in the shop soon, but first dibs go to anyone that signs up for the Immersion Course using my link. I’ll be sending a small gift package and scheduling a course success/ coaching call with you!

Just a reminder that the last day to enroll in Immersion is tomorrow! If you are like me and overthink things until the last day, you are not alone. 

I know it’s a huge decision. I have an Immersion stories highlight if you want to know more or go to my profile to find a link to the info page. Message me all your questions! 

#immersioncourse #immersioncourse2021 #designernotebooks #learntodesign #learnillustrator #surfacepatterndesigner
Just got an order of stickers in! I’m debating a Just got an order of stickers in! I’m debating about putting them in the shop as a separate product or adding them to orders. I think I need a few more to make a pretty coordinating set! 🌹

Reminder: there’s still a couple more days to enroll in the Surface Pattern Design Immersion Course or the free mini-course from Bonnie! Links in my profile...as always. Keep messaging with questions! ☺️
It’s been a minute since I showed my face here! It’s been a minute since I showed my face here! ☺️

I wanted to get a little personal today. If you’re here for sewing & crafty stuff...stay tuned. I’m not abandoning you. 🙂 If you saw my stories last week, you may have learned that I’m deep in design mode for a few weeks, working with @bonniechristine on the Surface Pattern Design Immersion Course.

When I discovered Spoonflower (about 8 years ago!) and realized I could create my own fabric, I had this far off “maybe someday” dream to create a collection of designs for a fabric company.

I spent many years learning bits and pieces of design and business skills. But a couple of years ago I got more serious about making my dream a reality. 

Last year, I made an investment in myself and I joined the Immersion Course with Bonnie Christine. It was truly the community support and confidence that I gained that propelled me forward this year. Just a few weeks after Immersion ended I signed a licensing deal for children’s wall art with Oopsy Daisy and a few months after that...I signed a contract with a fabric company!

You guys...Bonnie is SO genuine and generous in everything she does. ❤️ It spills over into this beautiful and inspiring community that cheers each other on every step of the way. 

This year, Bonnie invited me to join her support team to help encourage new students through the course and provide technical support for all those tricky Illustrator issues. 🙌🏻

This course is for anyone that wants to invest in their creative career. My “wildest dream” came true this year. I’m actually feeling a bit lost right now because I need a bigger dream!

Whether you have a few years of experience like I did when I joined or you have never used design software...Bonnie will walk you through the ENTIRE process. This is like a college-level course on design and creative business. We have many older students starting a second career, people that just graduated design school but don’t know how to practically start an art-based business, and people from dozens of countries around the world. It’s a beautiful, diverse community filled with people taking steps toward their creative business goals.

More below...
We had our first day of fake spring yesterday. It We had our first day of fake spring yesterday. It was warm for one day and it’s back to being cold. 🤷🏻‍♀️

I always draw flowers anyway. I’m hoping some of the local botanical gardens open back up this year. We have some really great inspiration nearby and flowers will start blooming soon!

It’s the little bits of beauty that inspire me the most. What are you looking forward to this Spring?
Just a reminder that I have this heart garland tut Just a reminder that I have this heart garland tutorial linked in my profile if you want to make some happy Valentine’s decor this week.

My girls are origami experts, so we worked together on these video tutorials last year. It’s a good family project for older kids! 💕

#heartcrafts #valentinesdecor #valentinecrafts #mycolorfulhome #cozymodernvibe #diyvalentinesdecor
This another favorite pattern of mine. As my style This another favorite pattern of mine. As my style has developed, I’ve embraced the imperfect lines and tend to work with graphic, but organic shapes. I like unexpected little pops of color or shapes that emerge from layering.

My iPad is at the fix-it shop, so of course, I’m feeling inspired today. ☺️ Maybe I should try some actual sketching and planning on paper with a pencil...😜

#radianthomestudiodesign #fabricdesign #surfacepatterndesign #surfacepatterncommunity #surfacepatternlife #licensingartist #artlicensing
Remember last year, the girls and I made this cute Remember last year, the girls and I made this cute origami heart garland tutorial? ❤️💙💛🧡

I don’t usually decorate with themed stuff, but these are fun to make and add some joyful, non-tacky hearts around the house for Valentine’s Day. 💕 I popped the link in my profile buttons. There are videos in the blog posts too. 

Also, I shared some personal stuff in my stories today!

#origamigarland #origamiproject #valentinesdecor #valentinesgarland #valentinescrafts #origamiheart #origamihearts #papercrafts #heartcraft #happyhearts #joyfulhome #mycolorfulhome
Follow on Instagram
  • Disclosures & Copyright
  • About
  • Contact me!
  • Digital Pattern FAQ’s

Copyright © 2021 · Sara Curtis // beloved theme